
·
How to get your Ashby API Key: Step-by-step guide
April 24, 2023
Ashby supports authentication with an API Key. To connect, you'll need to generate an secure API Key from your account settings.
This short guide shows you how to generate one, whether you're testing in your sandbox or helping customers connect their Ashby account.
- Sign in to Ashby and click "Admin" in the top navigation bar
- Navigate to Integrations > API Keys
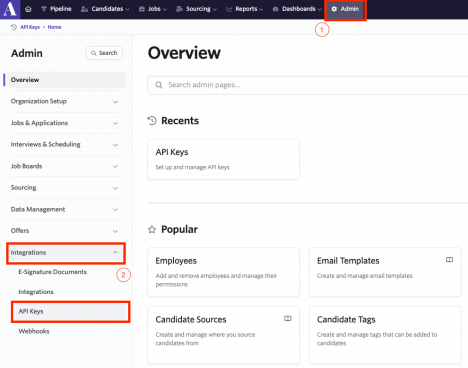
- Click + New in the upper right corner
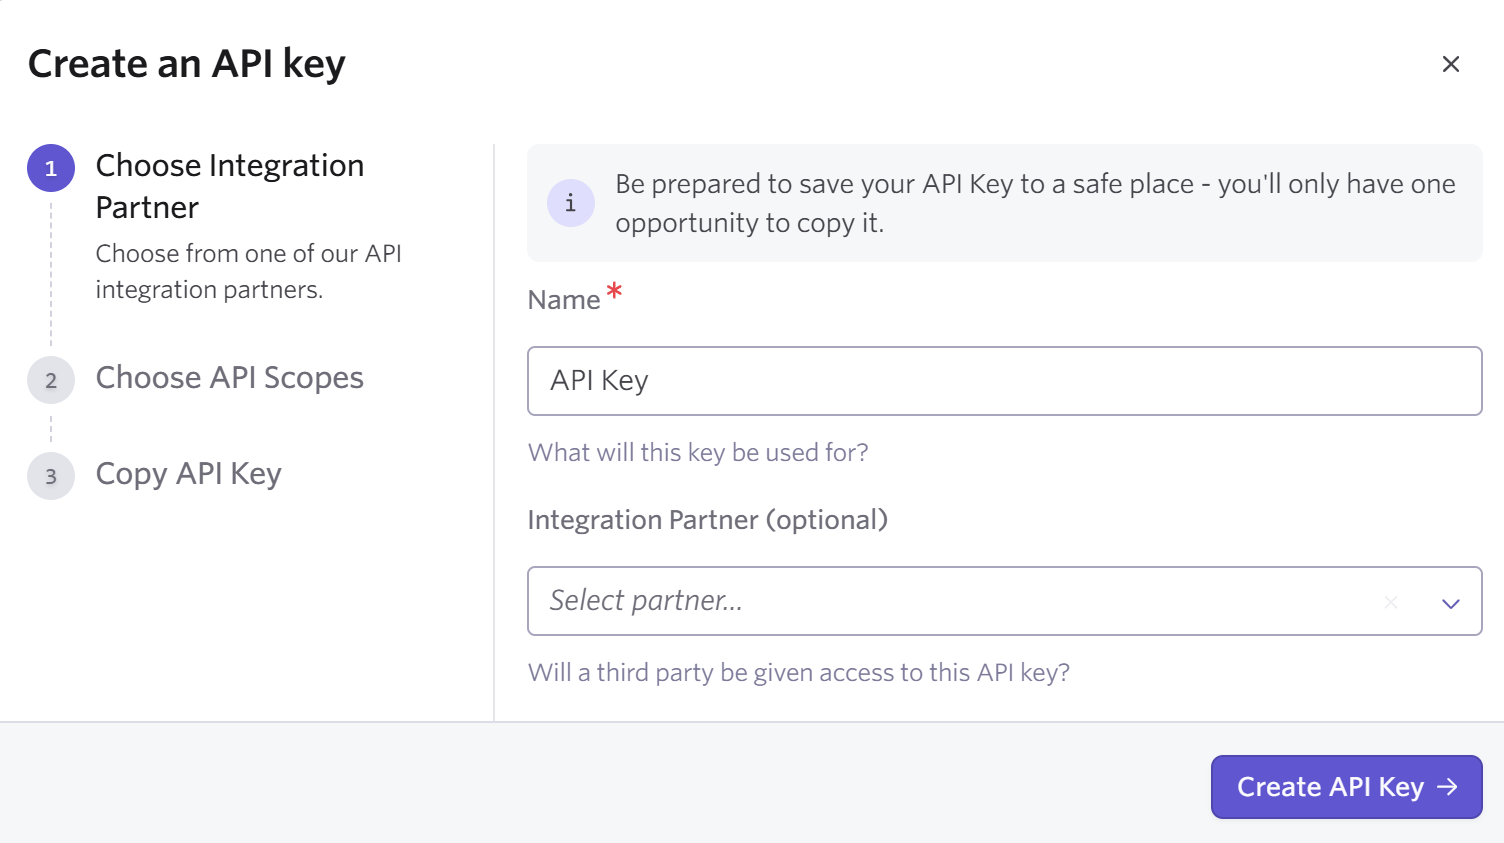
- Add a name for the new API Key, click Create API Key
- Set necessary API Scopes, e.g.
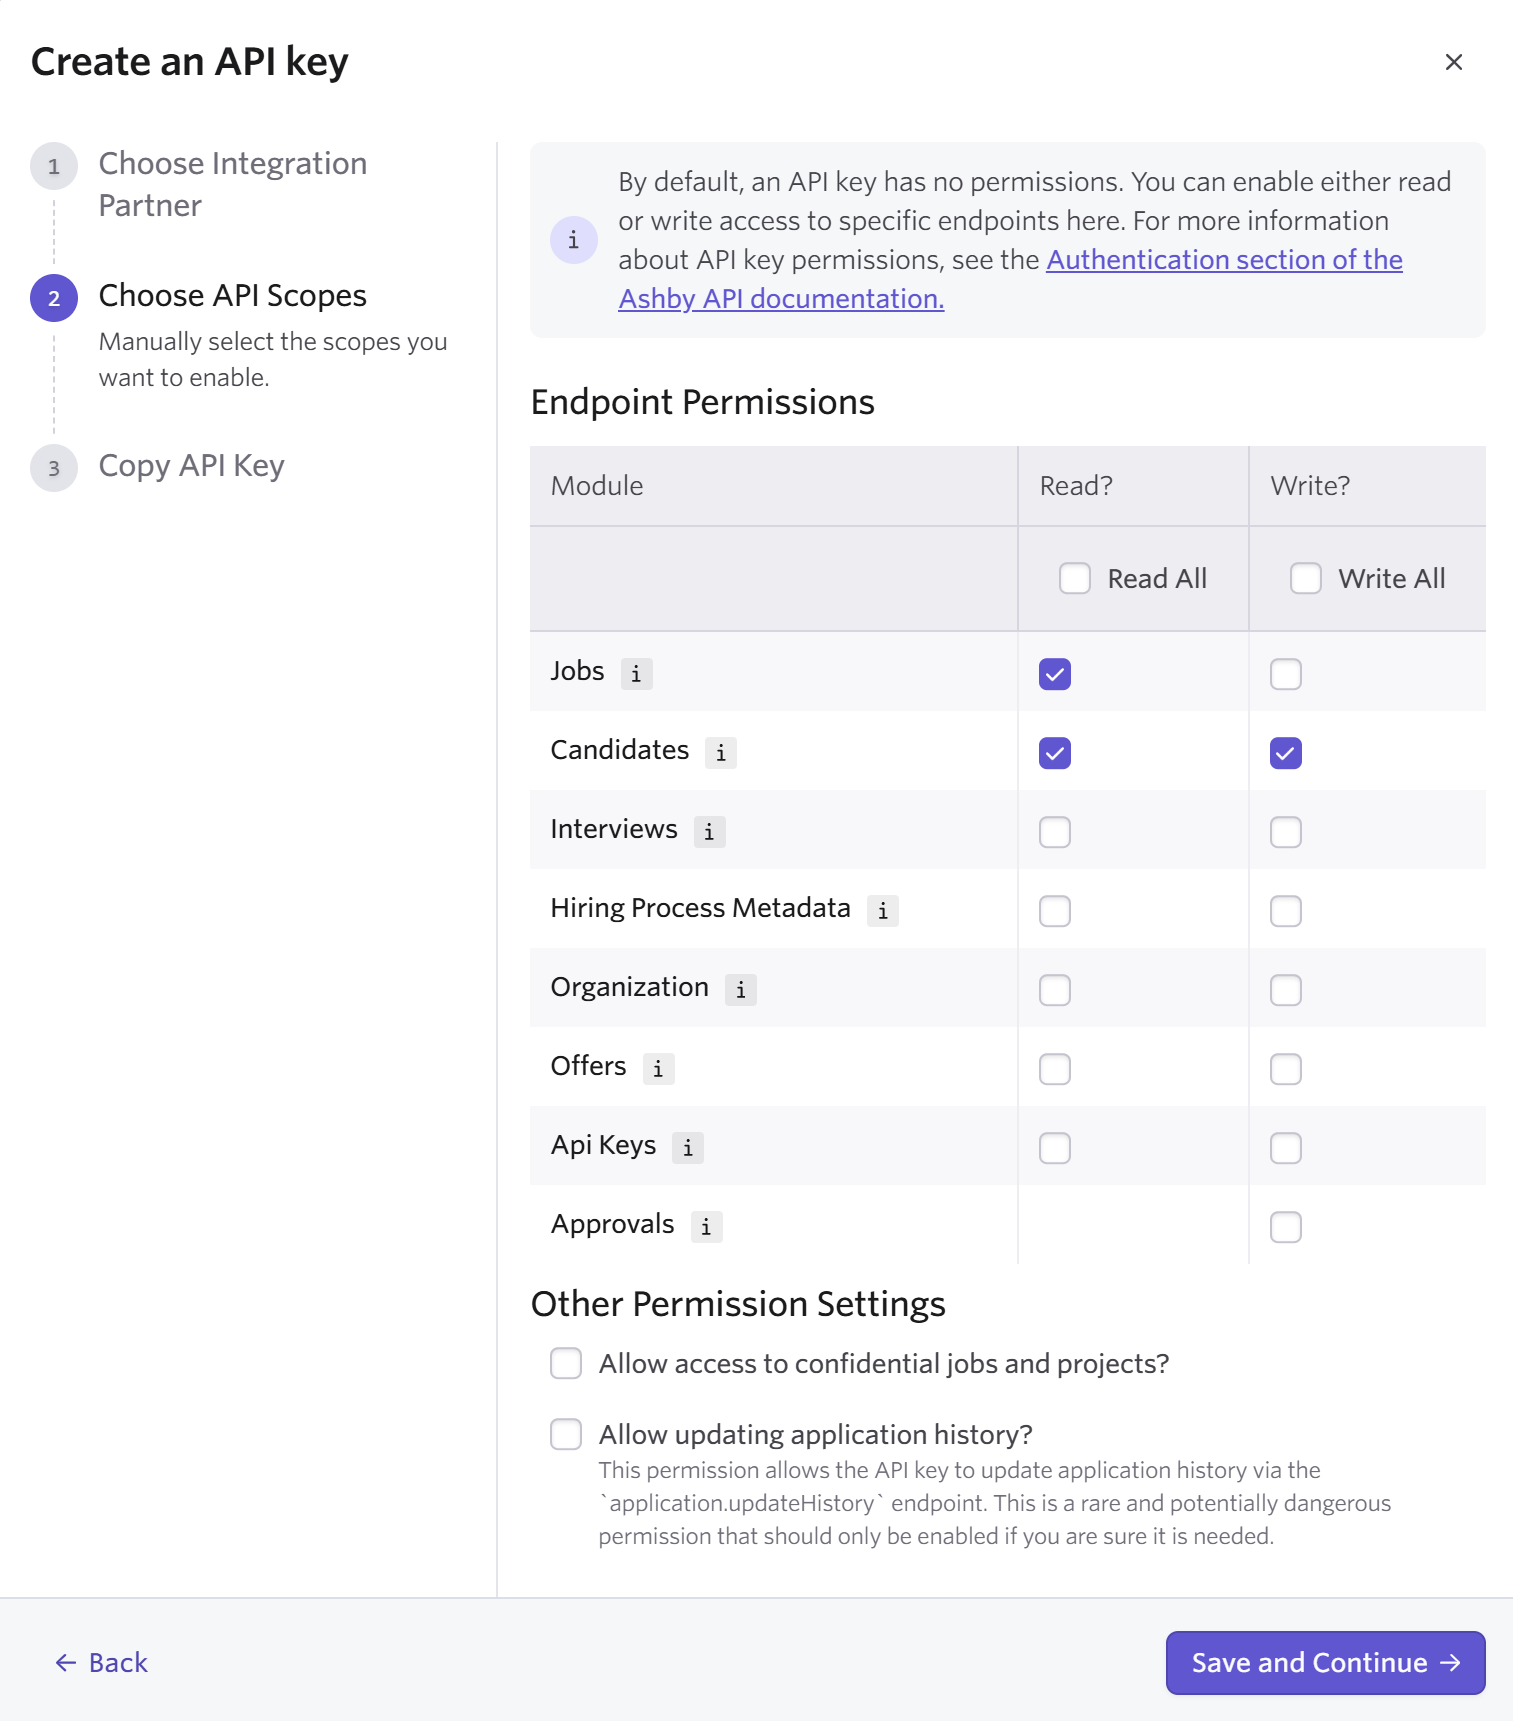
To read Applications, you will also need the "Offers" READ permission.
To use Webhooks, you will also need the "API Keys" WRITE permission. - Click "Save and Continue"
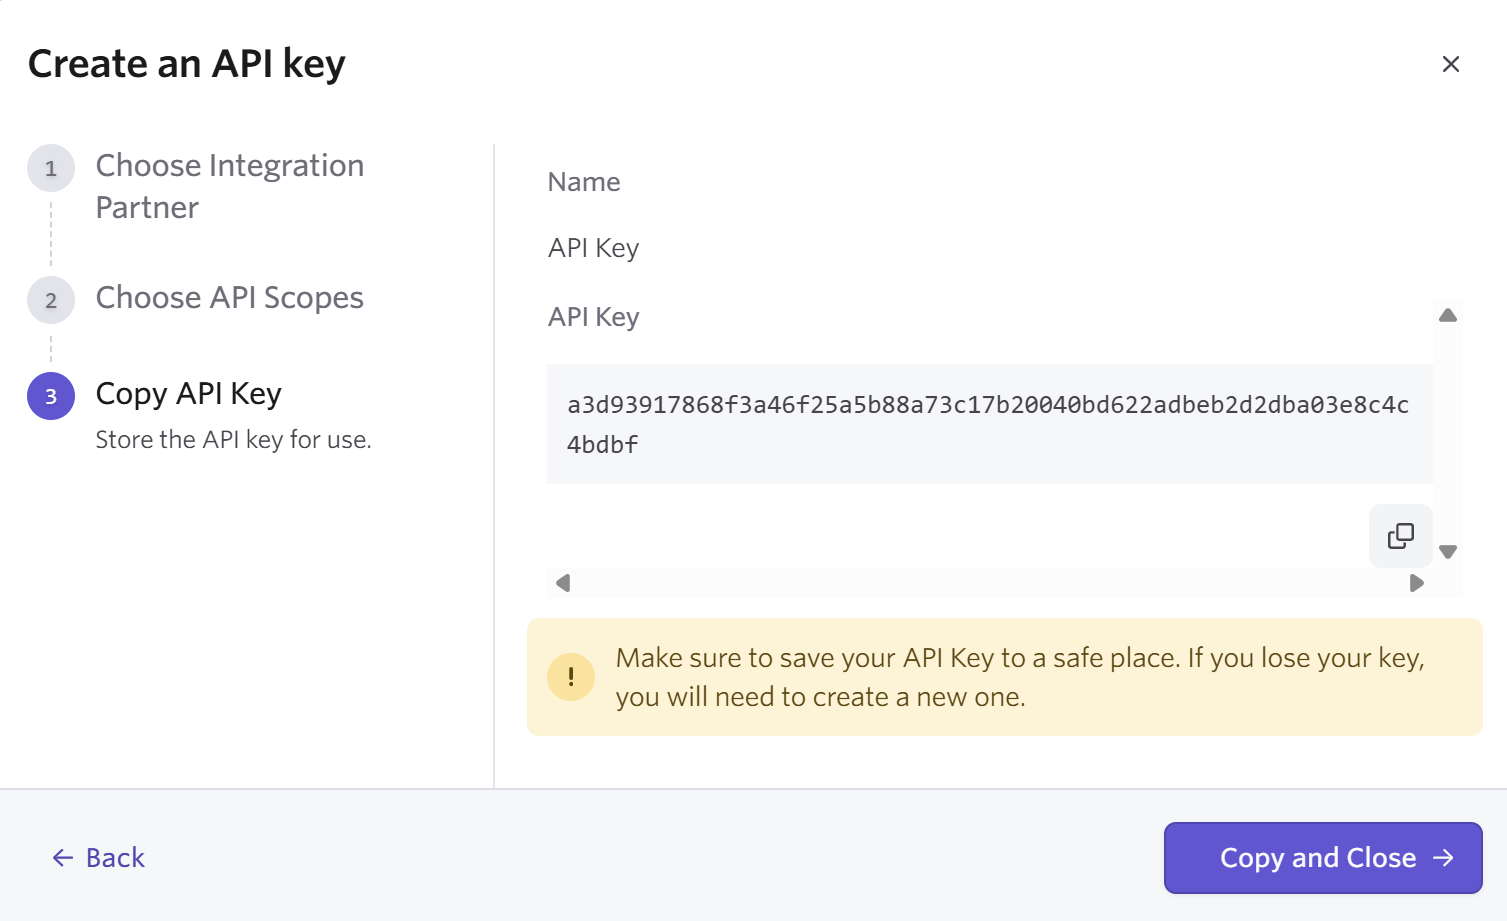
- Copy the API Key
Generating a Ashby API Key is the first step. The harder part is building pipelines that stay reliable as customers add more systems.
Unified.to gives you options: deliver data via API, streaming webhooks, database sync, or even as MCP tools for AI agents. One integration layer that adapts to your architecture instead of forcing tradeoffs.
Book a demo to see how we simplify integration delivery across 767 integrations and 33 categories.