How to Create a Xero Connection in
April 2, 2026
Follow the steps below to create a Xero application and connect it to Unified.to.
1. Sign in to the Xero Developer Portal
Go to the Xero Developer portal:
https://developer.xero.com/app/manage/
Sign in with your Xero account.
2. Create a New App
From the dashboard, click Create New App.
Choose the appropriate app type and fill in the required details:
- App name
- Company or organization name
- Privacy policy URL
- Terms and conditions URL (if required)
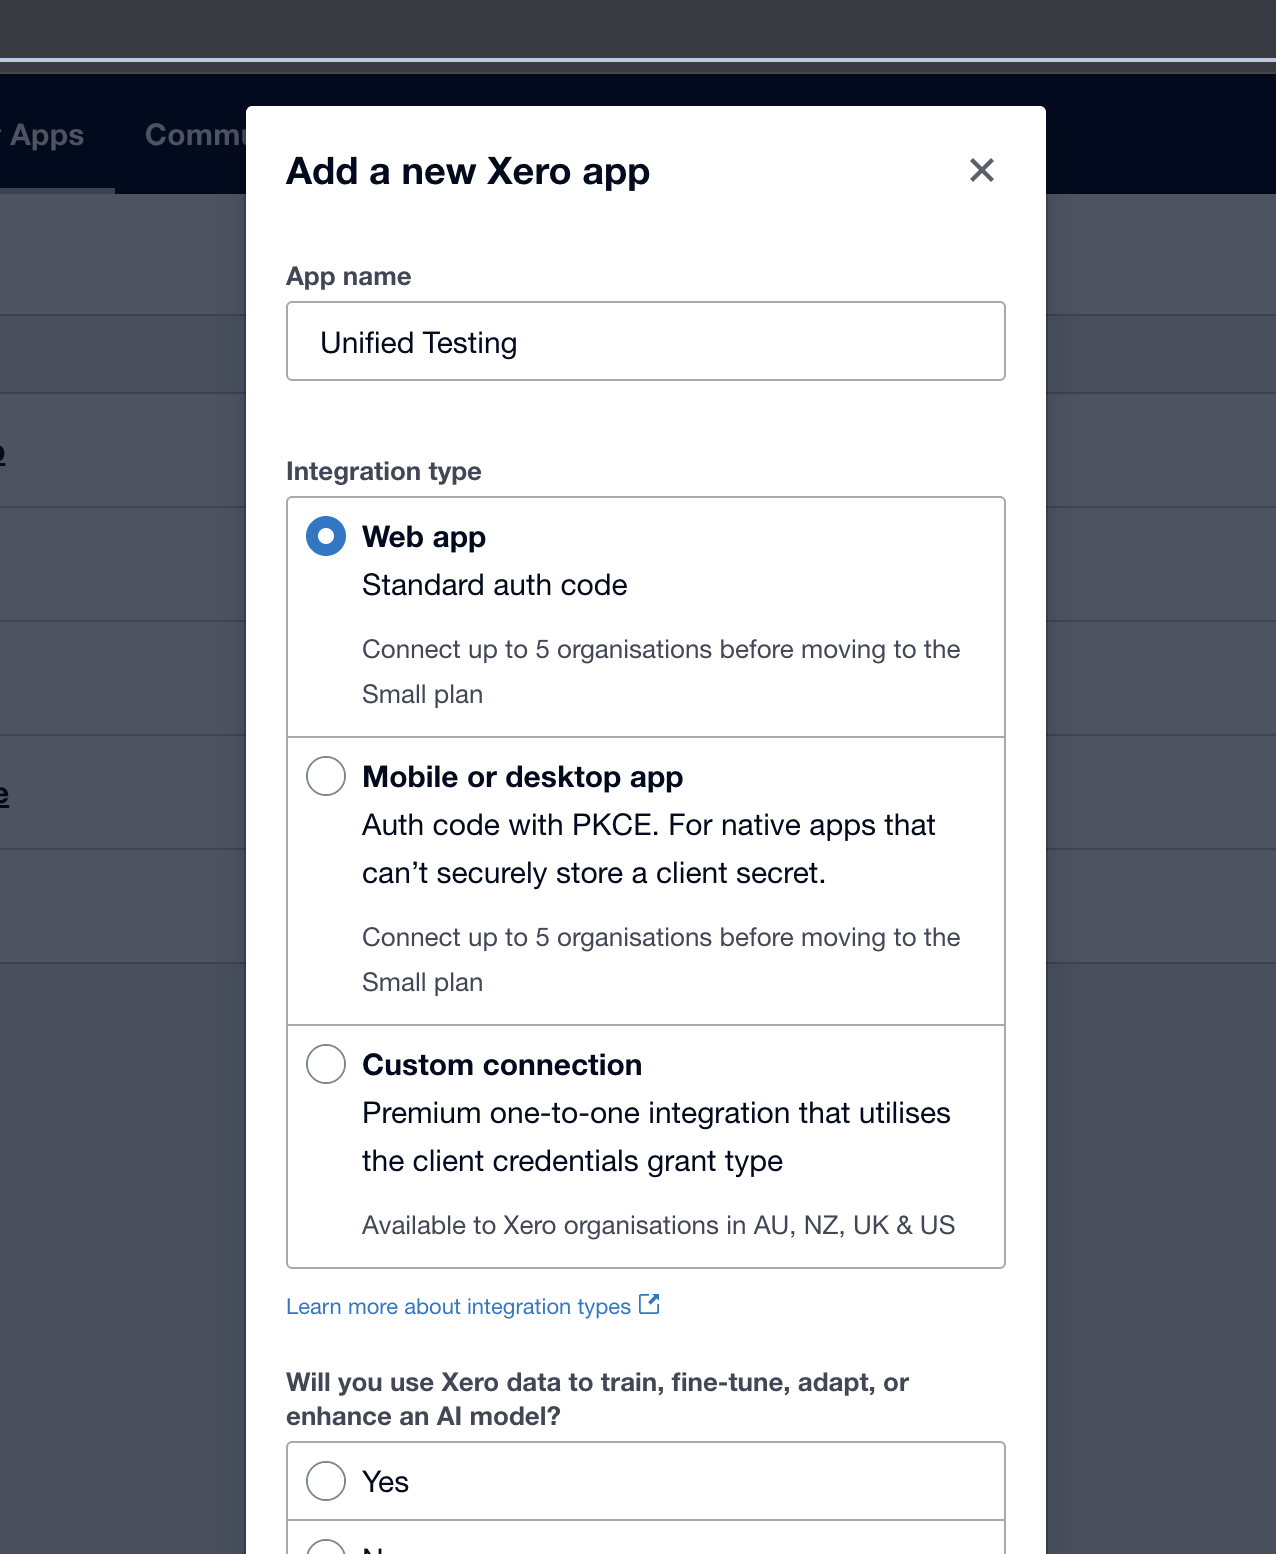
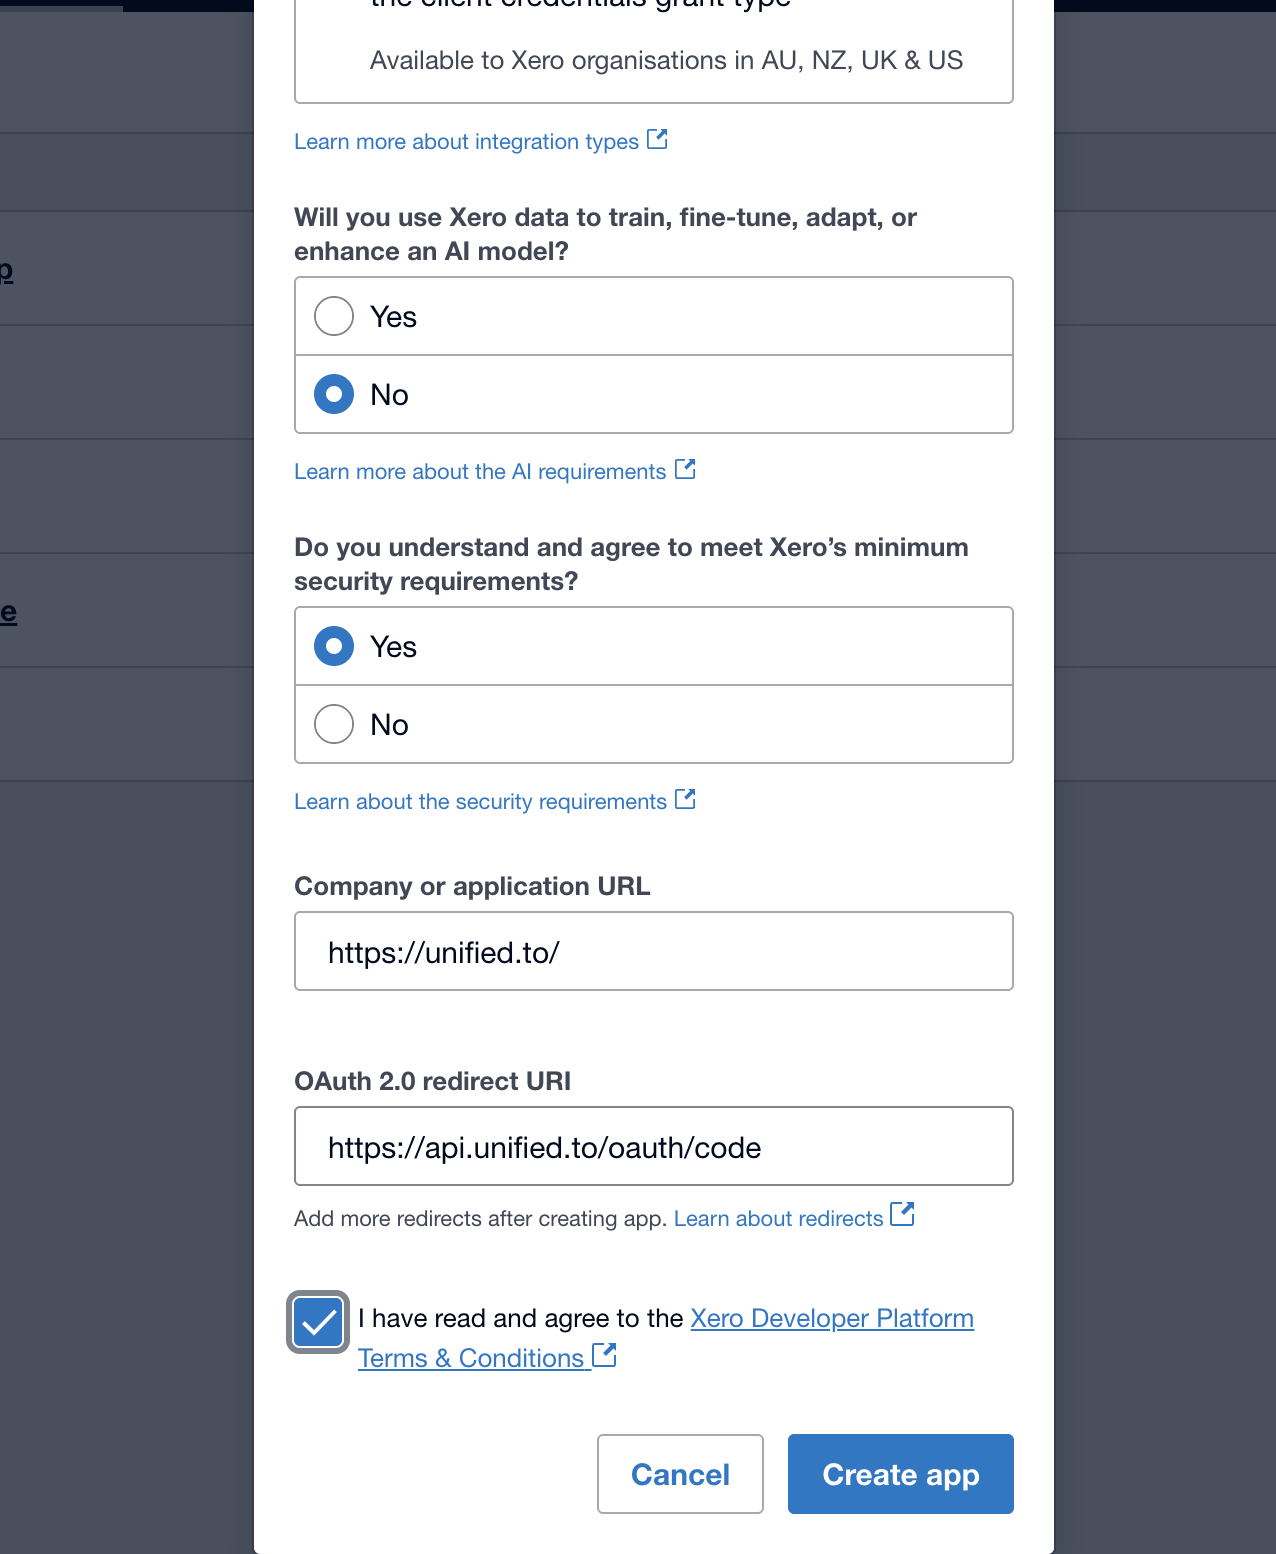
3. Add the Redirect URI
While creating the app, add the OAuth 2.0 Redirect URI provided by Unified.to.
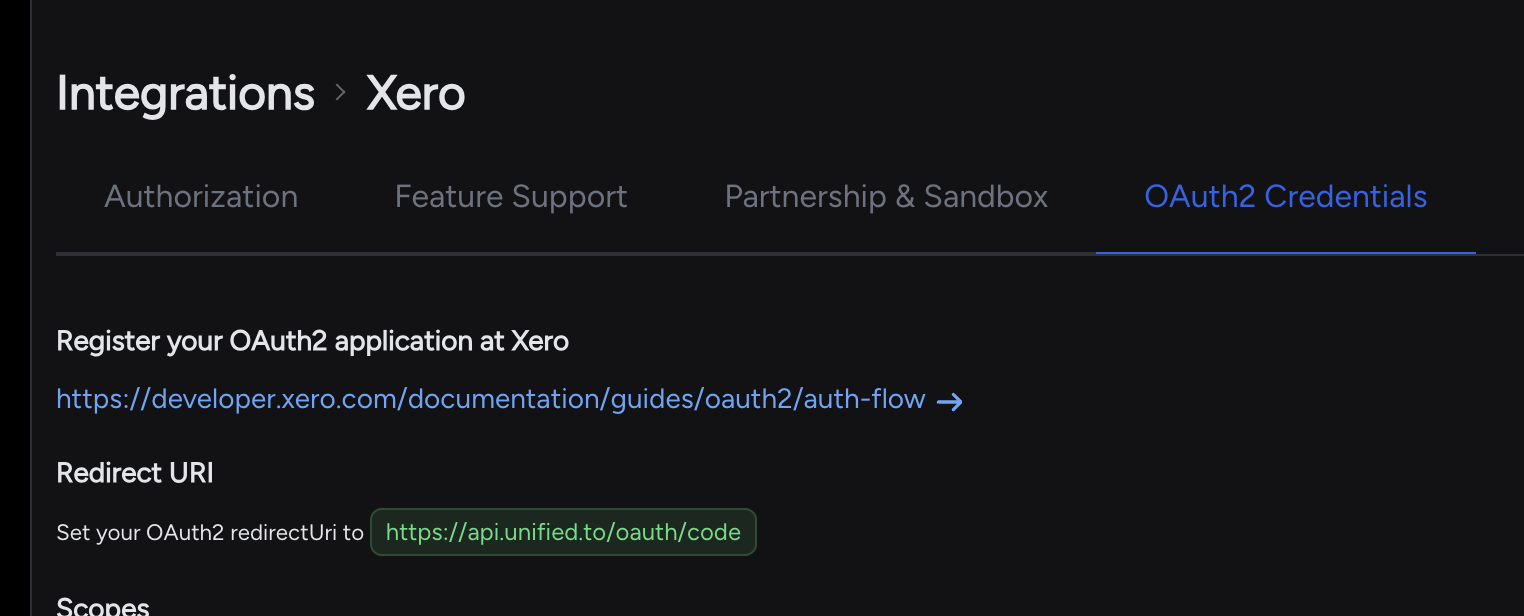
You can find the correct redirect URI here:
https://app.unified.to/integrations/xero?tab=oauth2
Important: The redirect URI may differ depending on your Unified.to region. Make sure you copy the exact value shown in your Unified.to dashboard.
Examples:
- US region
- EU region
- AU region
If the redirect URI does not match exactly, Xero authentication will fail.
After adding the redirect URI, click Create App.
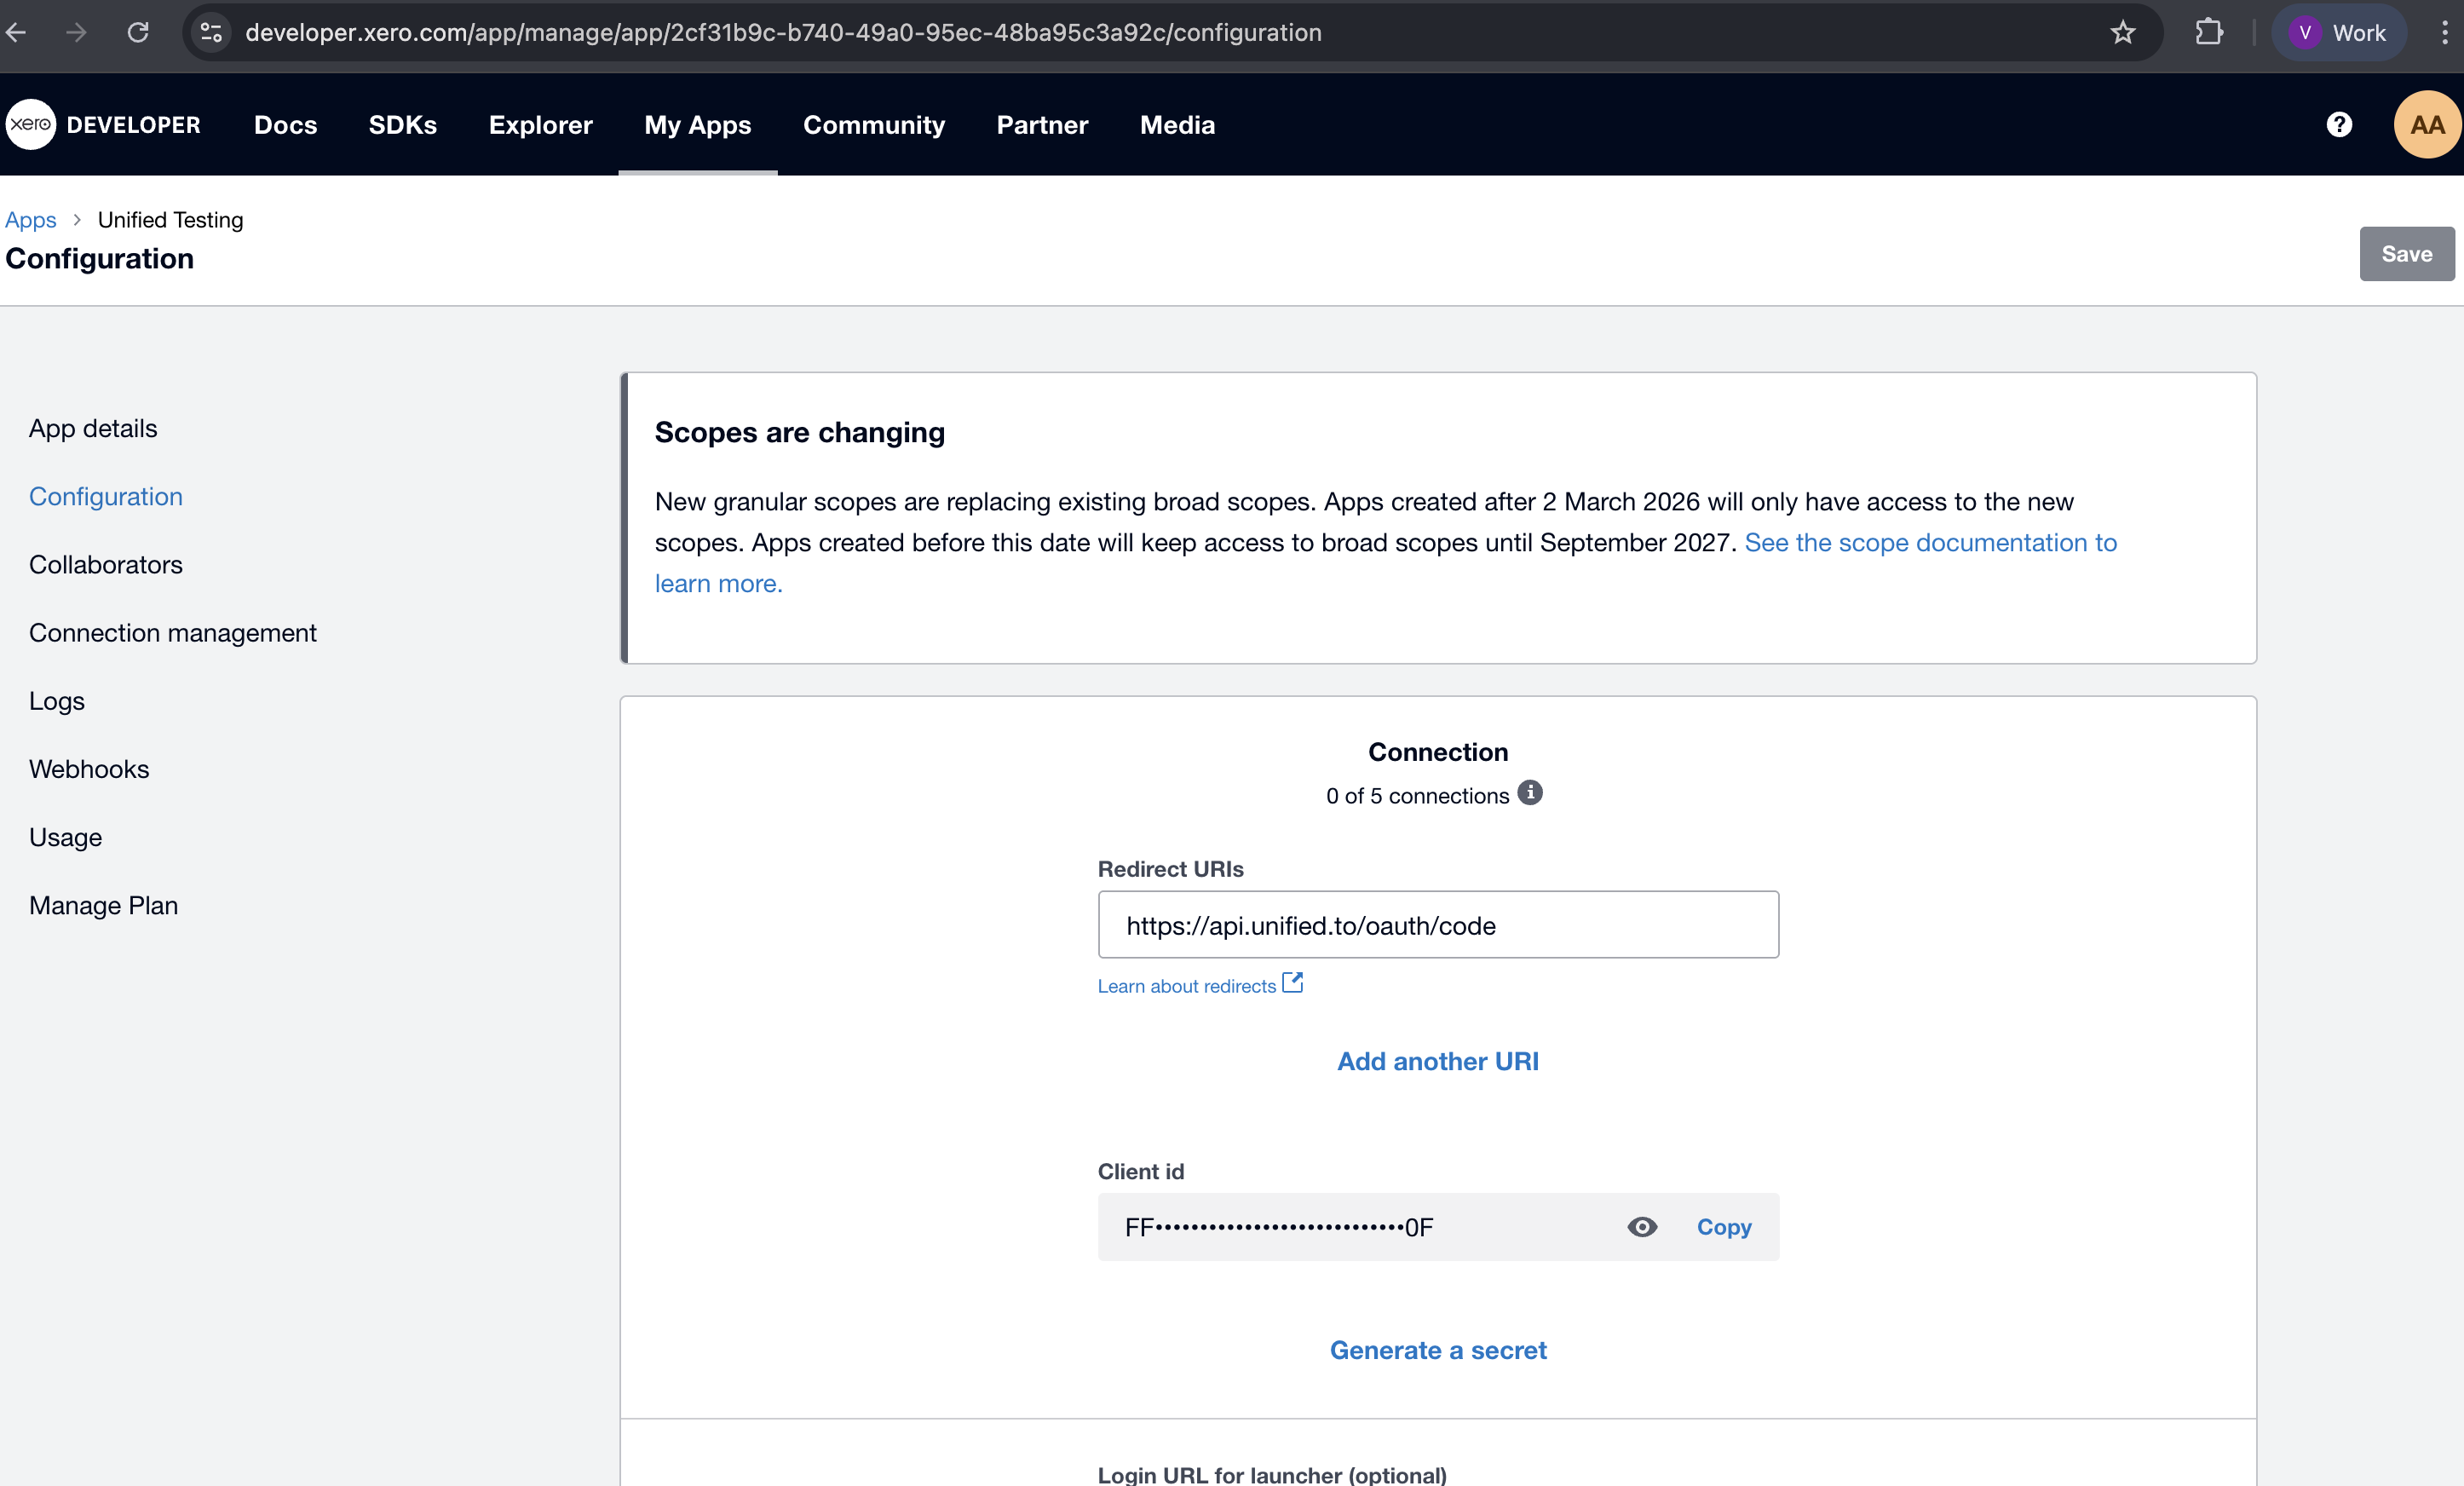
4. Copy the Client ID and Client Secret
After the app is created, open the app and go to the Configuration tab.
There you will find:
- Client ID
- Client Secret
Keep the Client Secret secure. Do not share it publicly or commit it to source control.
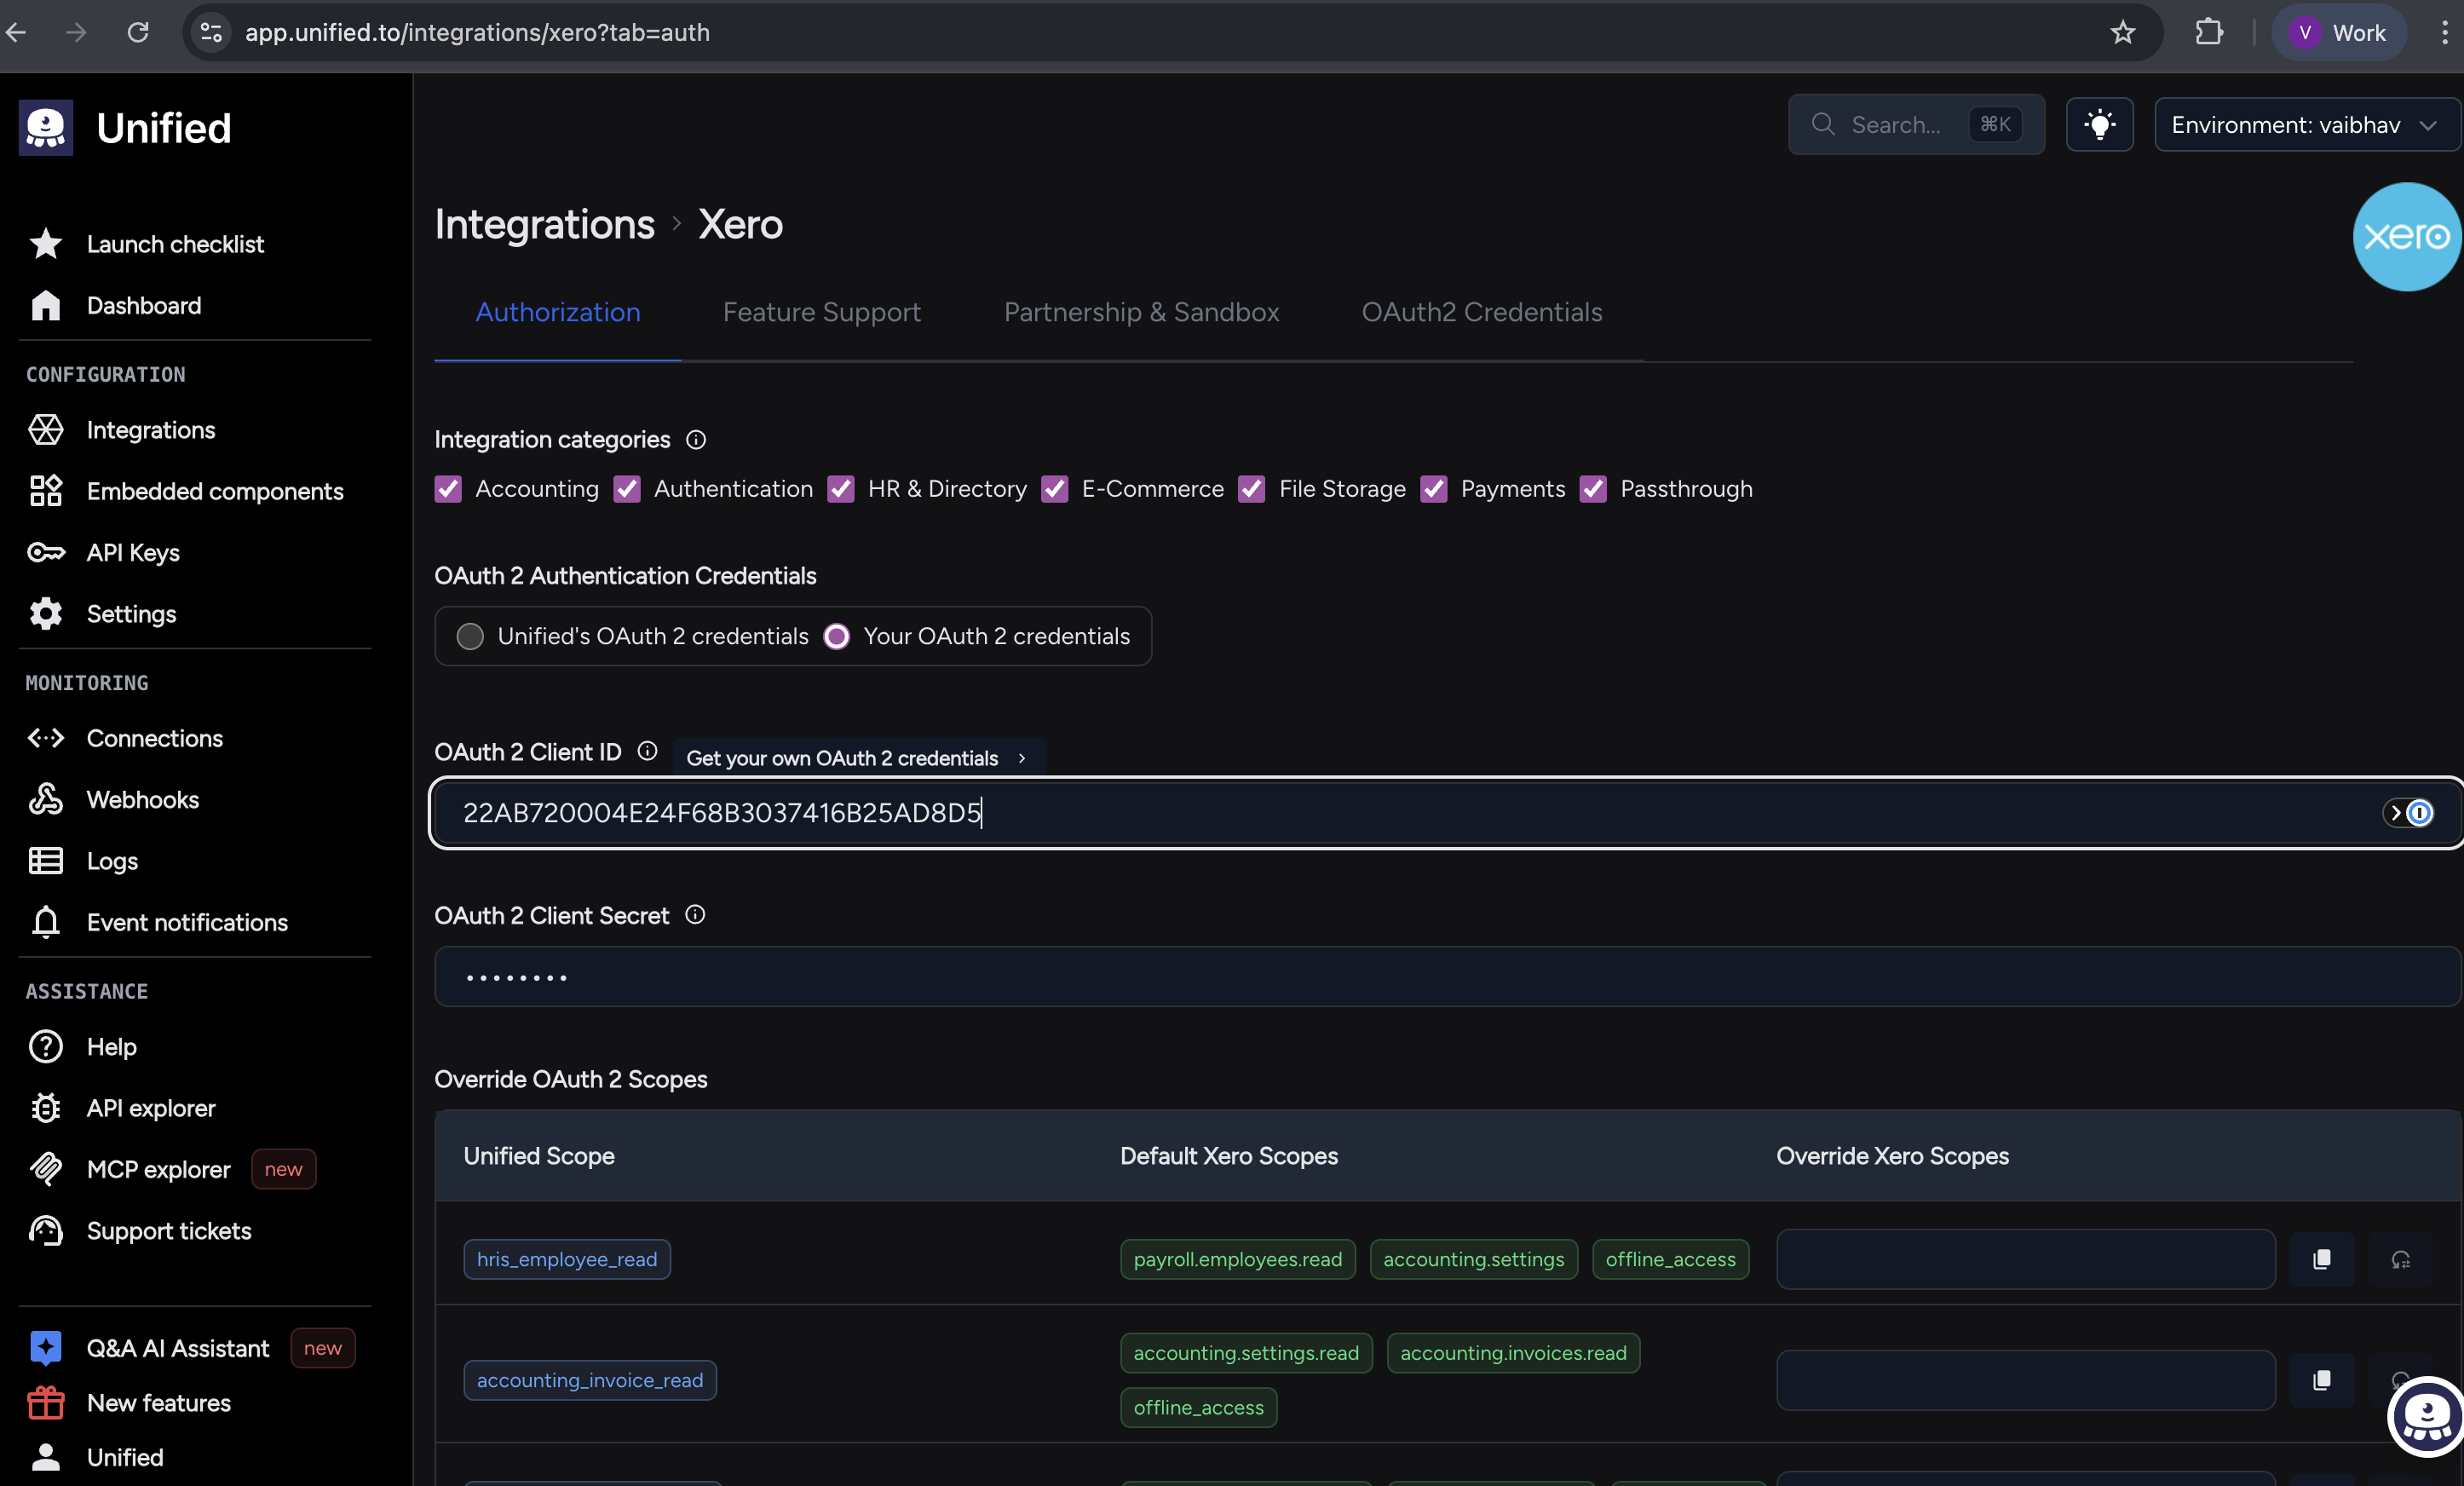
5. Add Credentials to Unified.to
Open the Xero integration settings page in Unified.to:
https://app.unified.to/integrations/xero?tab=auth
Paste the following values:
- Client ID
- Client Secret
Click Activate.
6. Create a Connection Using Embedded Components
To create a customer-facing connection flow:
- Go to Embedded Components in Unified.to.
- Select the Xero integration.
- Launch the embedded authorization flow.
- Complete the authorization process.
This allows your end users to connect their Xero account directly from your application.
Notes
Journals Endpoint Availability
The Journals endpoint is a premium Xero feature.
According to Xero's documentation, the Journals API is only available starting with the Advanced pricing tier. Customers using lower Xero plans may receive authorization or access errors when calling this endpoint.
Common Issues
- Ensure the redirect URI in Xero exactly matches the one shown in Unified.to.
- Make sure you are using the correct region-specific Unified.to redirect URI.
- If you regenerate the Client Secret in Xero, you must update it in Unified.to.
- Only users with sufficient permissions in Xero can authorize an organization.
- If you have previously selected an organization for the same Xero app, Xero may automatically reuse that organization during future authorizations.
Troubleshooting
If authentication fails:
- Verify the Client ID and Client Secret are correct.
- Double-check the redirect URI.
- Re-authorize the connection after saving any changes.
- Remove the existing connection and create a new one if necessary.