How to Create a Unified.to Connection to HighLevel
March 19, 2026
This guide explains how to connect an existing HighLevel account to Unified.to. It assumes:
- You already have a Unified.to account
- You already have a HighLevel account
- You have access to a HighLevel Developer (Agency) account
Overview
To create a connection between Unified.to and HighLevel, you will:
- Create or configure a HighLevel OAuth app
- Collect required credentials (Client ID, Client Secret, etc.)
- Use Unified.to to create a connection
- Authorize the connection via OAuth
Step 1: Create a HighLevel OAuth App
- Log in to your HighLevel Developer (Agency) account link
- Navigate to the App Dashboard.
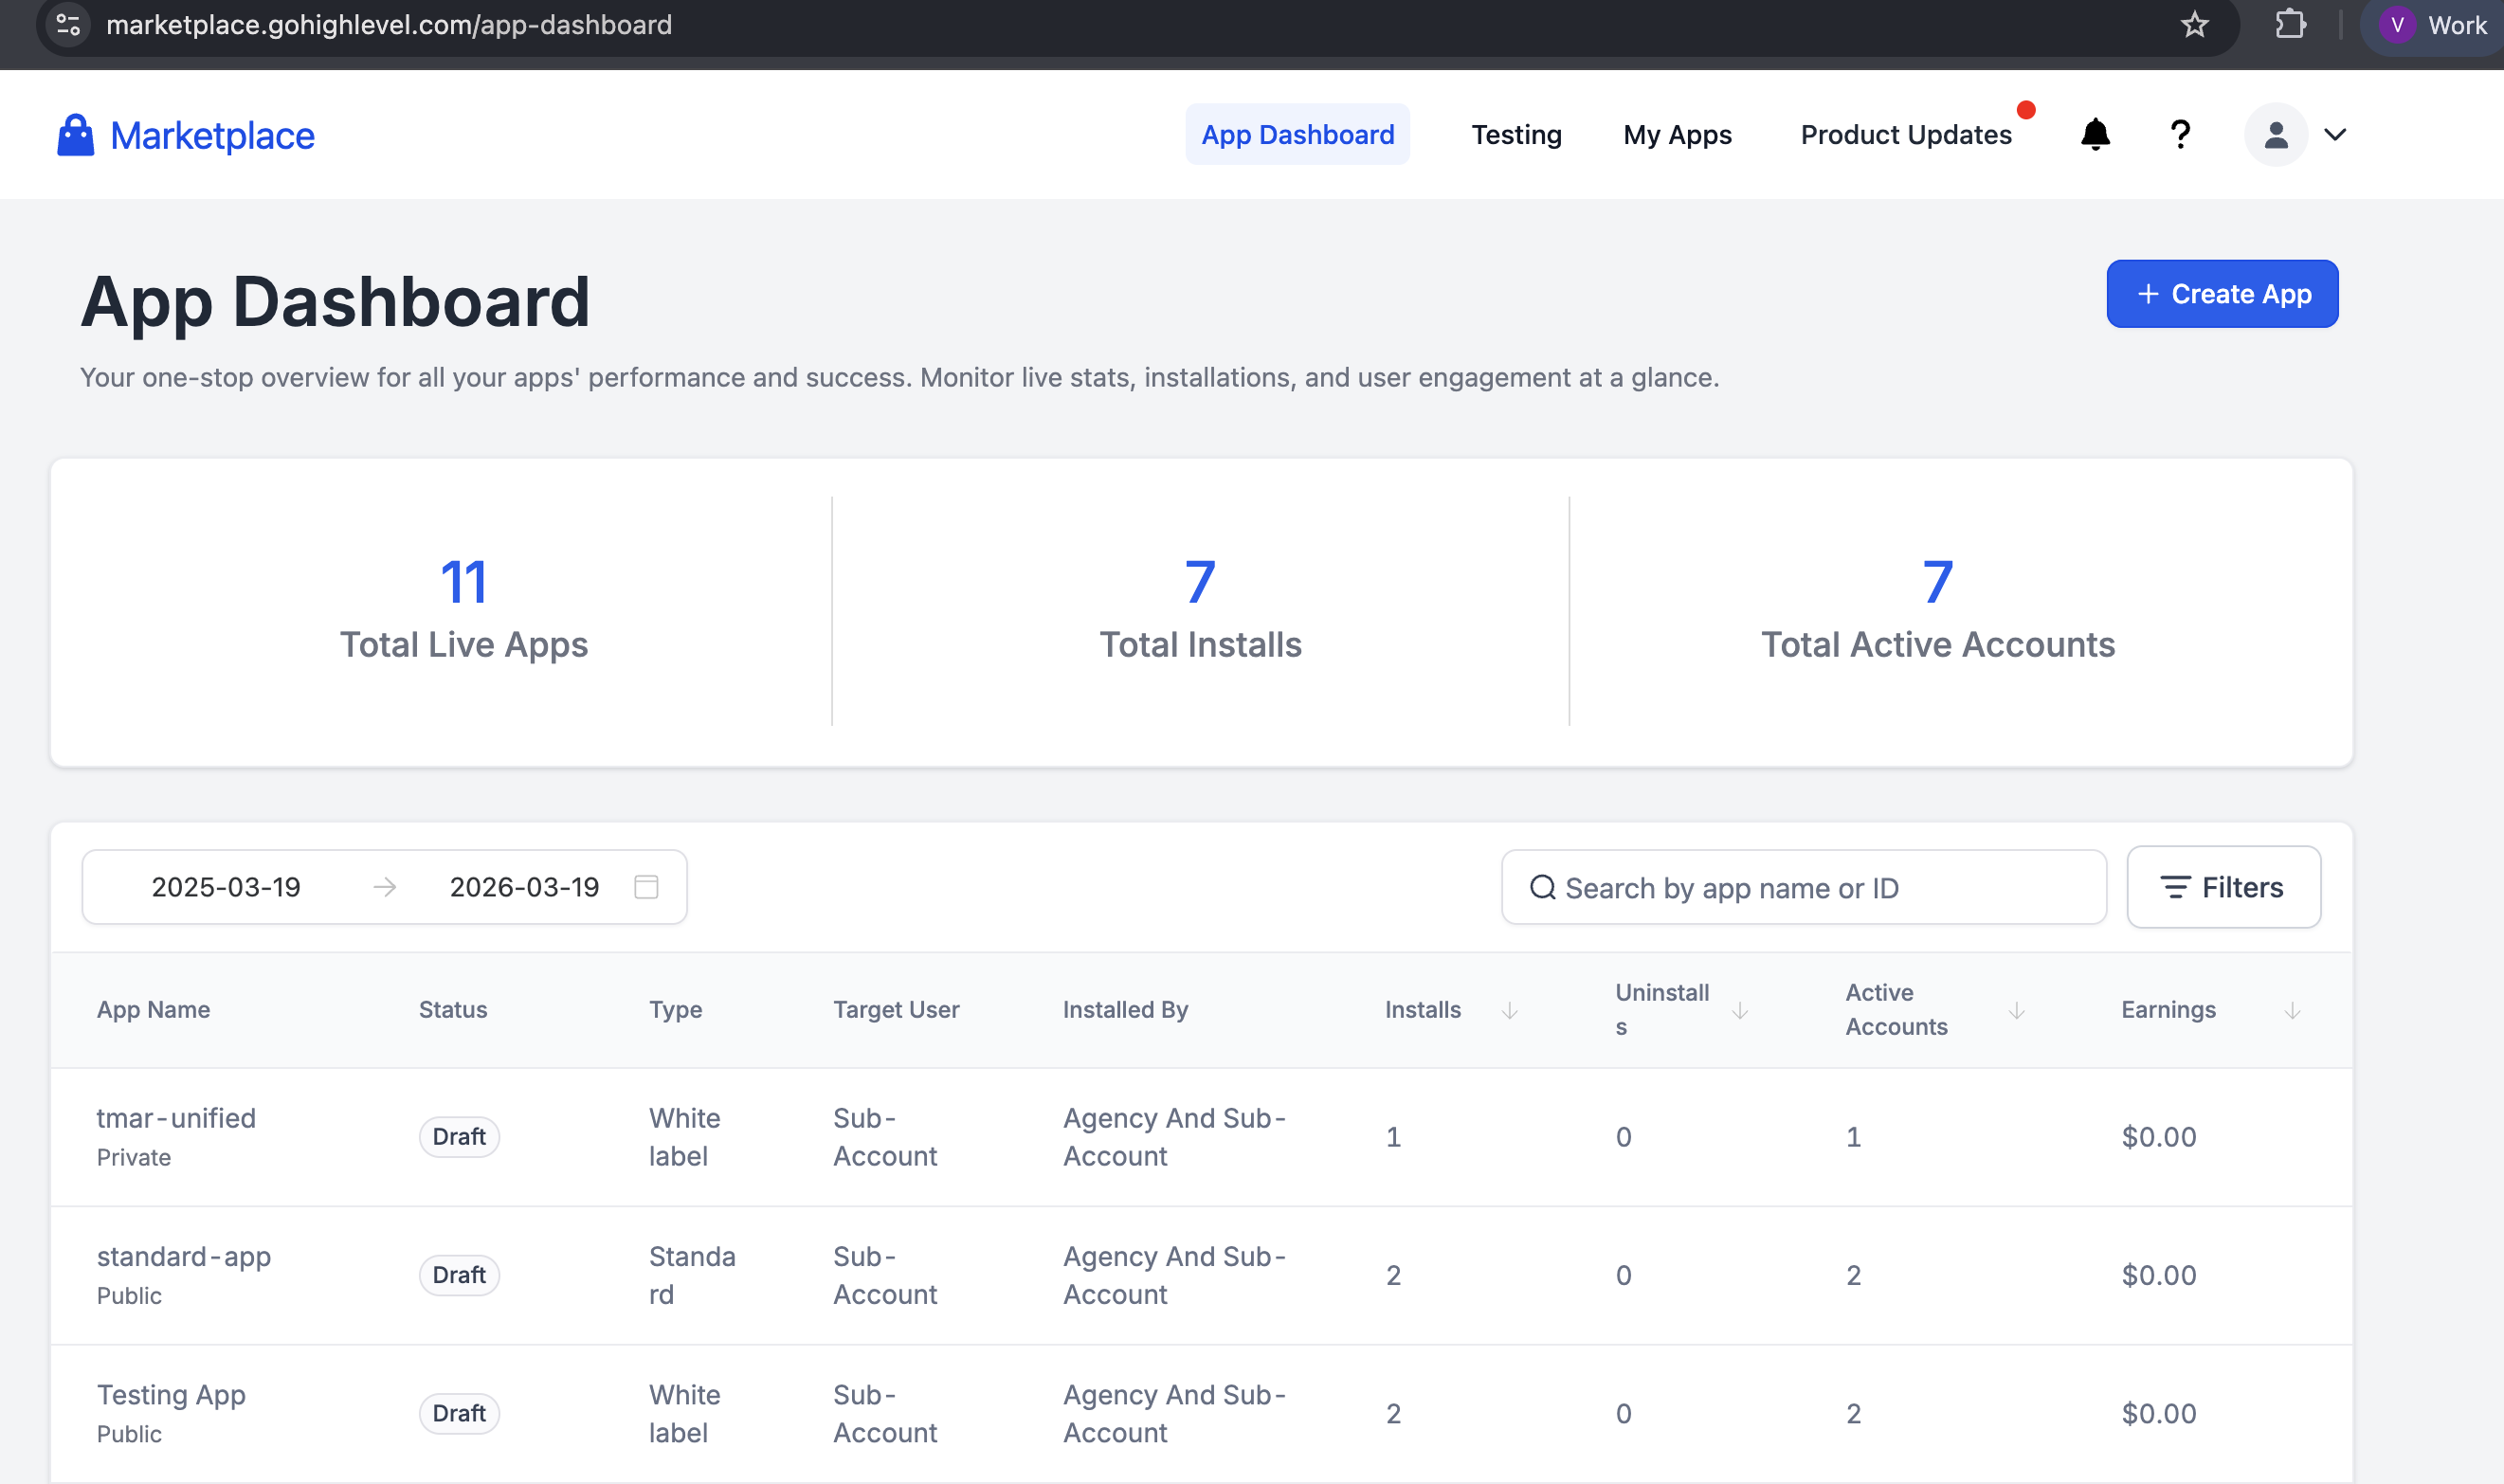
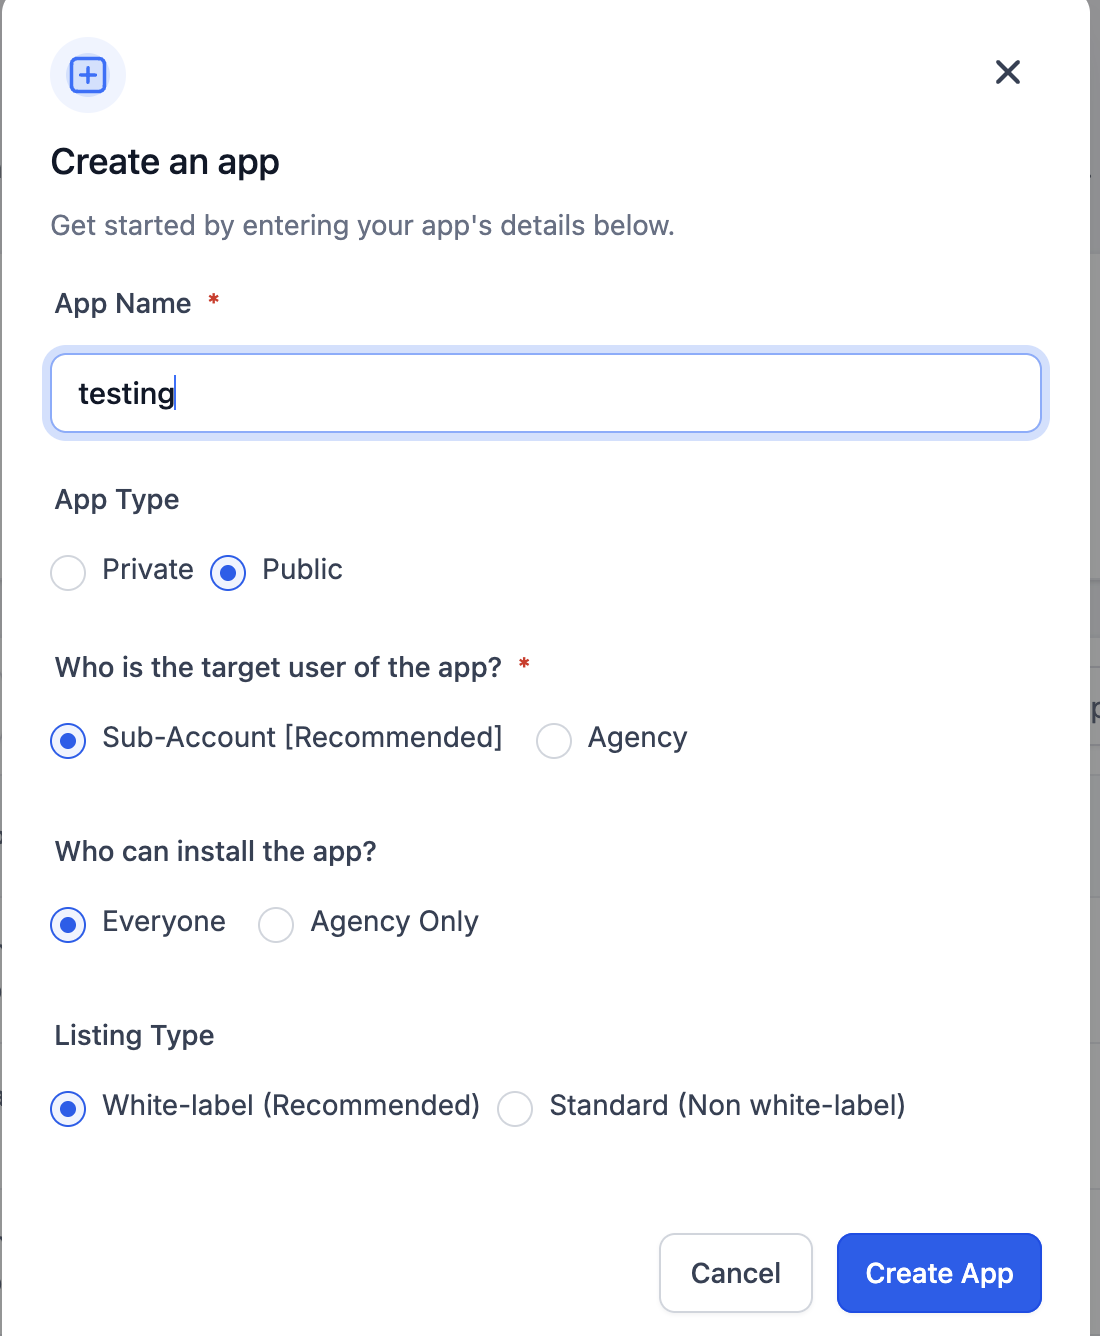
- Click Create App
- Fill in the required details:
- App Name: Any name (e.g., Unified Integration)
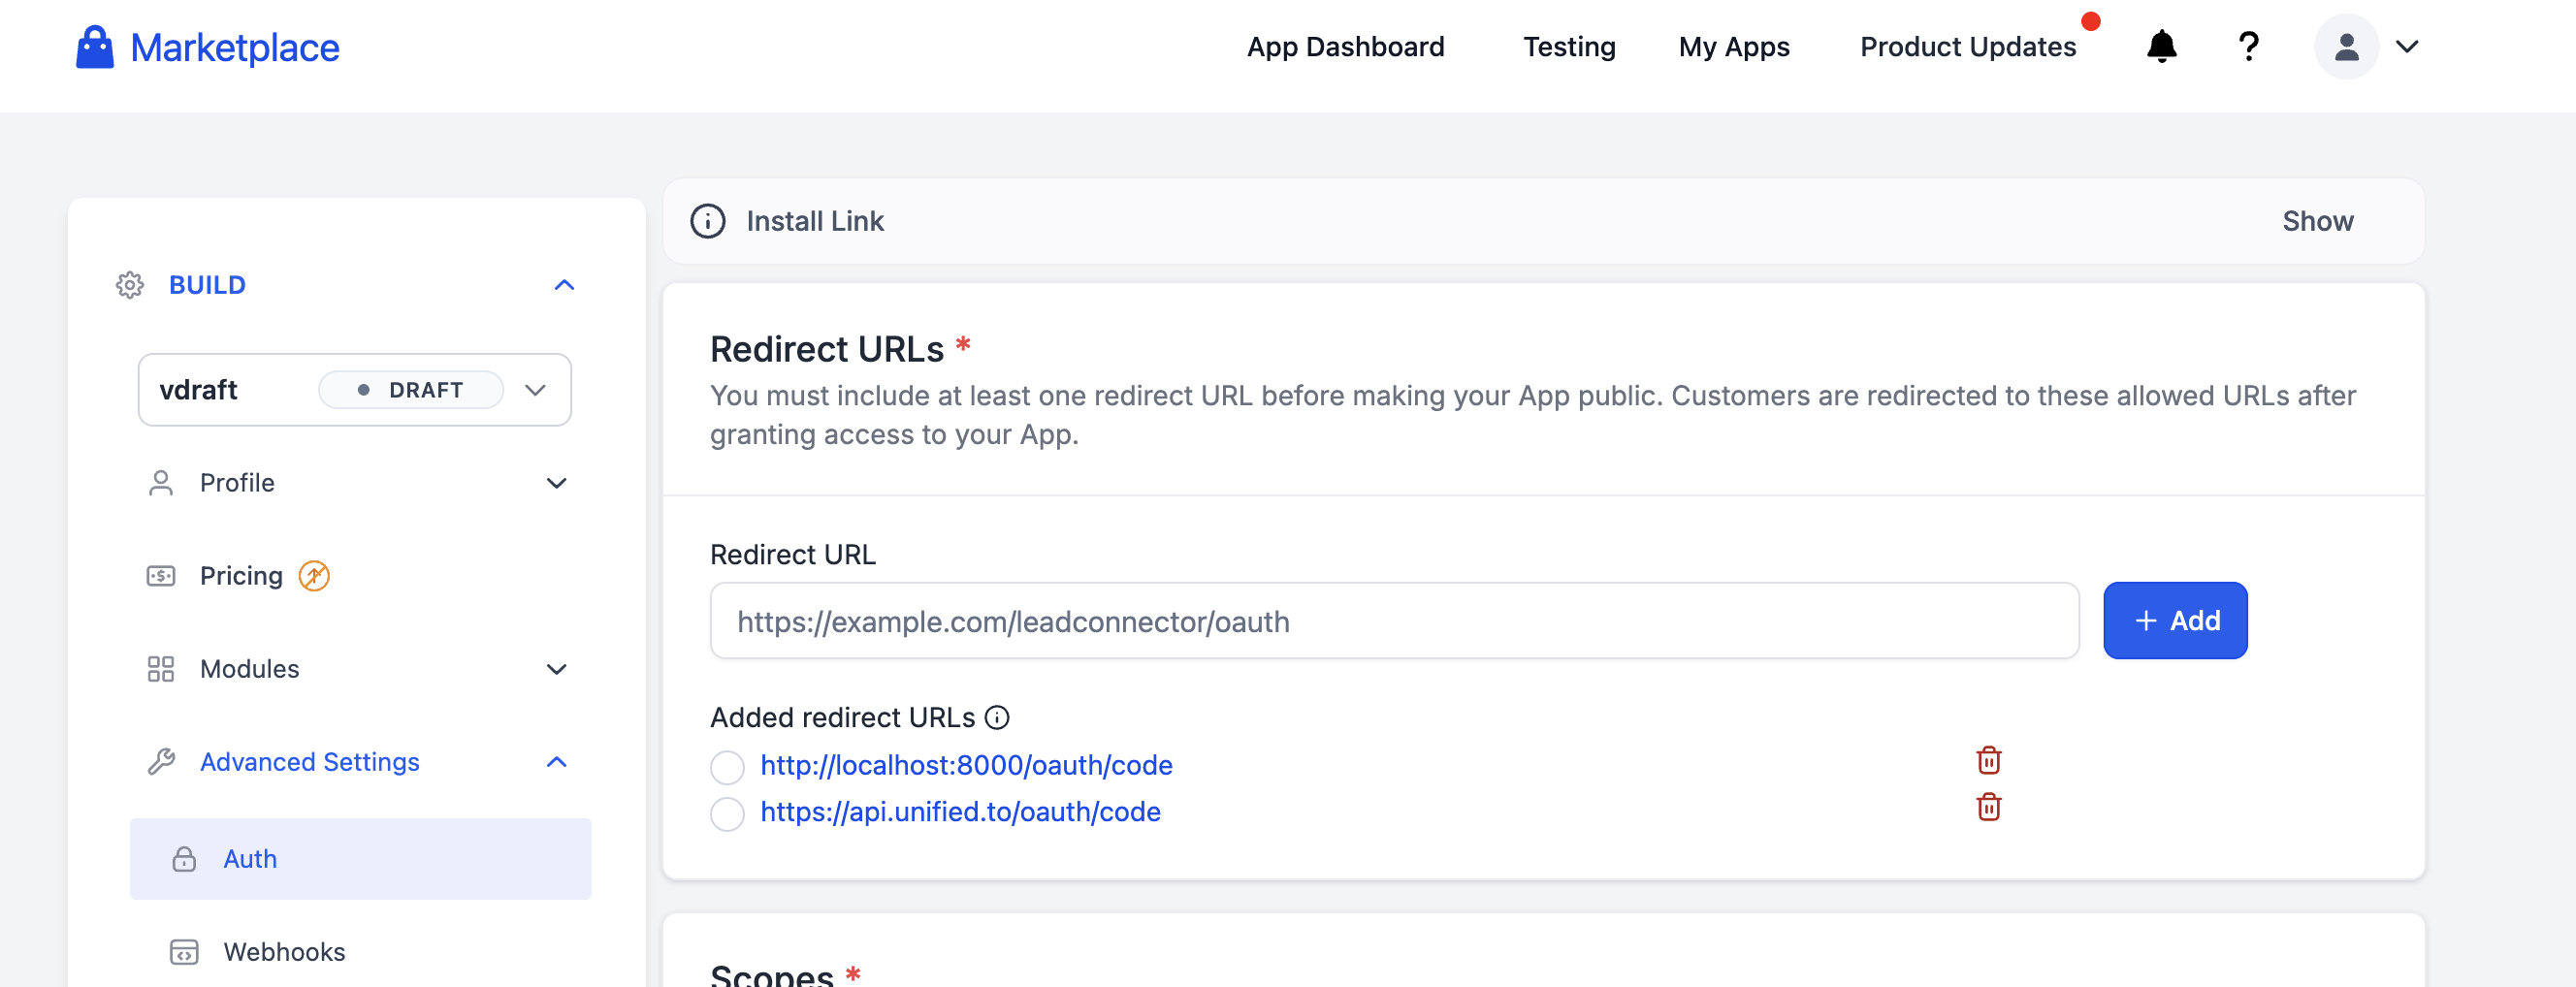
- Redirect URL: In Advanced settings → Auth, set the redirect URL to the value shown on the integration's OAuth2 Credentials page in Unified.to.
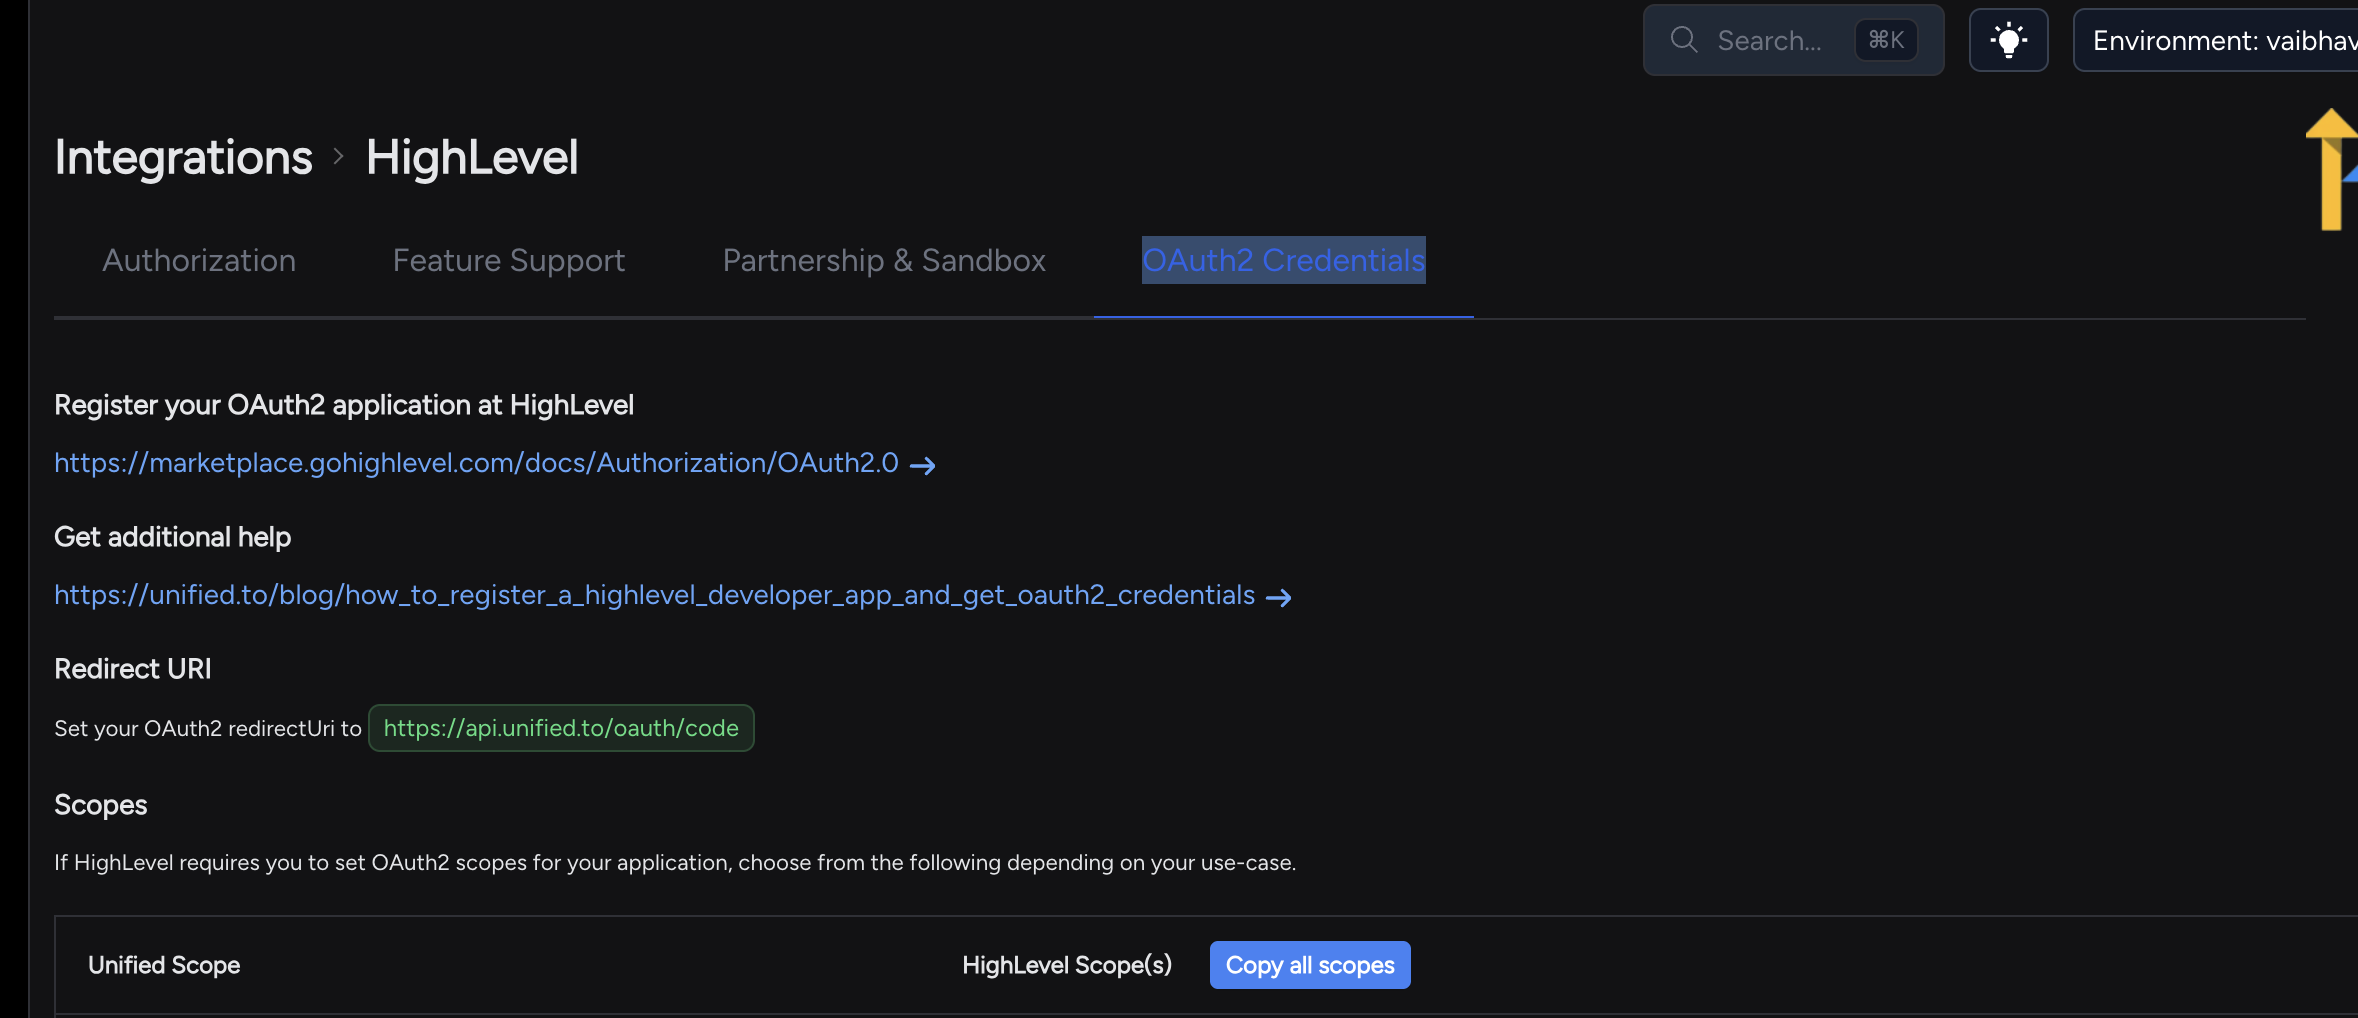
- Scopes: Use the scopes listed on the HighLevel app setup page.
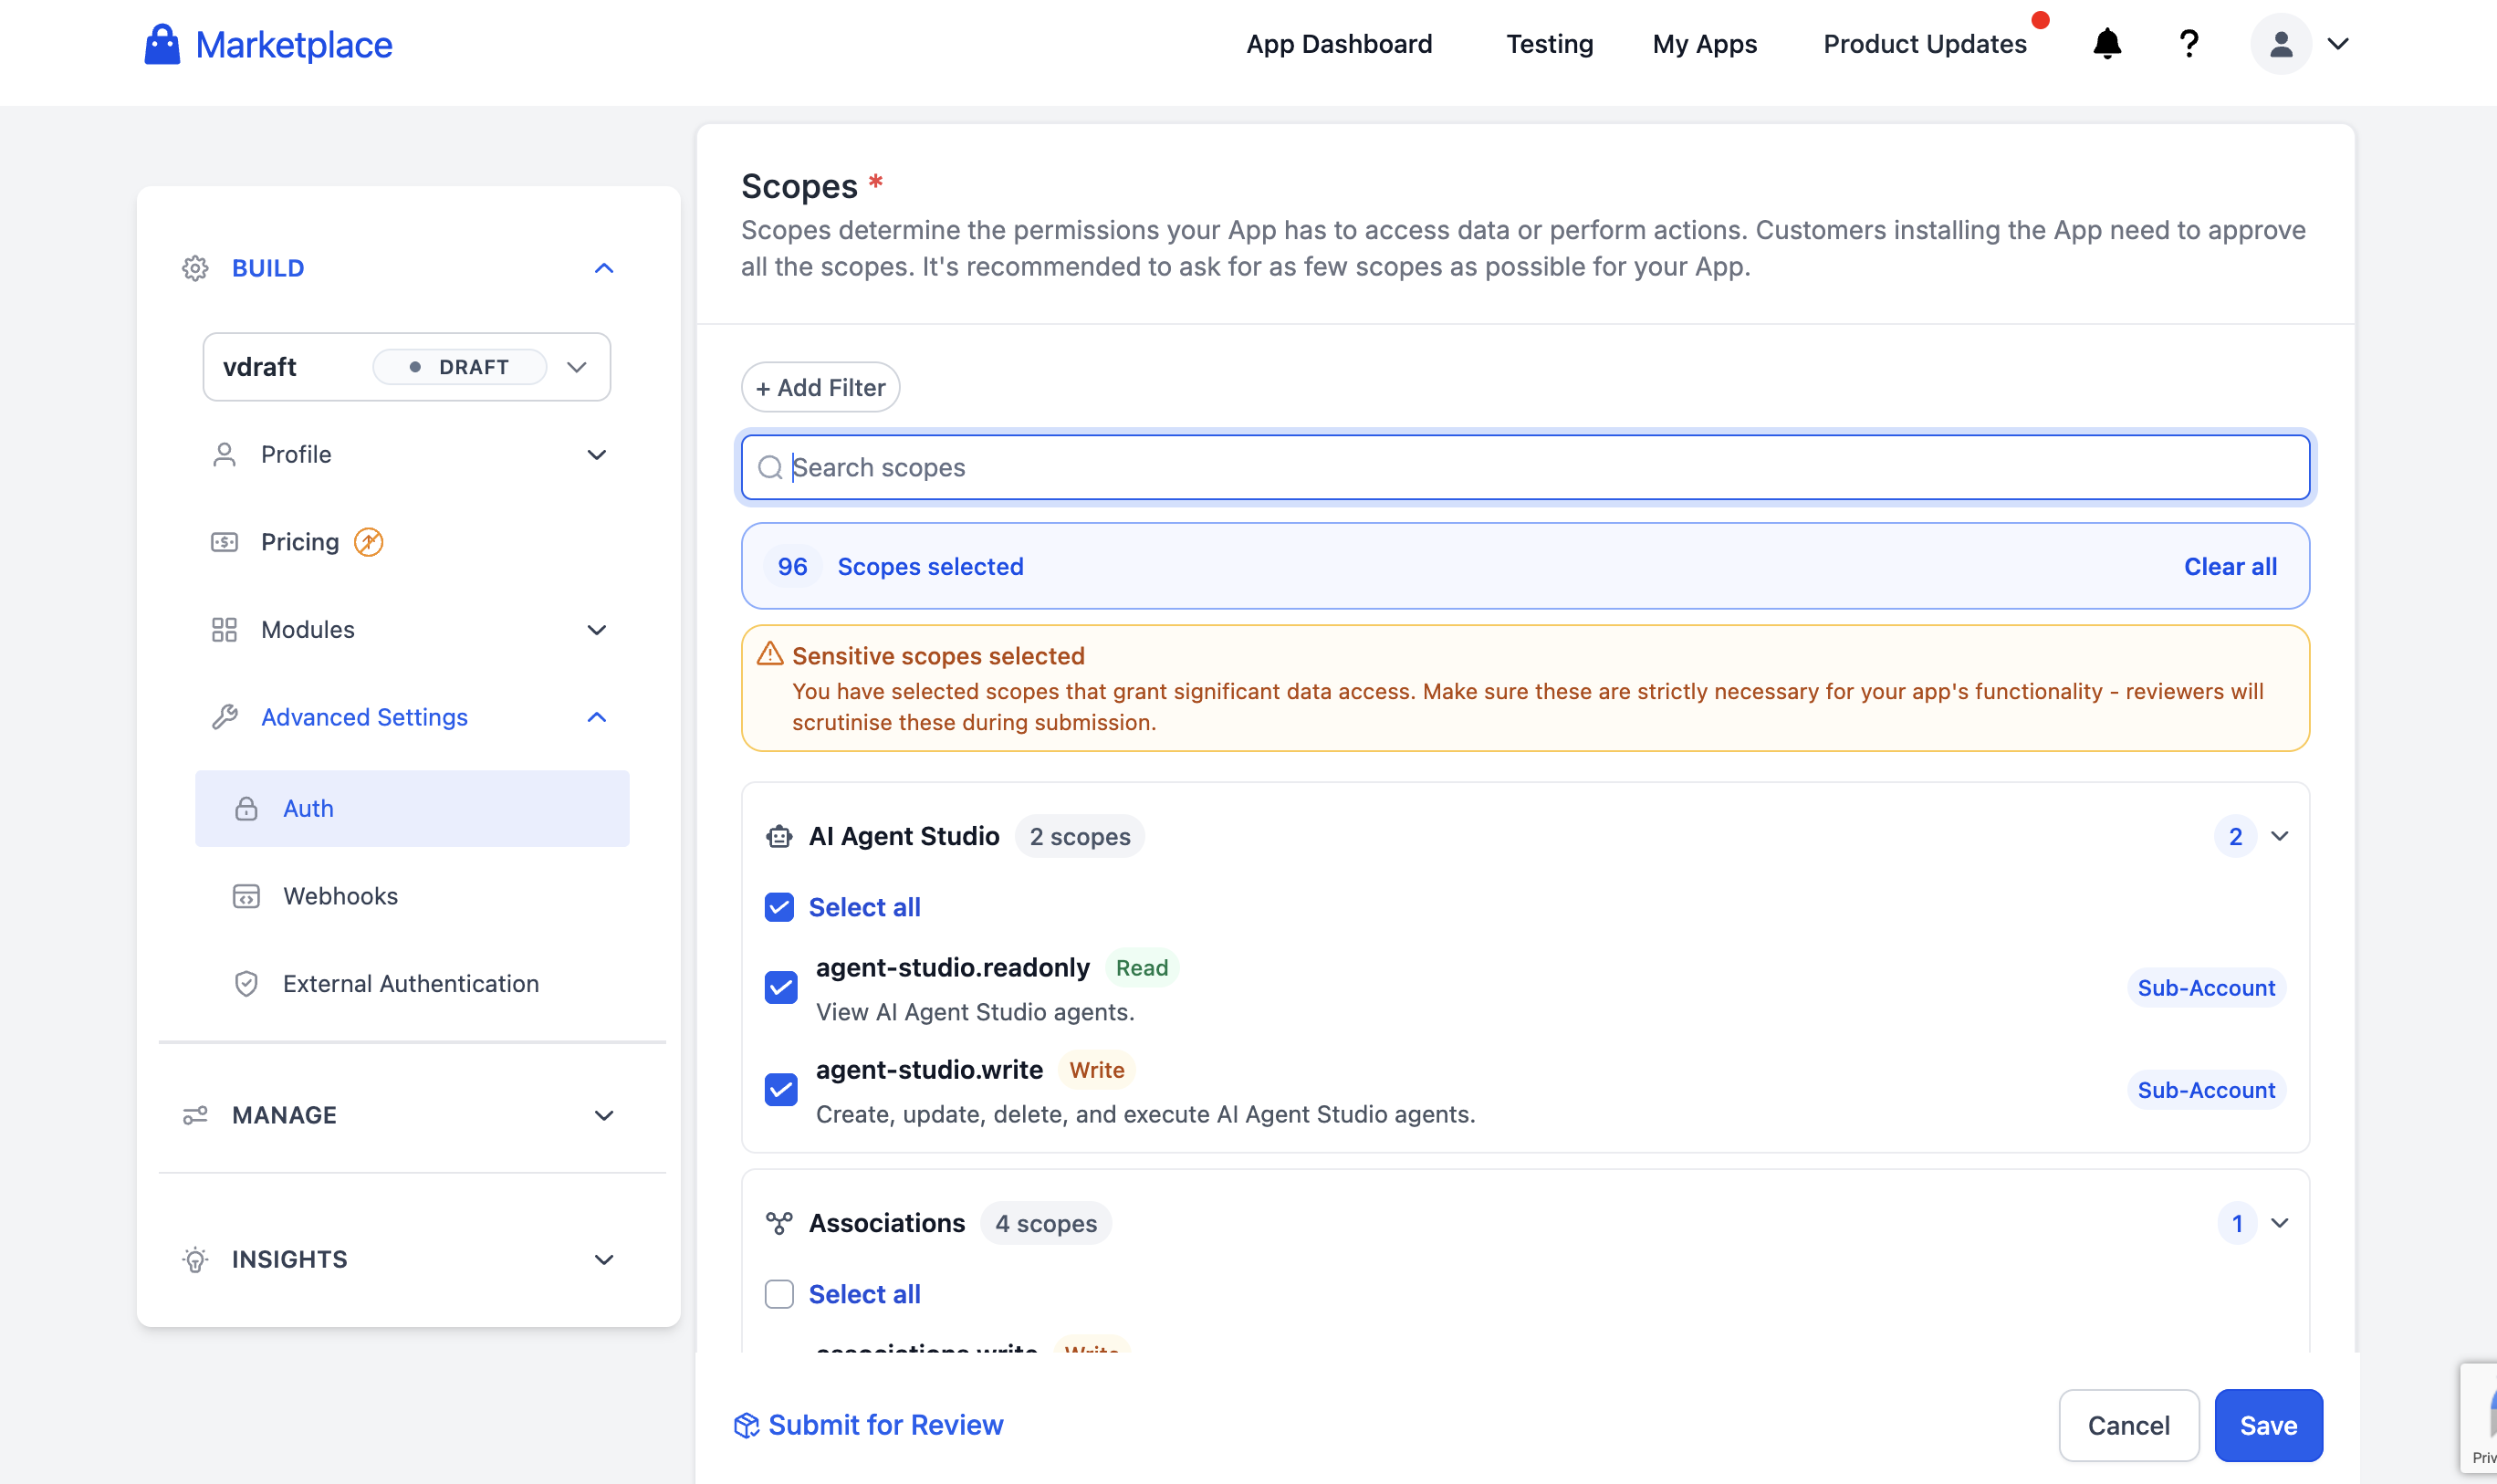
In Unified.to, you can also find the required scopes listed below the integration page.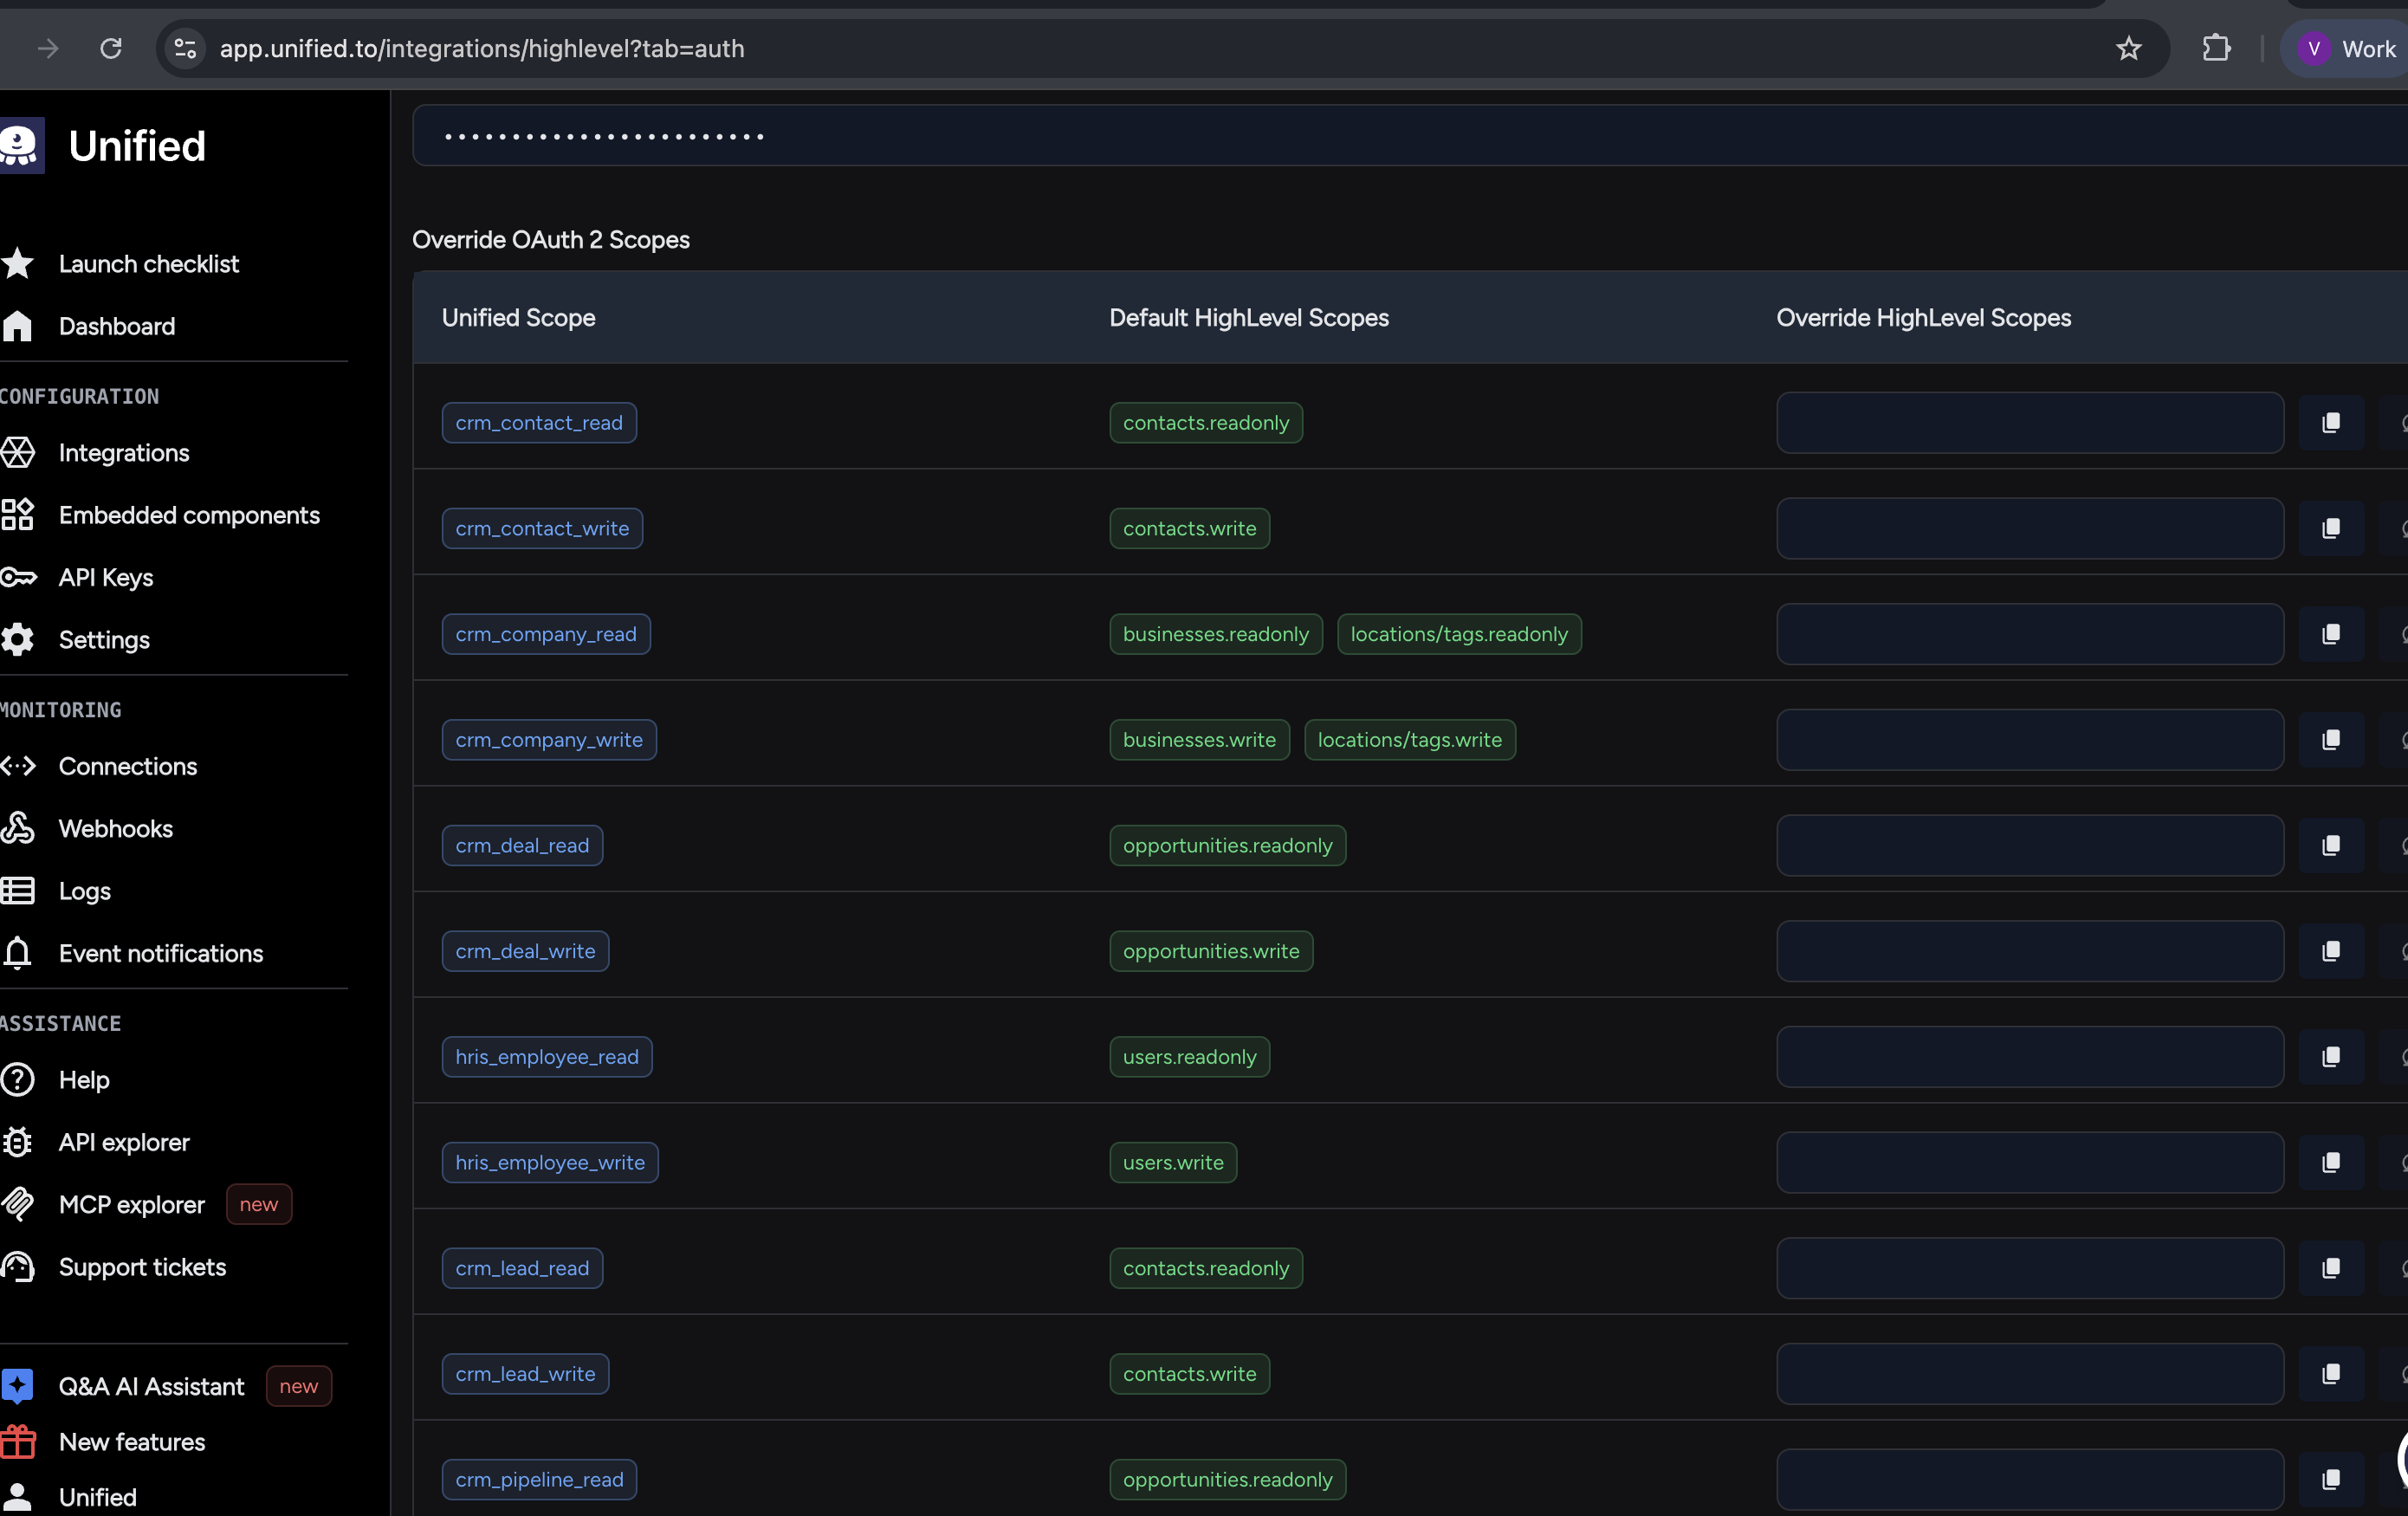
- App Name: Any name (e.g., Unified Integration)
- Save the app in HighLevel.
Step 2: Get Credentials
After creating the app, go to Manage → Secrets and add:
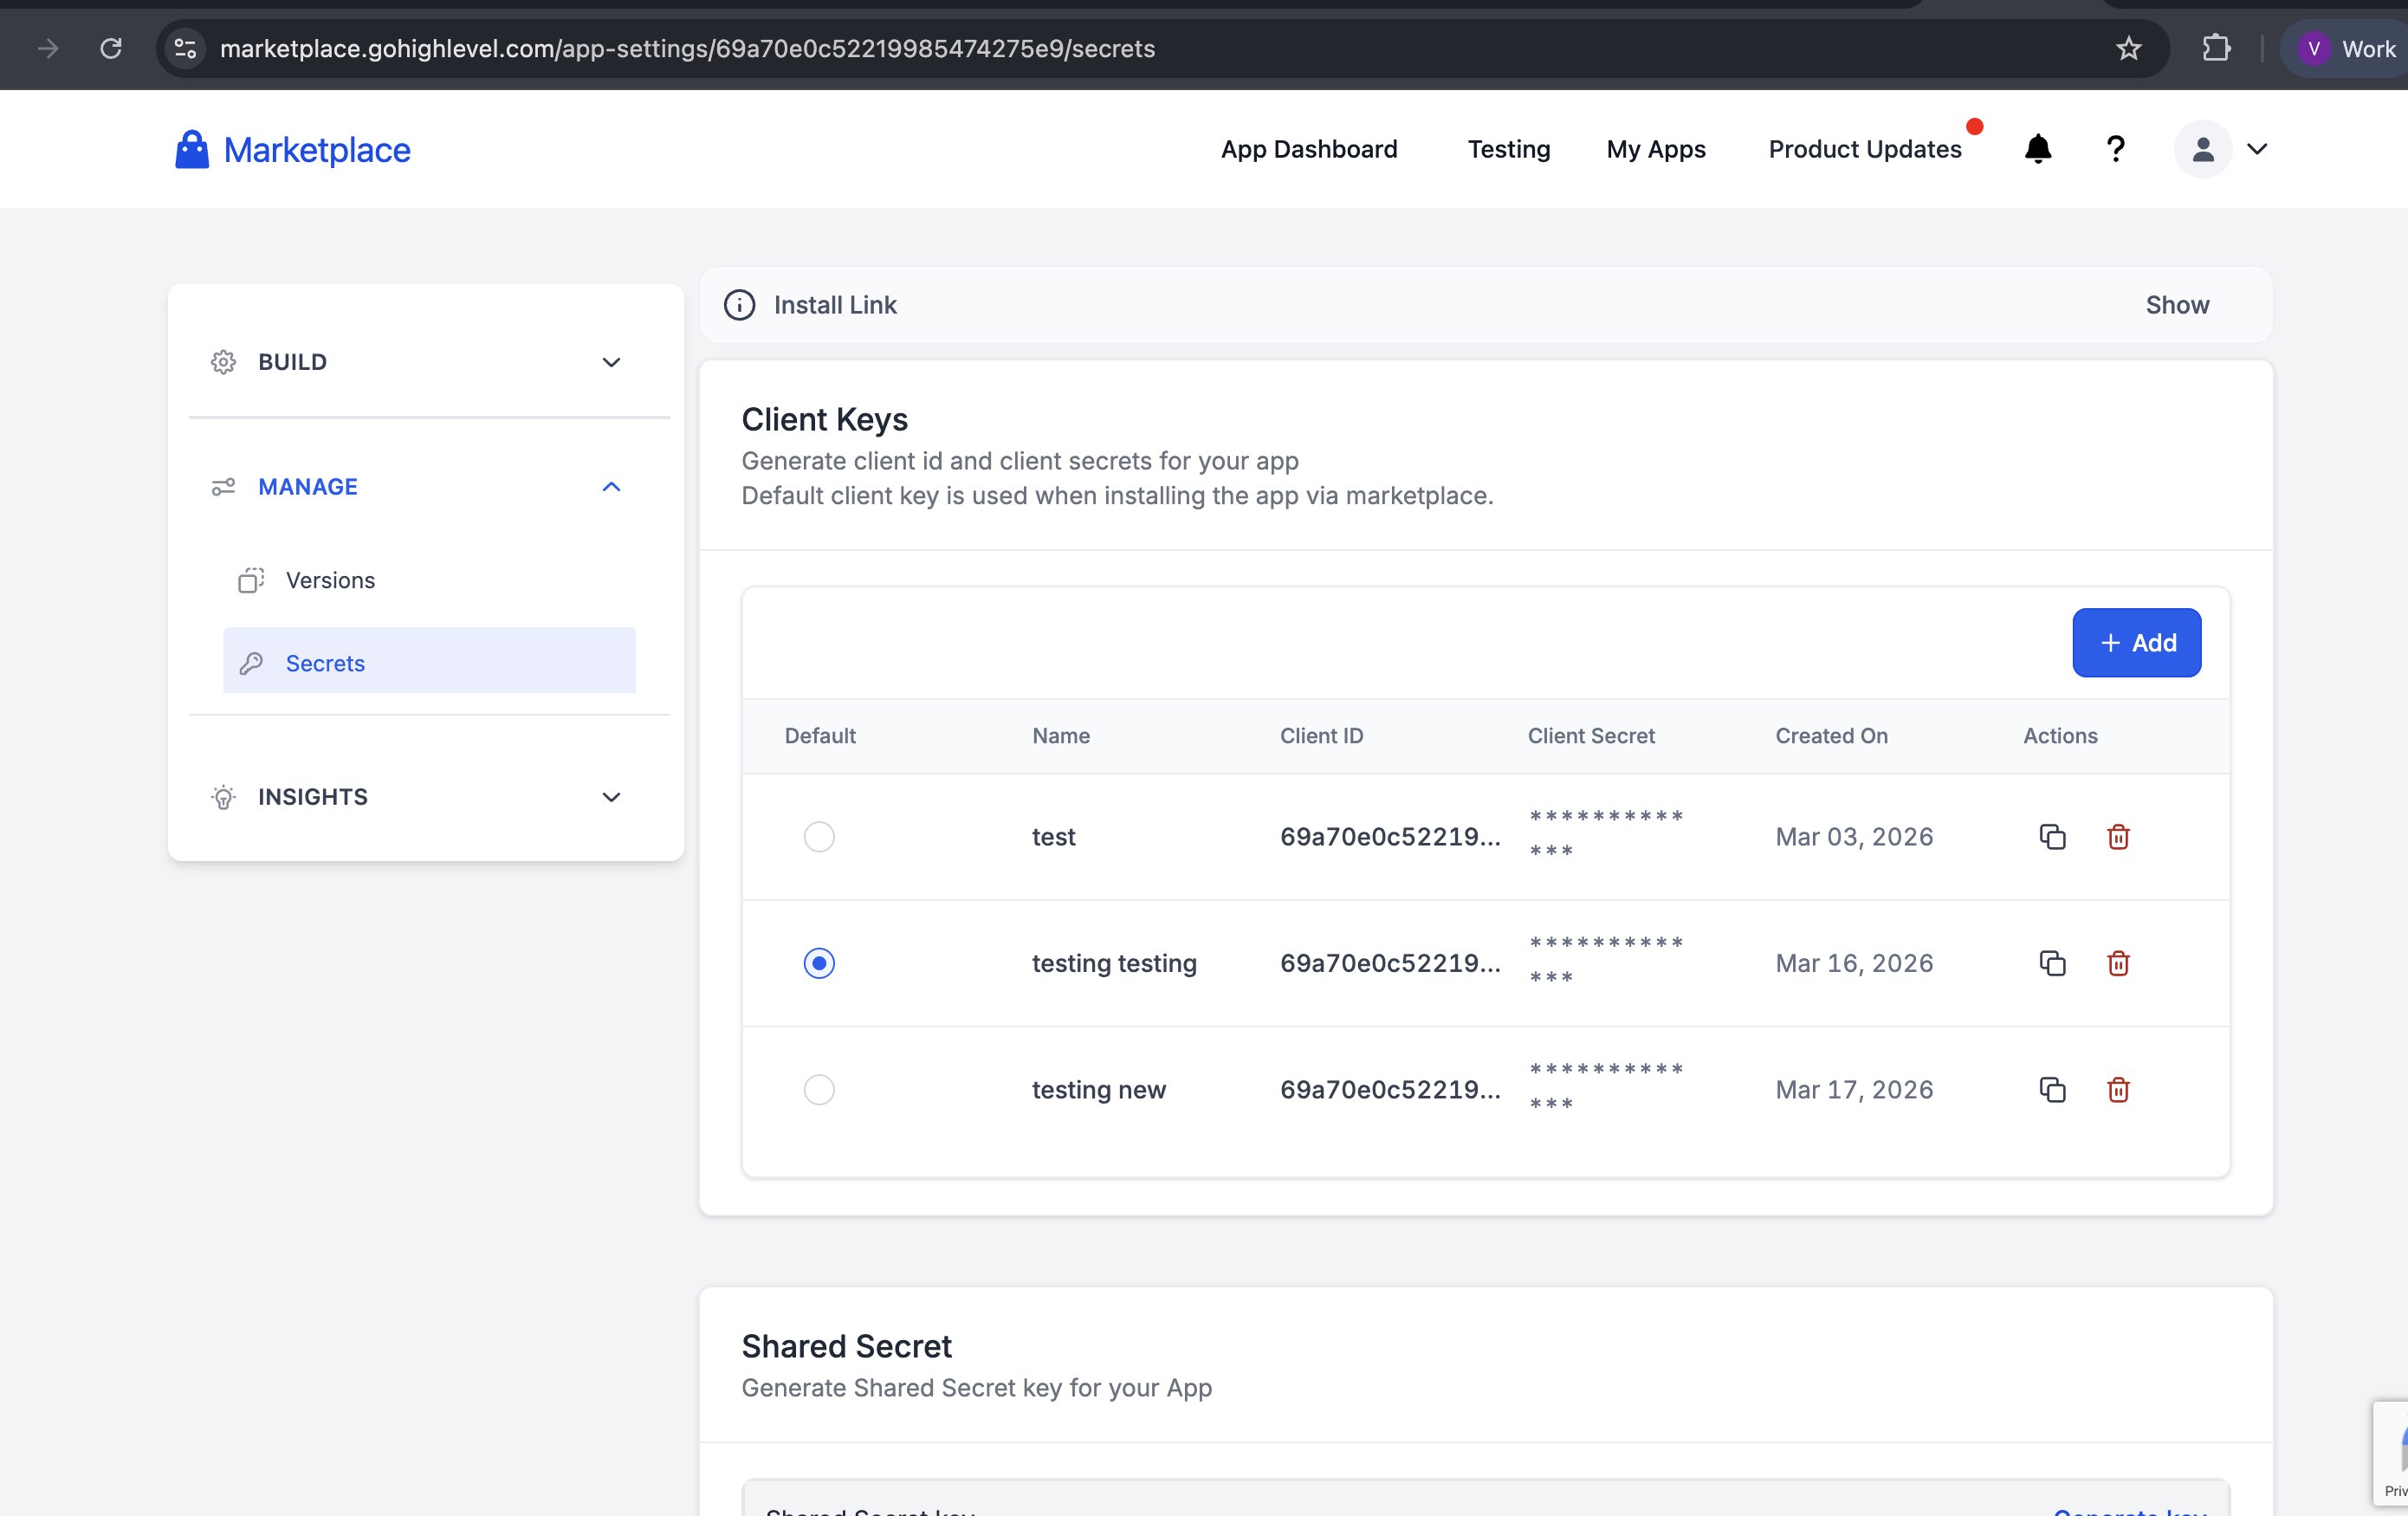
- Client ID
- Client Secret
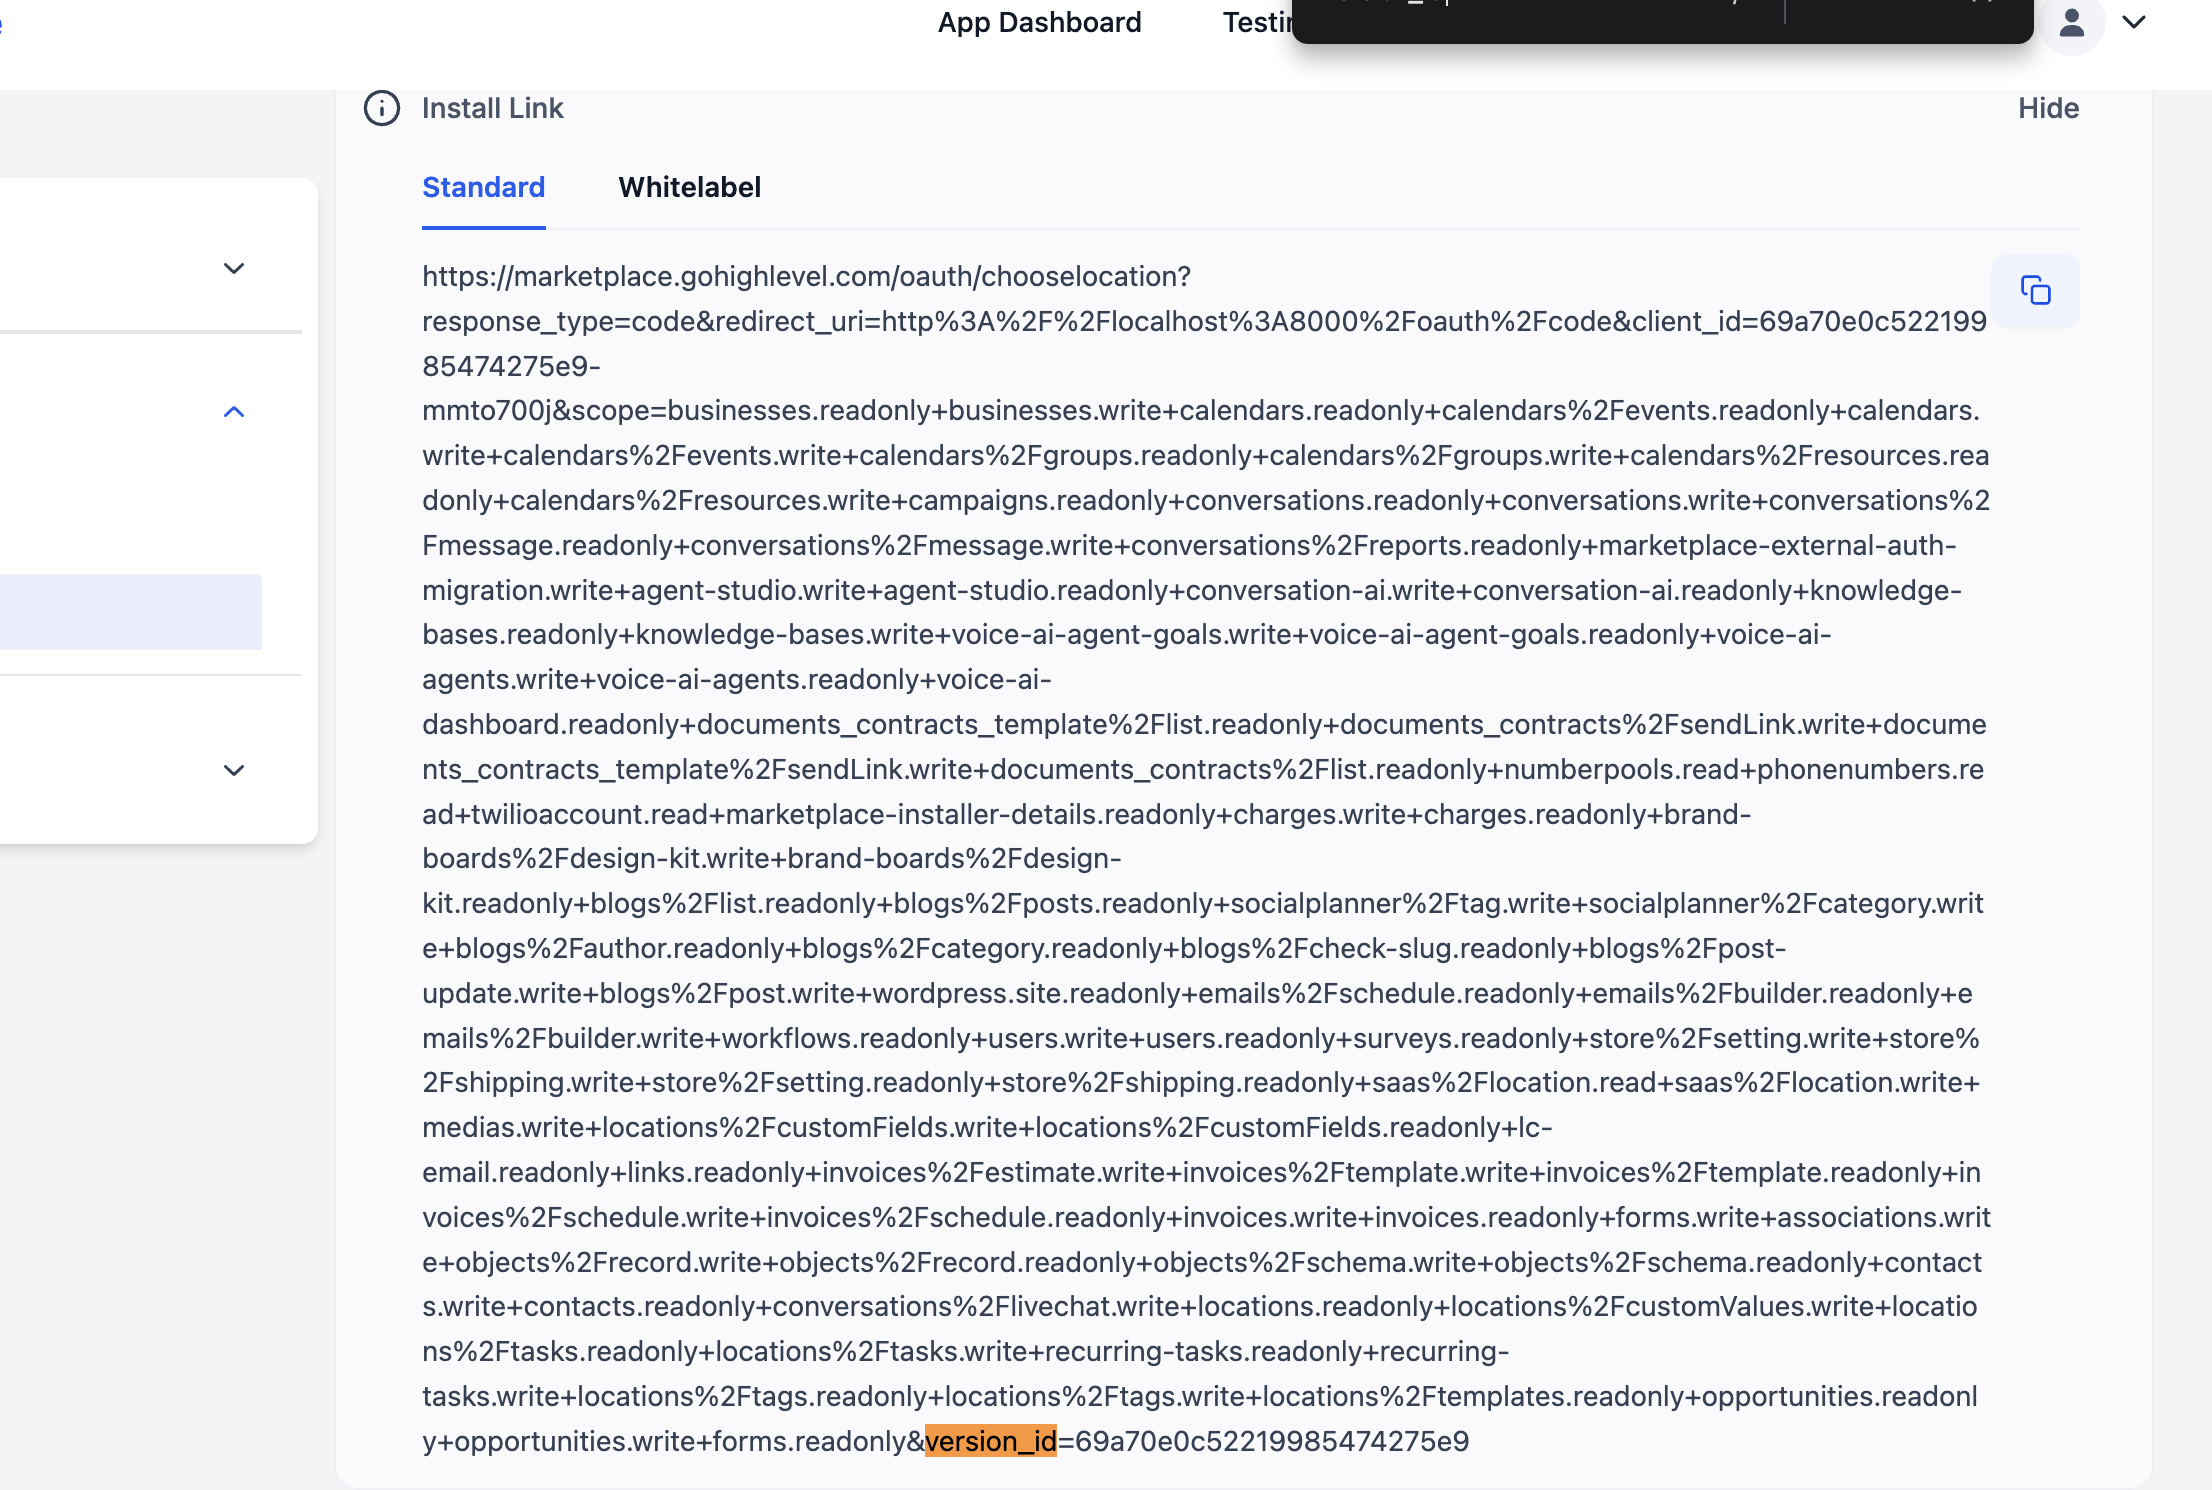
To find the Version ID, open the install link and copy the Version ID from the resulting page.
Keep these secure. You will need them in Unified.to.
Step 3: Create Connection in Unified.to
- Log in to your Unified.to dashboard
- Navigate to Integrations.
- Select HighLevel as the integration
- Enter the following details:
- Client ID (from HighLevel)
- Client Secret (from HighLevel)
- Version ID (from HighLevel)
- Click Activate
- Go to Embedded Components.
- Click HighLevel.
Step 4: Authorize the Connection
- You will be redirected to HighLevel
- Log in (if not already logged in)
- Select the account/location you want to connect
- Approve the requested permissions
Once approved, you will be redirected back to Unified.to
Common Issues & Troubleshooting
1. Invalid Redirect URI
- Ensure the redirect URL in HighLevel exactly matches the one used by Unified.to
2. Unauthorized / 401 Errors
- Double-check Client ID and Client Secret
- Ensure the OAuth app is active
3. Missing Data
- Ensure correct scopes are selected in HighLevel
- Some data may depend on the selected location/account
Notes
- HighLevel uses location-based access. Make sure you select the correct location during authorization
- You can create multiple connections for different locations if needed
If you run into issues, reach out to the Unified.to support team with:
- Connection ID
- Error logs
- Steps to reproduce