How to create a Connection In Microsoft Teams
June 5, 2026
Most Microsoft products follow the same standard process for creating a connection, but Microsoft Teams is slightly different.
To access Unified Communications (UC) objects such as call records, Microsoft requires application-level permissions in addition to delegated permissions. This is necessary because Microsoft does not allow access to certain Teams resources using delegated permissions alone.
Before your end-users can authorize a MS Teams connection, you must first register an application in Microsoft Azure and configure the required permissions.
Step 1: Register Your Microsoft Application
Follow the guide below to register your application and obtain your Client ID and Client Secret:
Once you have completed the application registration, continue with the permission setup steps below.
Microsoft Teams Permission Types
Microsoft Teams uses two types of permissions:
- Delegated Permissions
- Application Permissions
Resources That Require Delegated Permissions
The following categories only require delegated permissions:
- Messaging
- HRIS
- Calendar
Resources That Require Application Permissions
The following category requires application permissions:
- Call Records
Step 2: Configure Delegated Permissions
- Open your registered application in Azure Portal.
- Navigate to API Permissions.
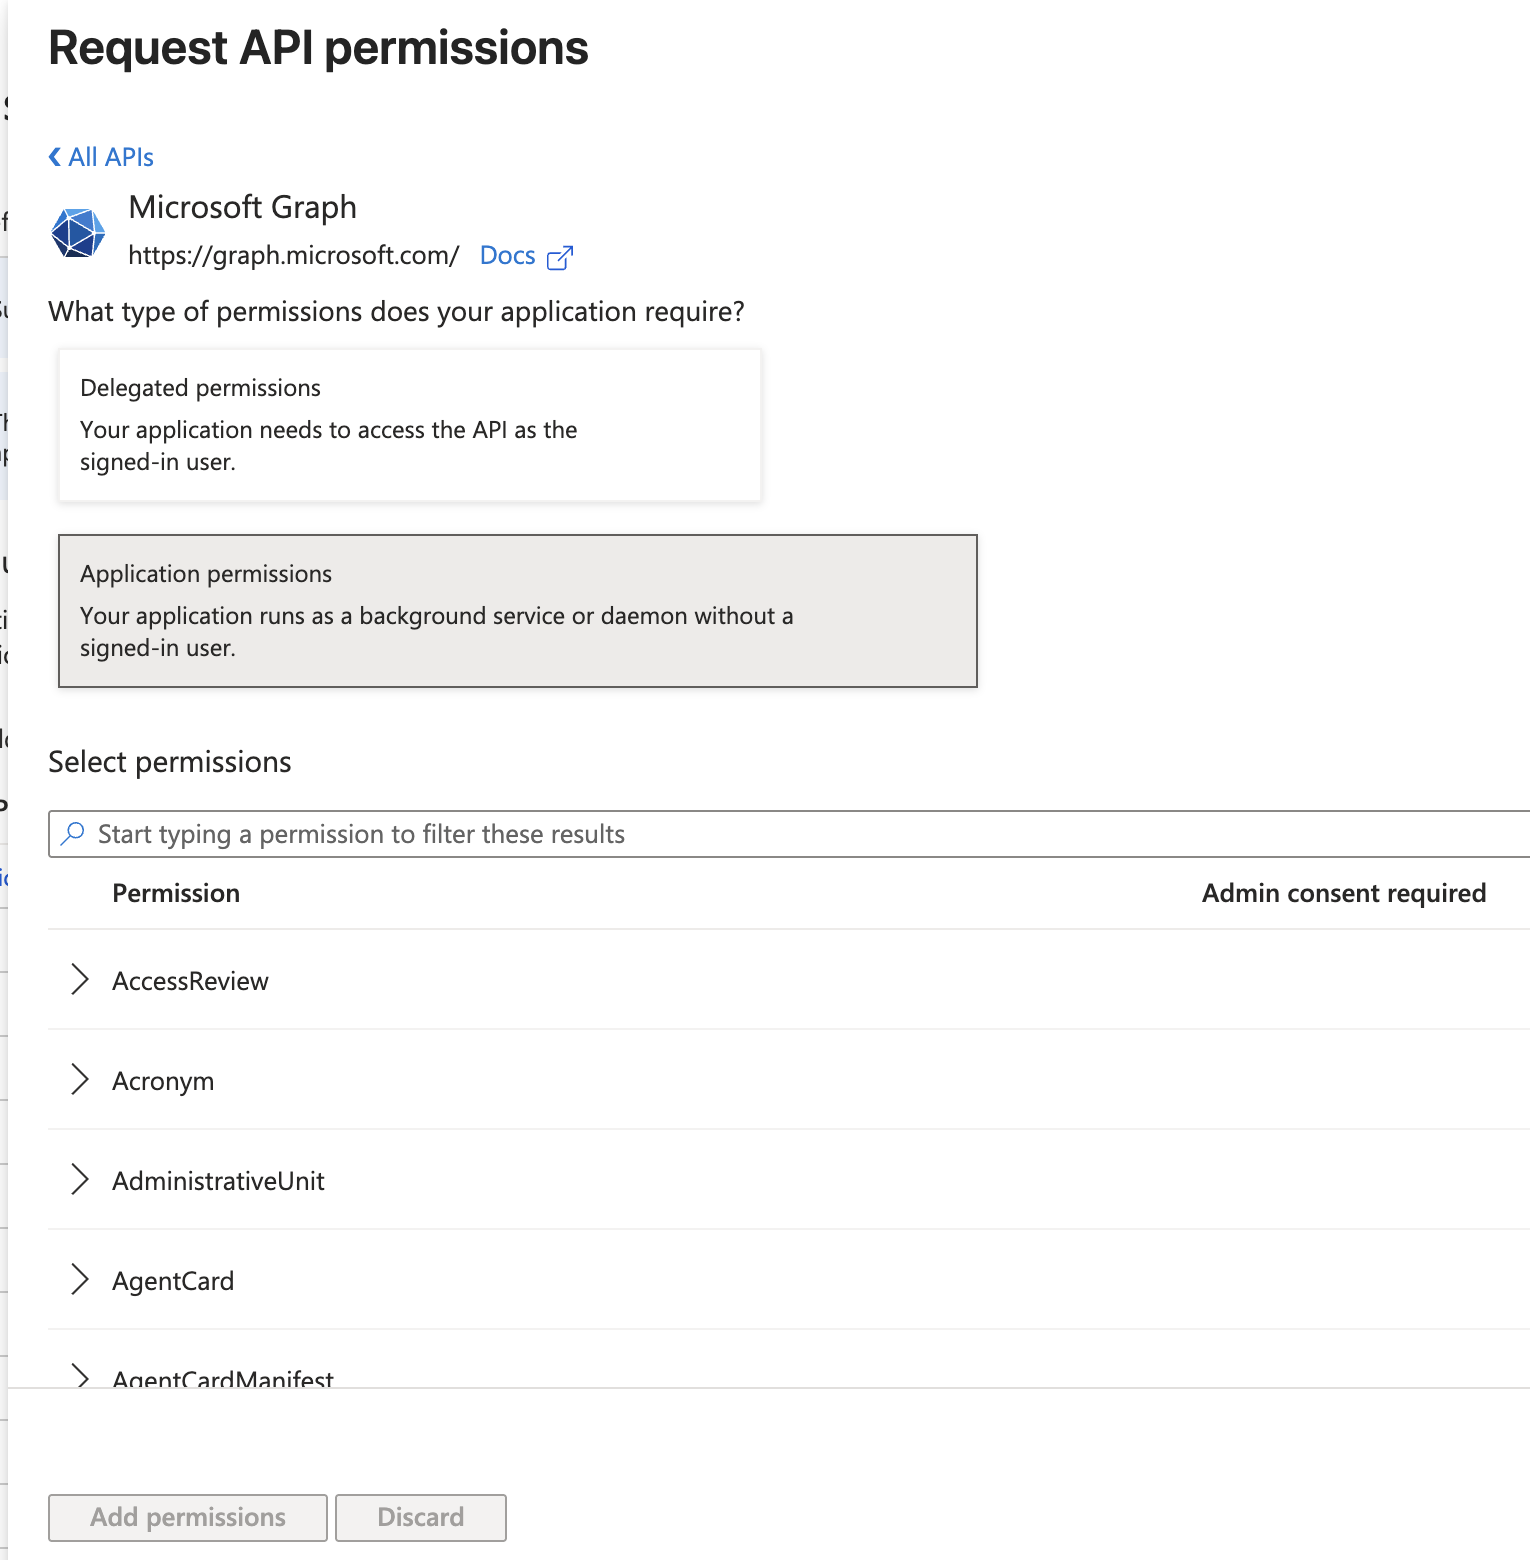
- Click Add a permission.
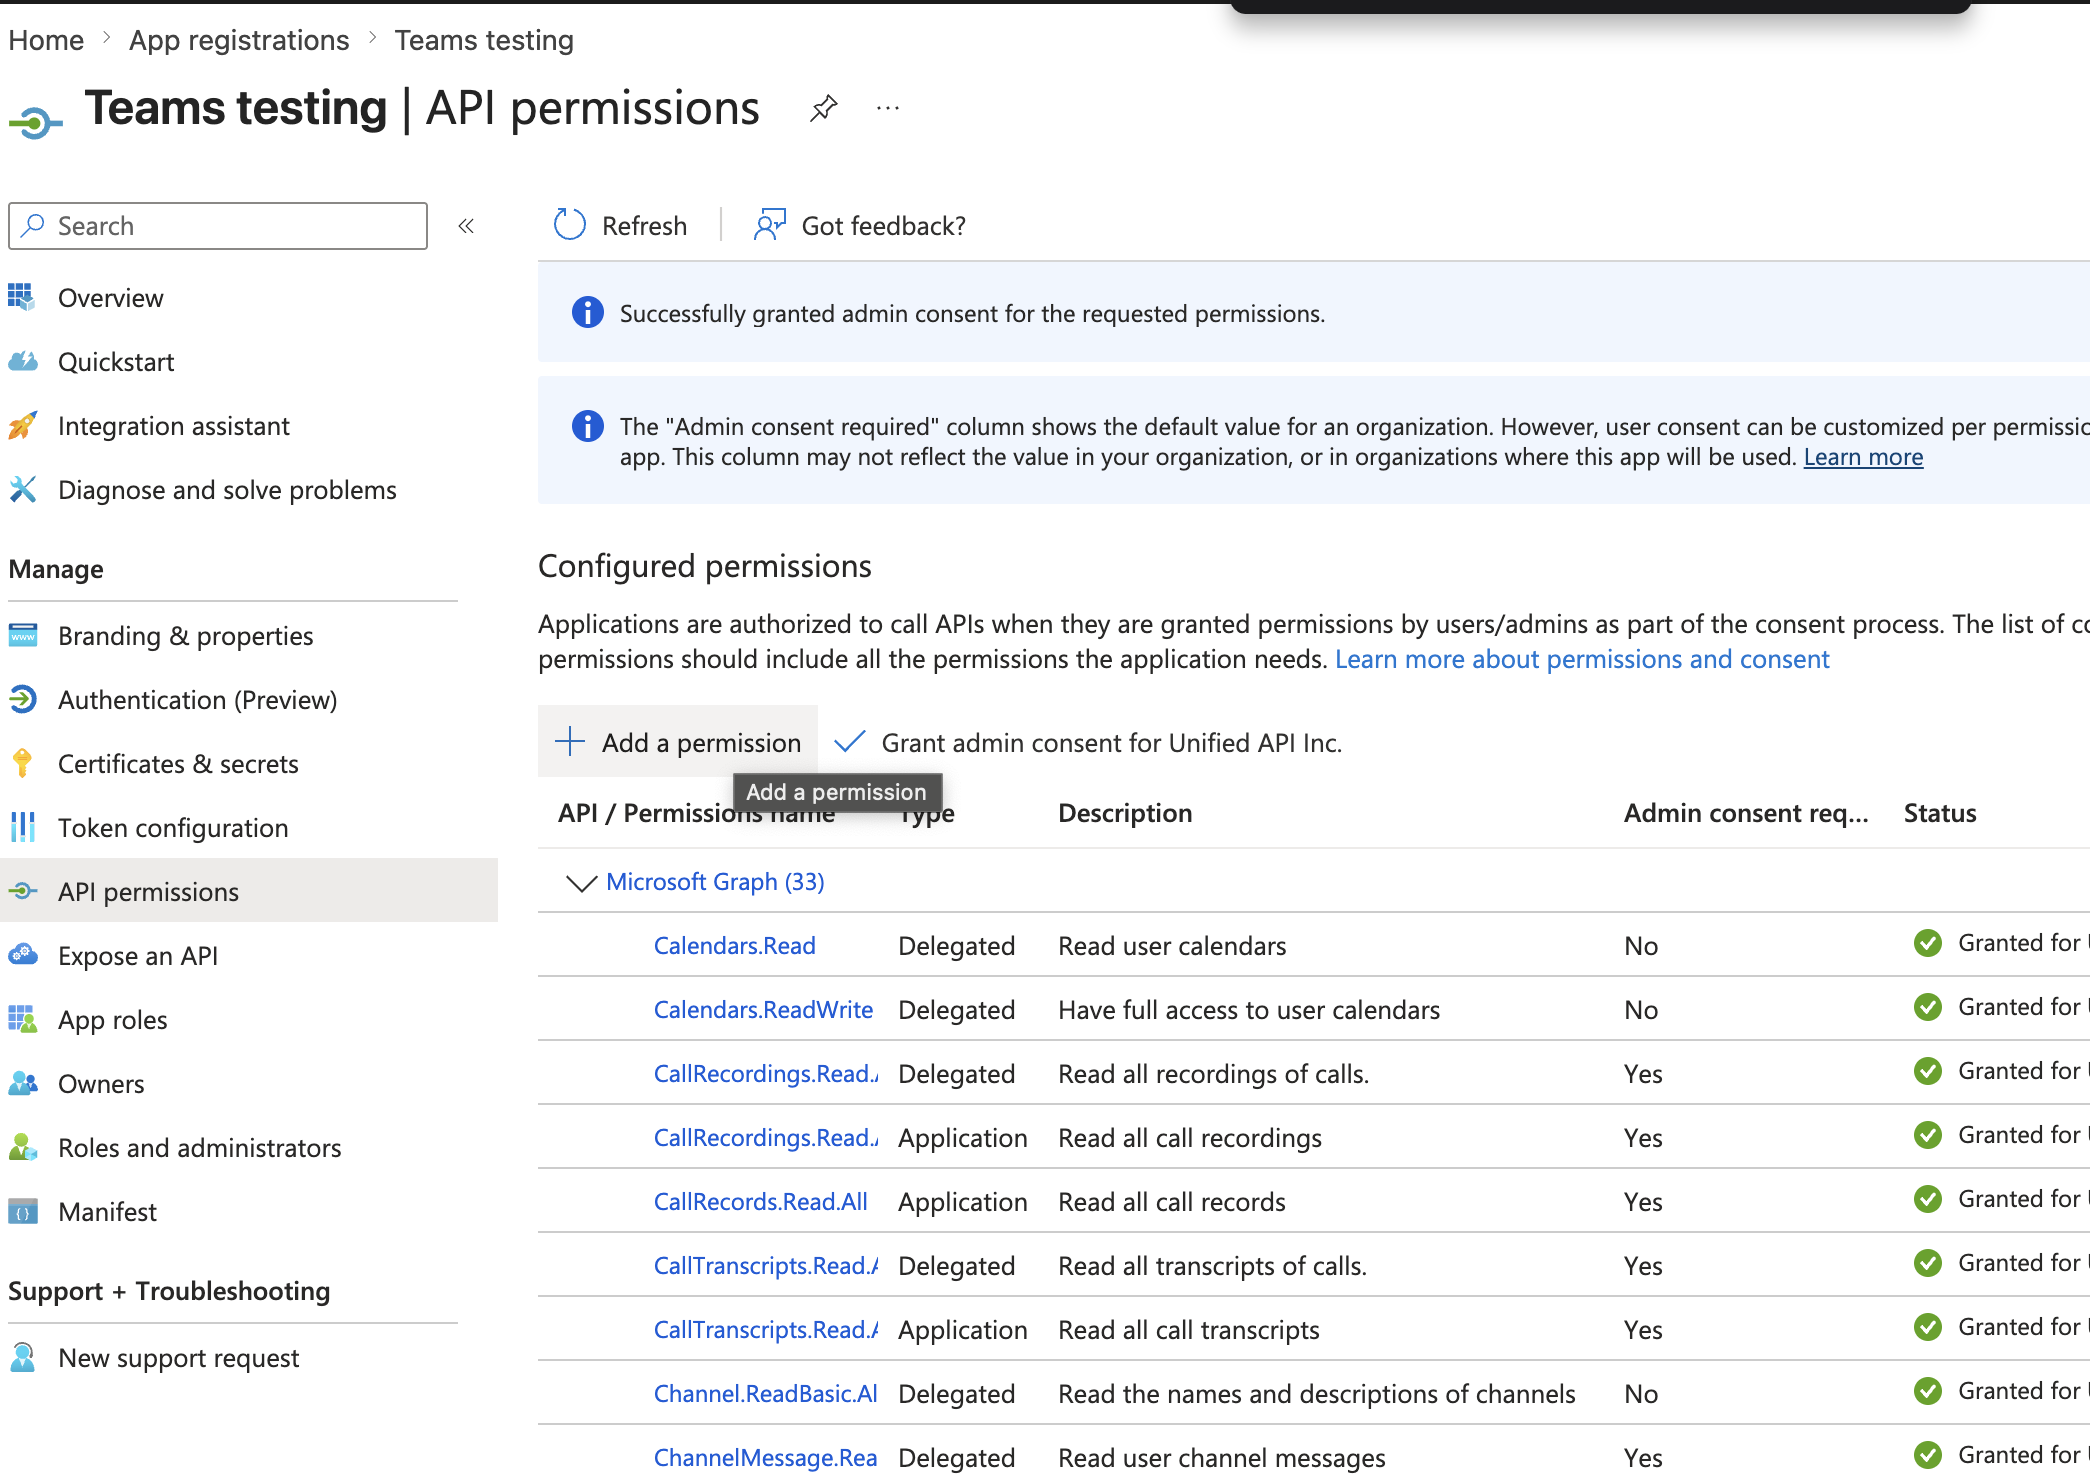
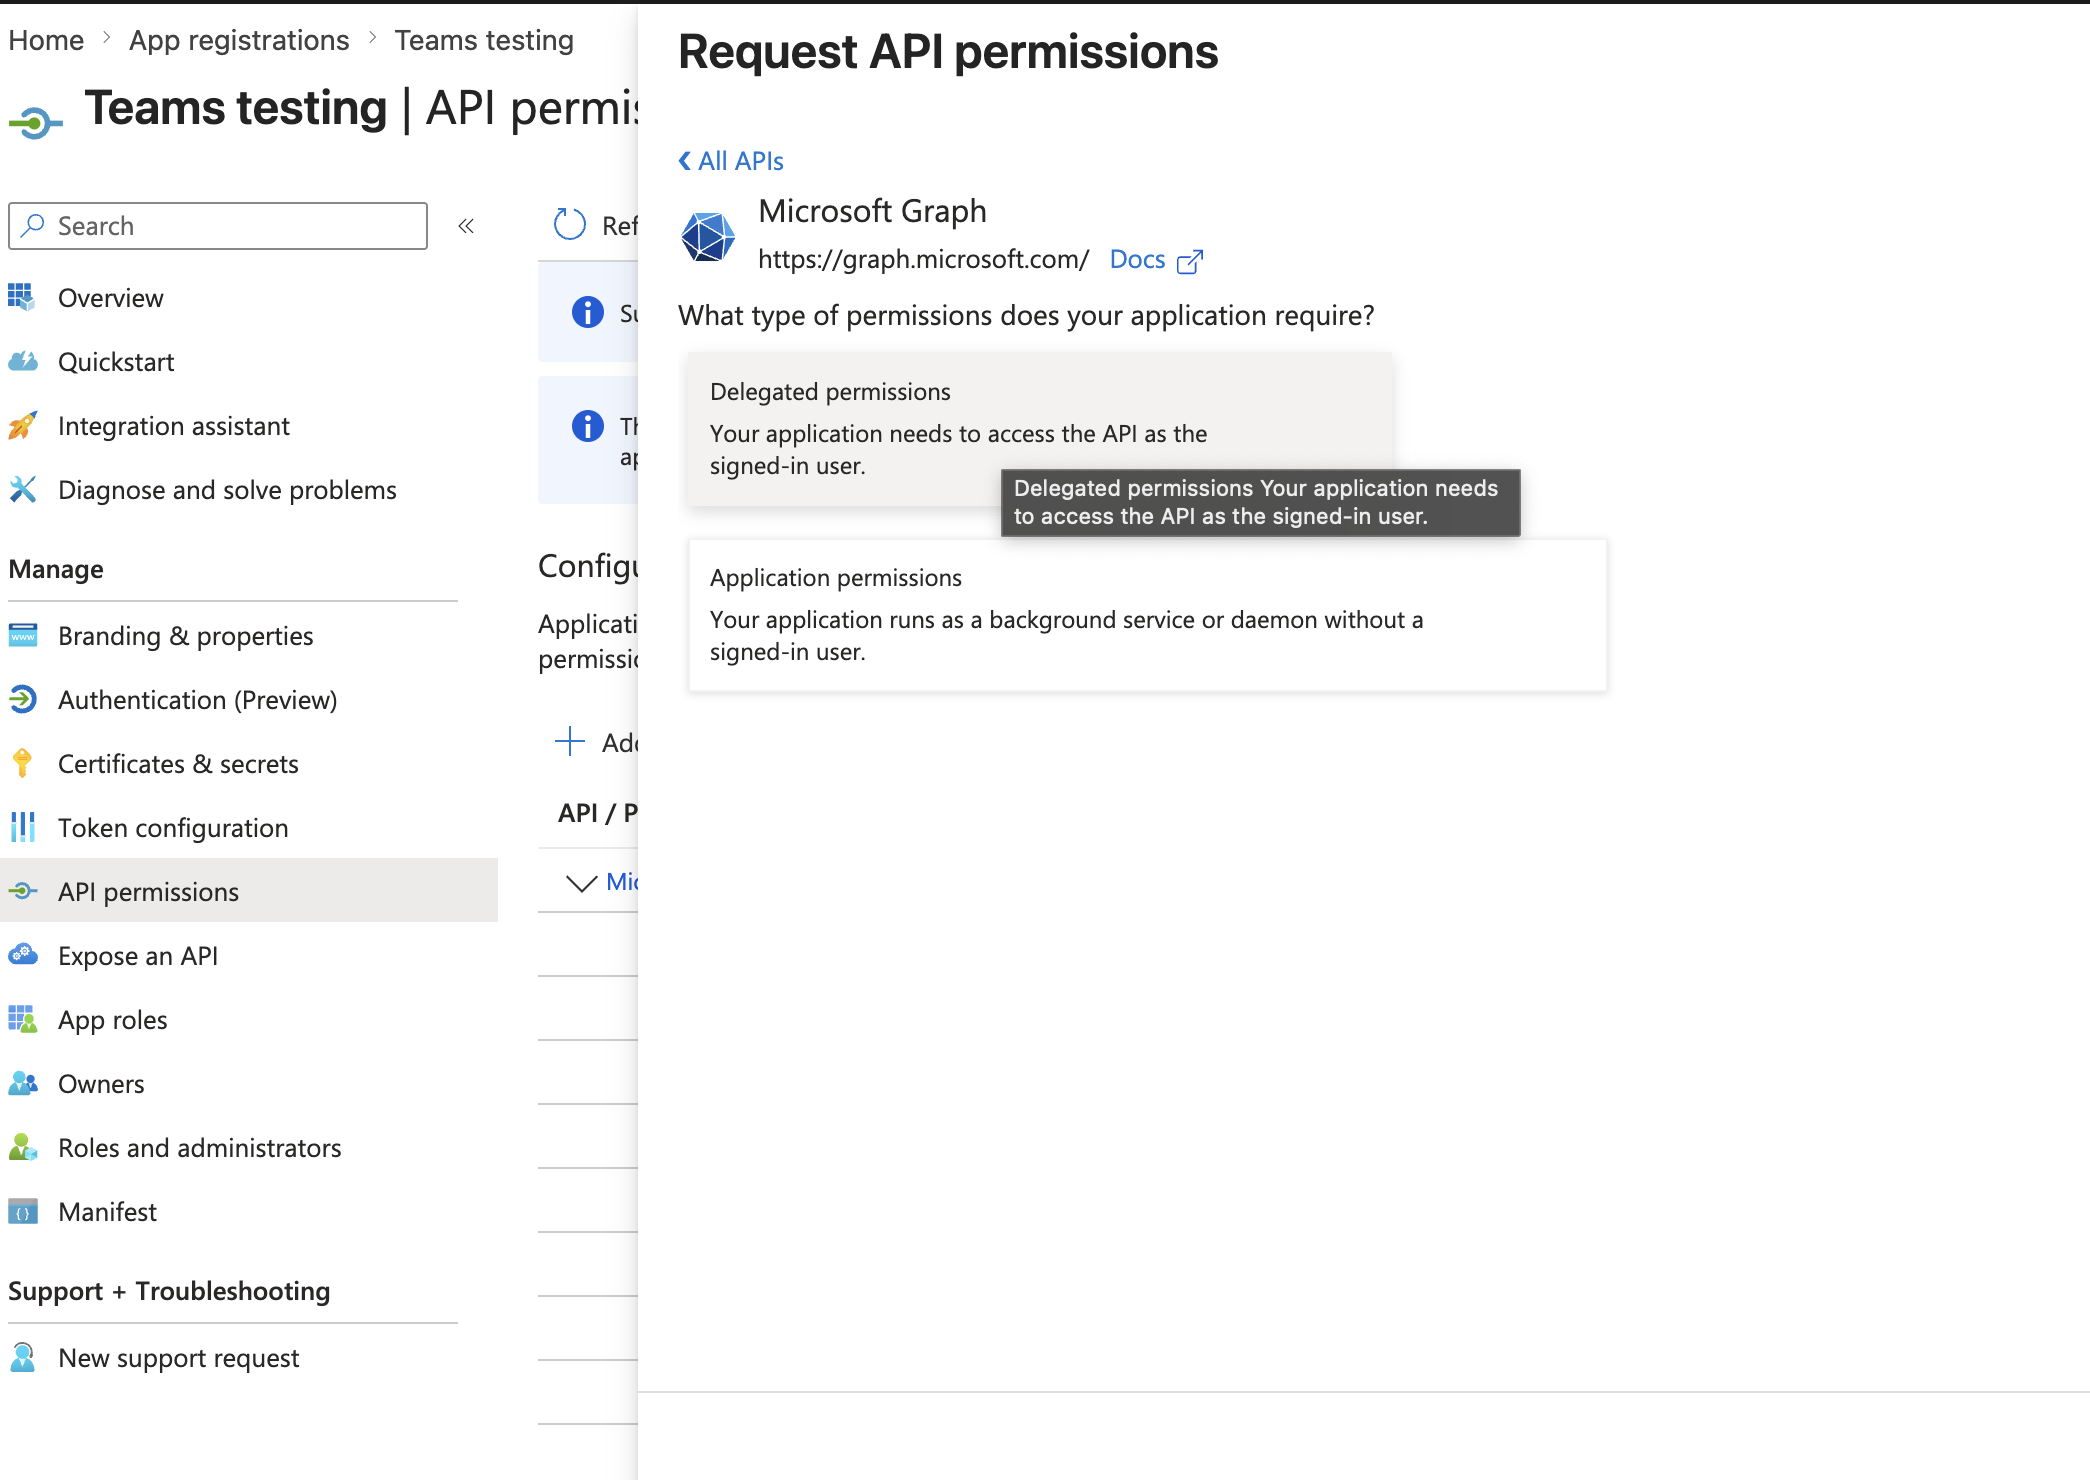
- Select Microsoft Graph.

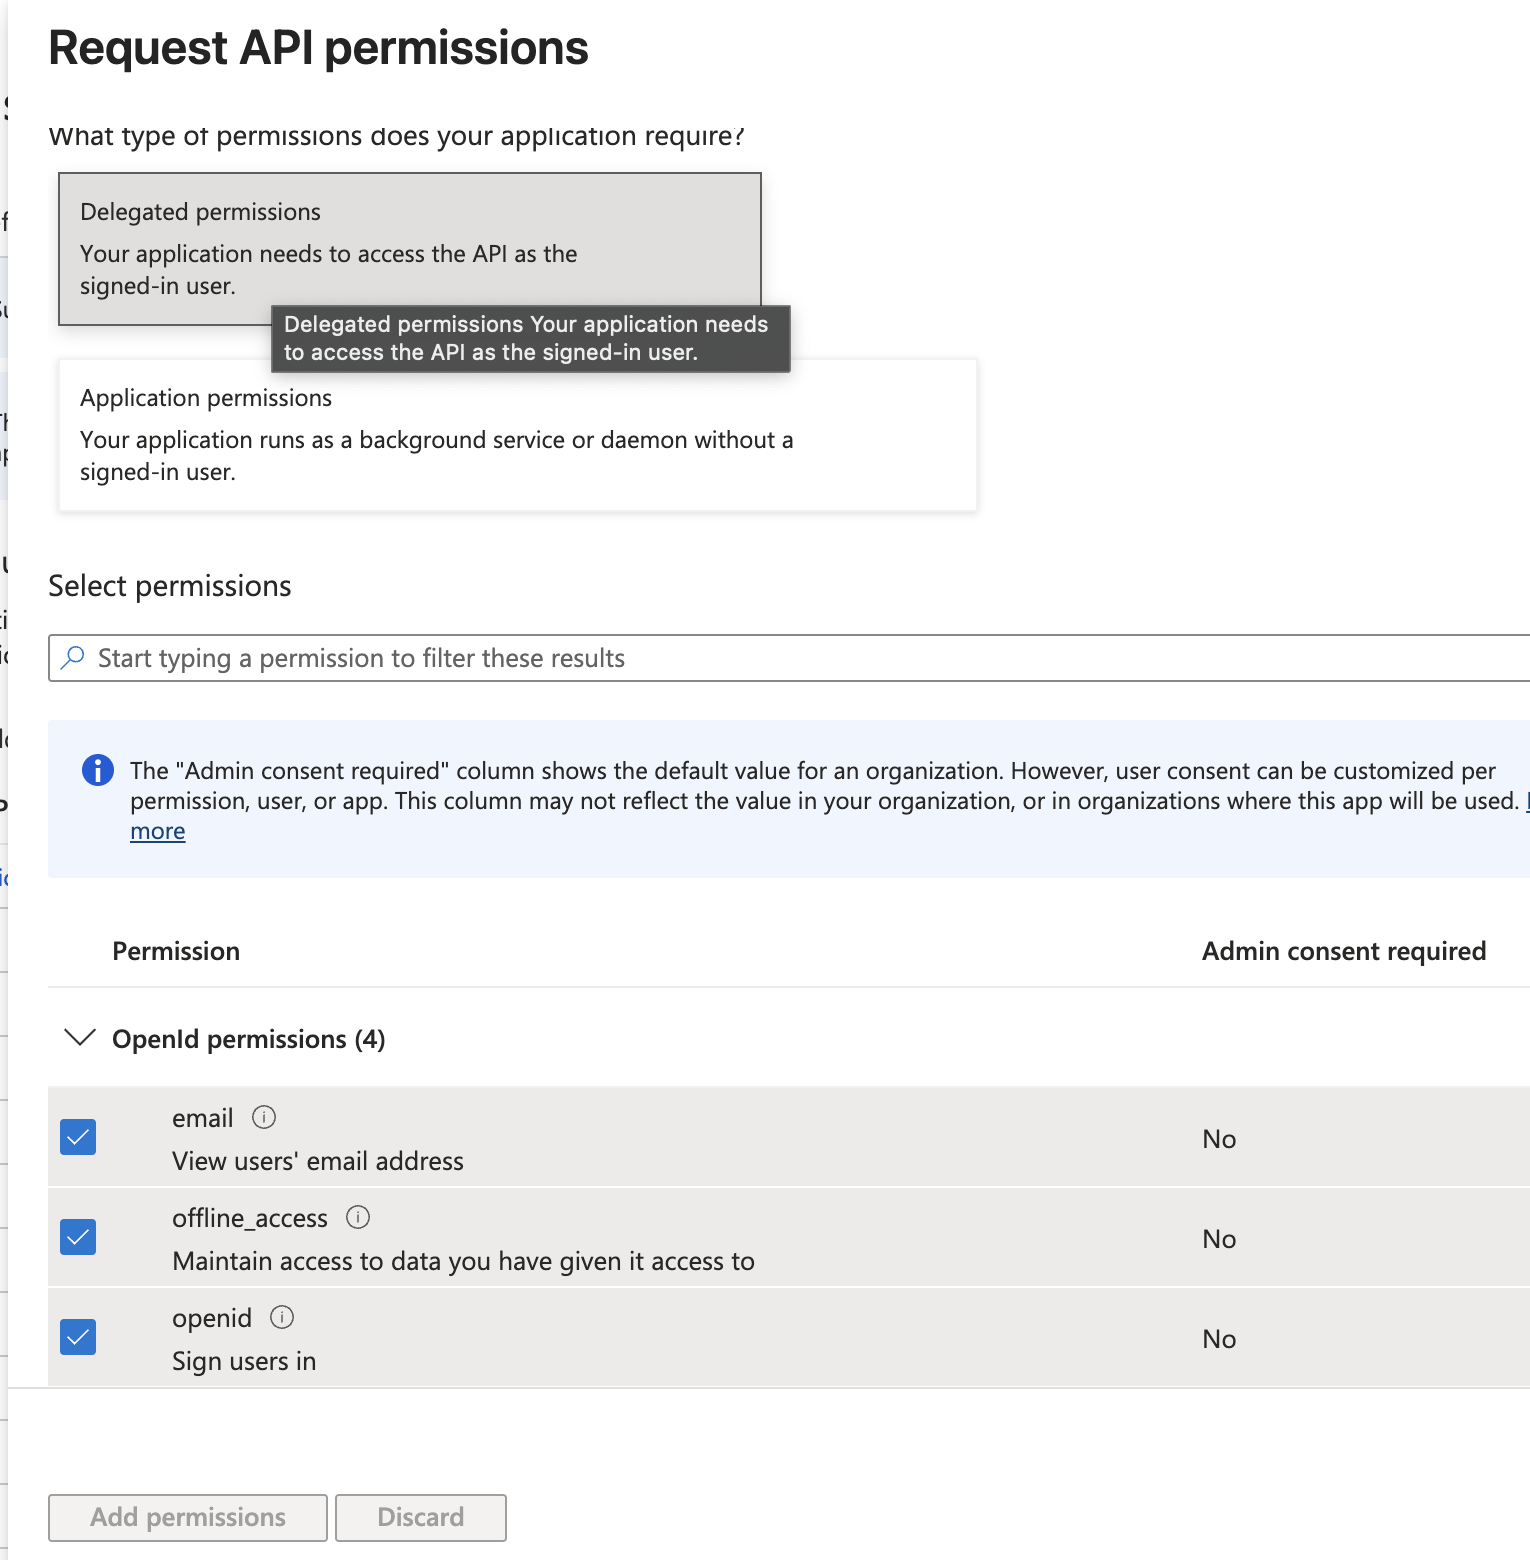
- Select Delegated permissions.
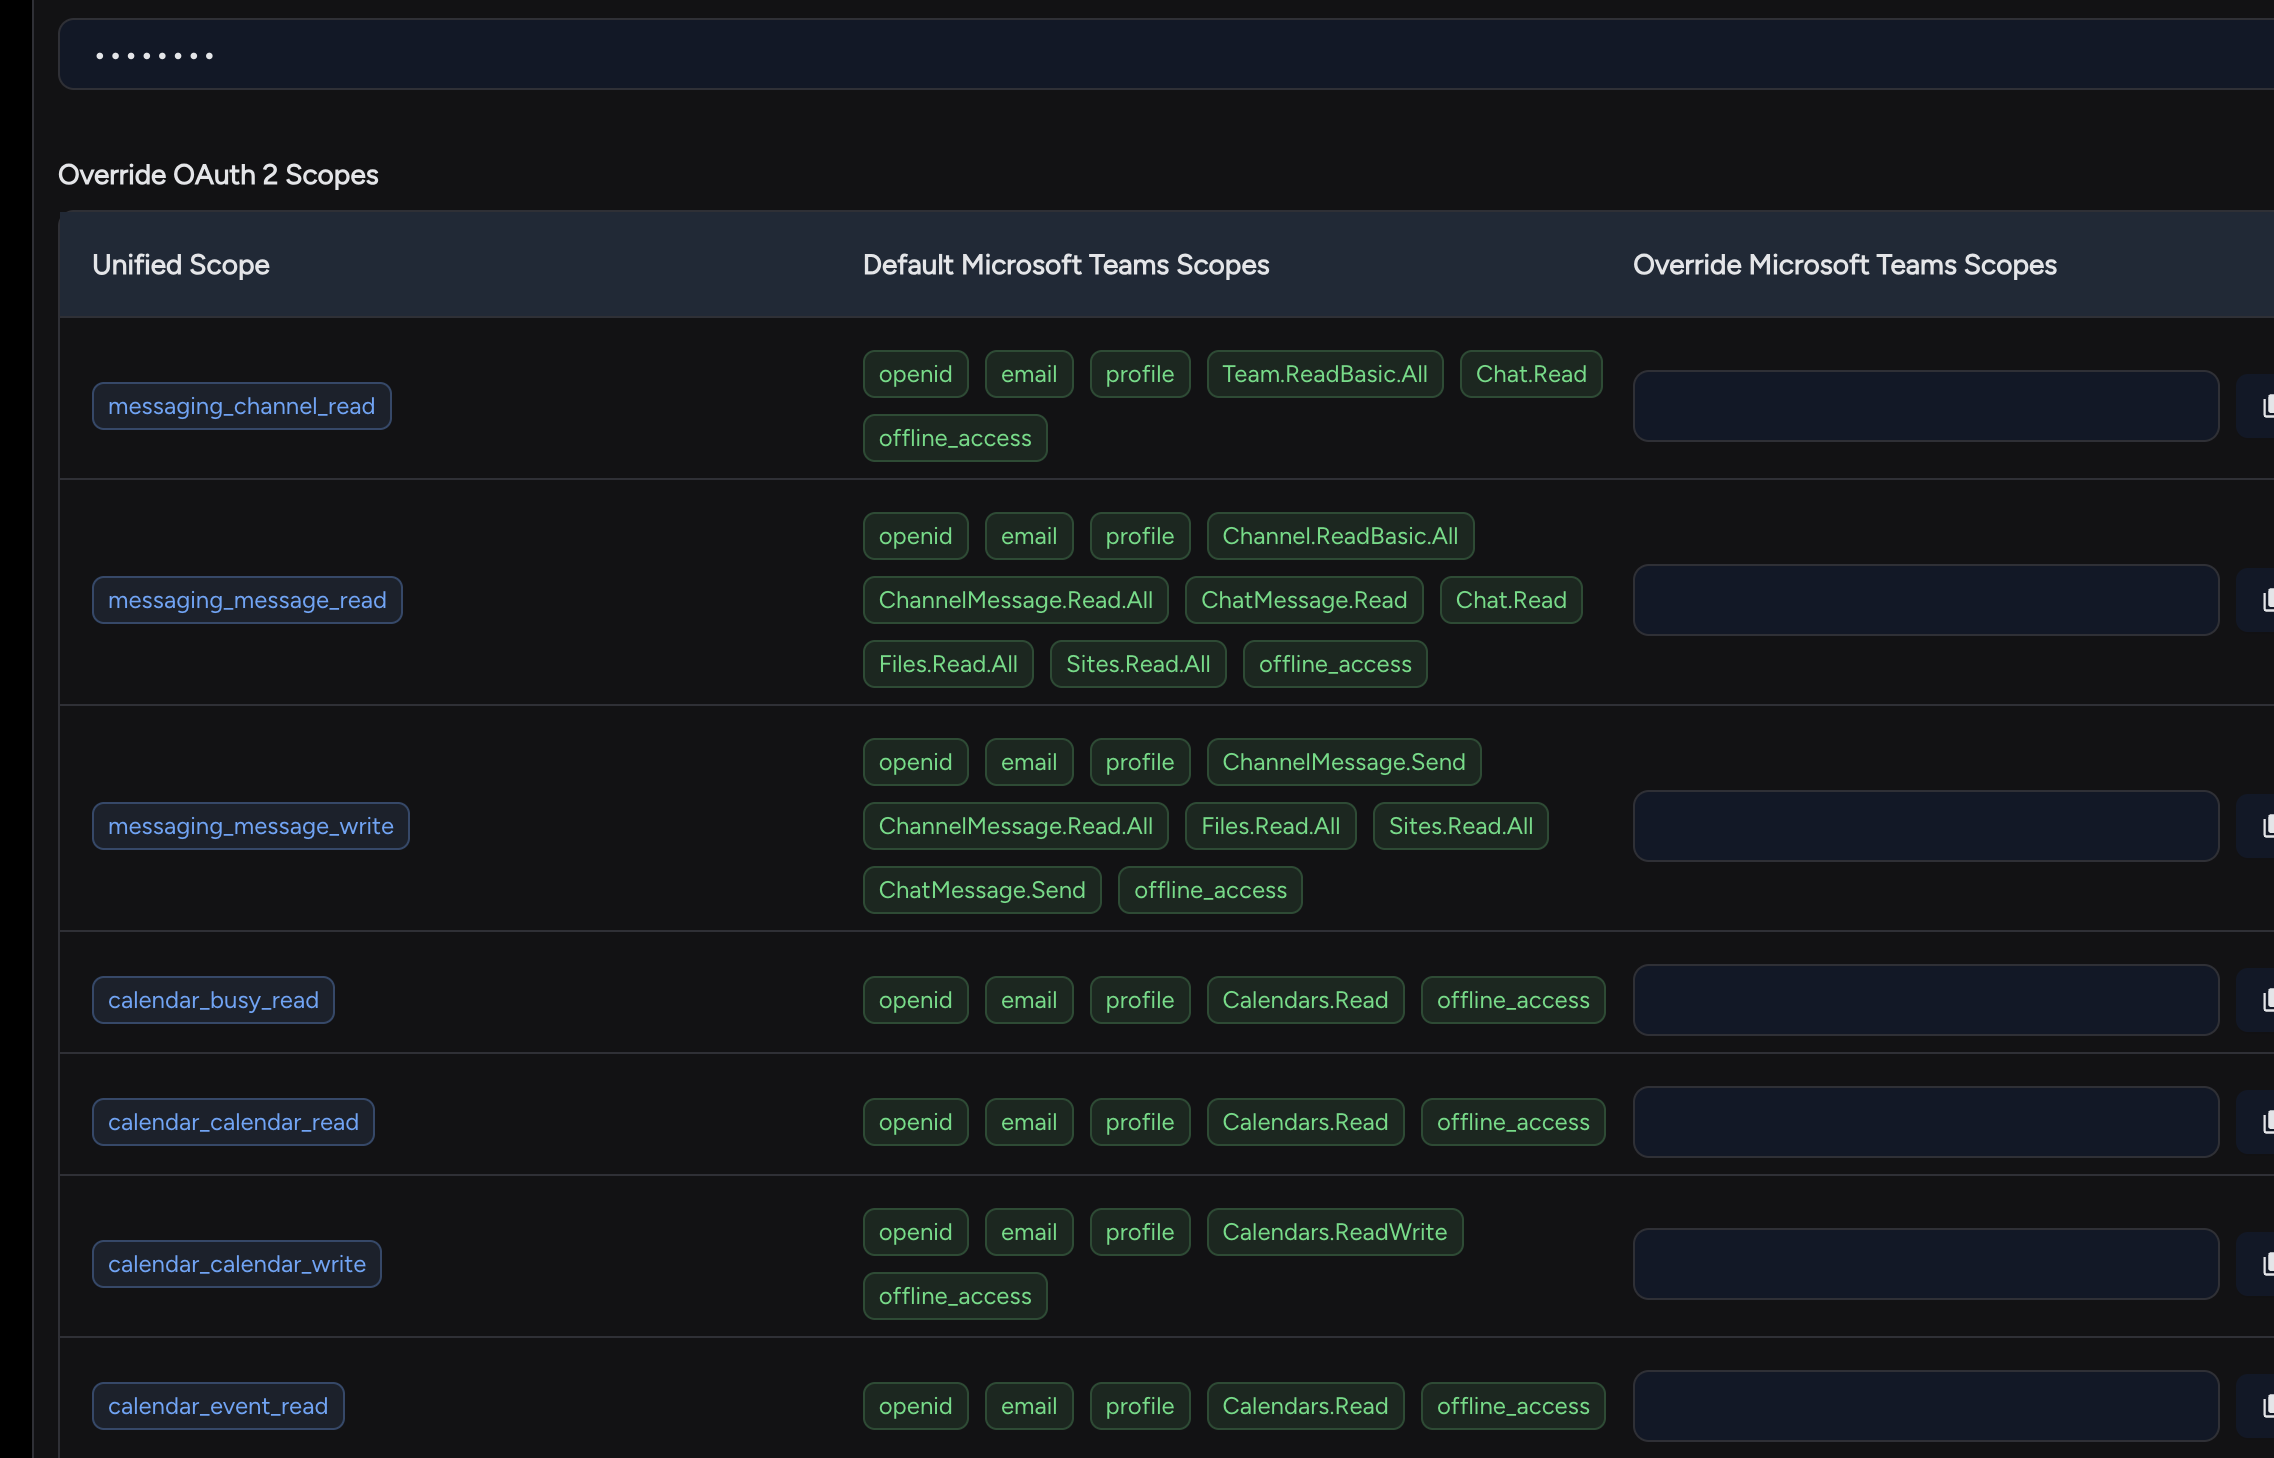
- Search for and select the required delegated permissions.
- Click Add permissions.
Step 3: Configure Application Permissions (Required for Call Records)
If you need access to Call Records, repeat the steps above but select Application permissions instead of Delegated permissions.
Search for and add the following permissions:
CallRecords.Read.All
OnlineMeetingRecording.Read.All
OnlineMeetingTranscript.Read.All
CallRecordings.Read.All
CallTranscripts.Read.All
After selecting all required permissions, click Add permissions.
Step 4: Create the Connection
After configuring permissions, create your Microsoft Teams connection.
If you have not yet obtained your Client ID and Client Secret, follow this guide:
Enter the following credentials:
- Client ID
- Client Secret
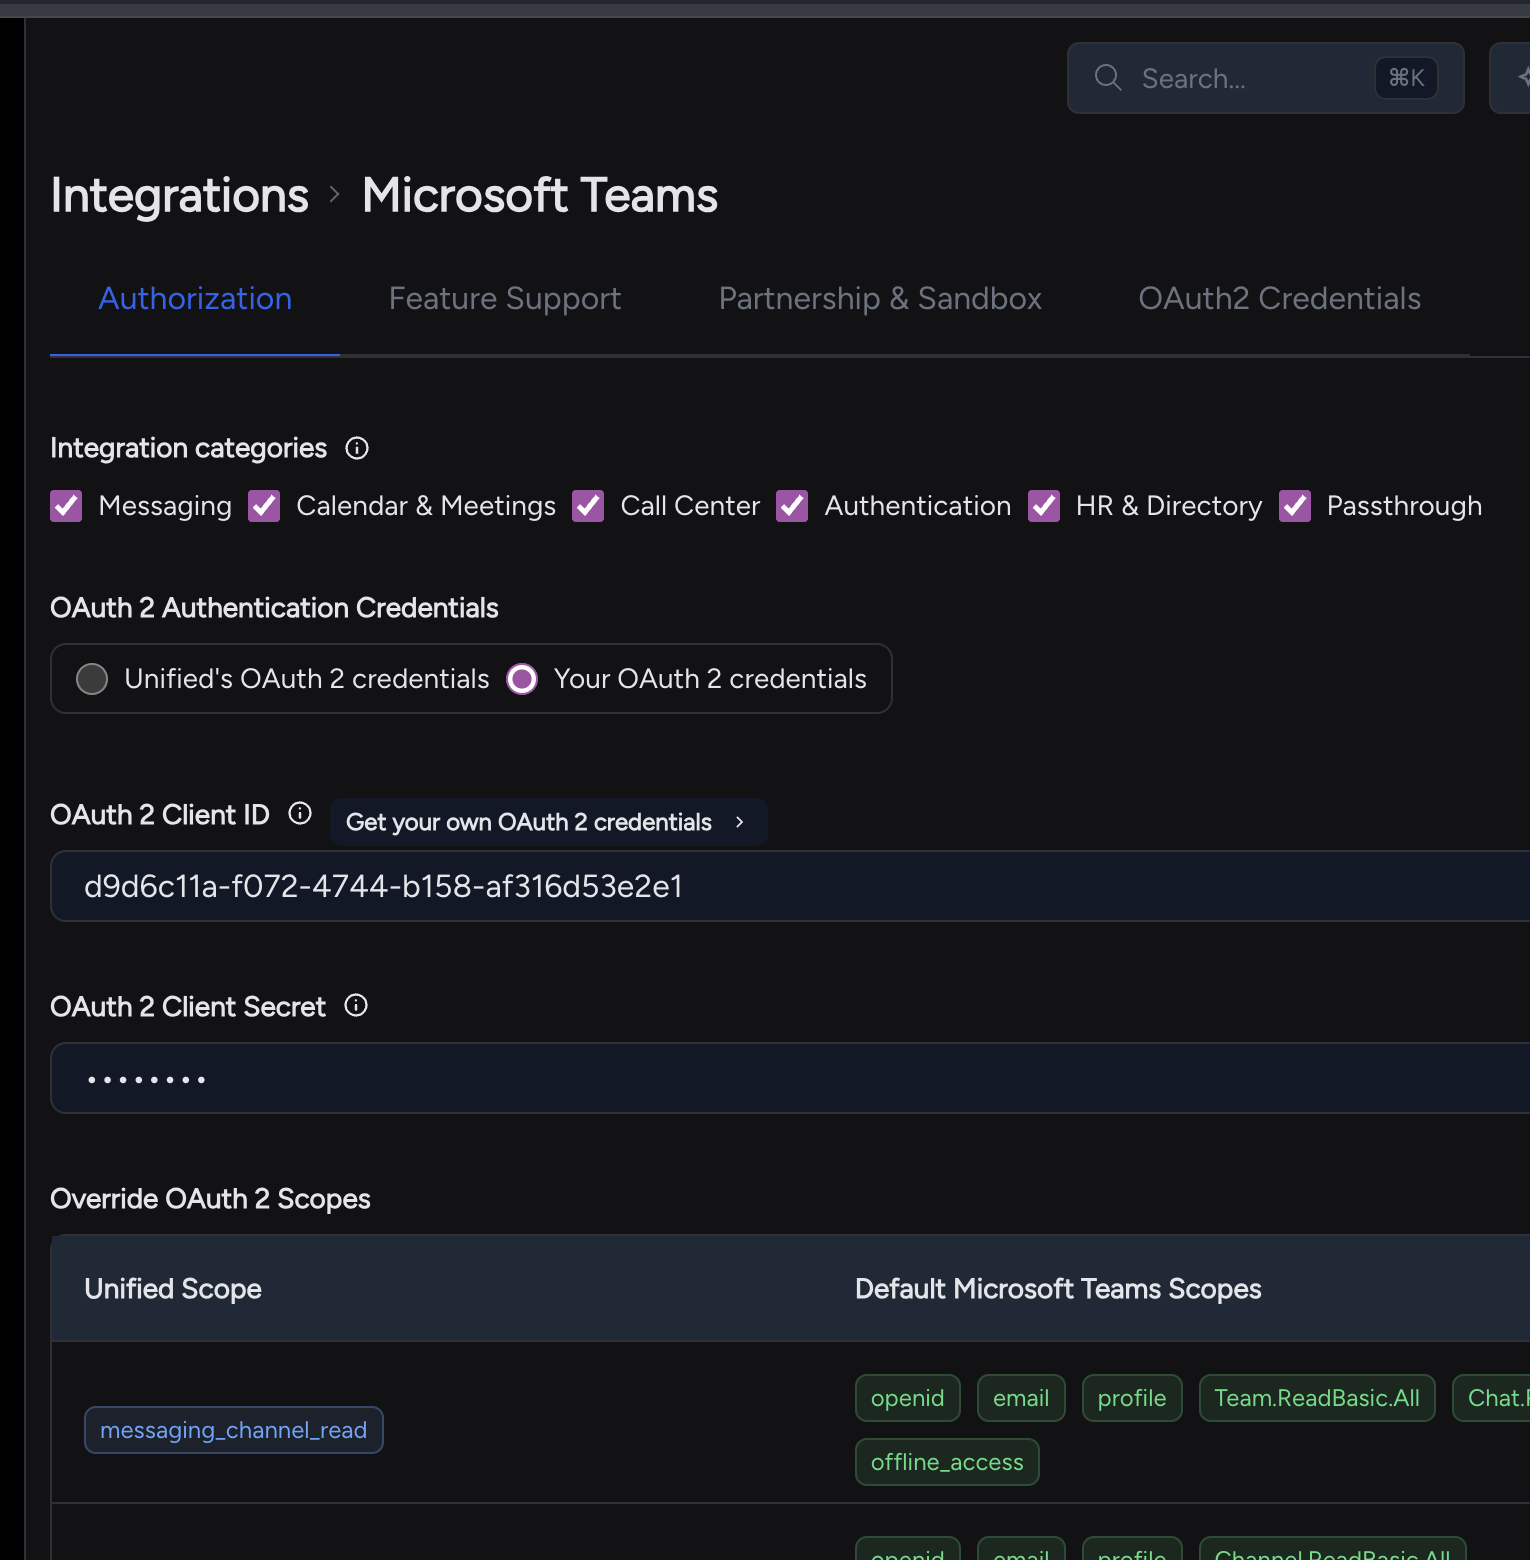
Click Activate.
You're Ready to Go
Your Microsoft Teams integration is now configured and ready to use.
If you have any questions or encounter any issues during setup, please contact our support team.