How to get your Microsoft Active Directory / Entra ID Client ID, Client Secret and Tenant ID: Step-by-step guide
April 24, 2023
Developers connecting to Microsoft Active Directory / Entra ID will need an Client ID, Client Secret and Tenant ID for authentication.
Here's how to generate, configure, and copy your Microsoft Active Directory / Entra ID Client ID, Client Secret and Tenant ID so you can use it in your integration or share steps with your customers.
Microsoft AD/Entra ID Client ID and Secret Authentication
Step: 1 Register an application
Registering your application establishes a trust relationship between the 3rd-party application and the Microsoft identity platform. The trust is unidirectional: the application trusts the Microsoft identity platform, and not the other way around. Once created, the application object can't be moved between different tenants.
- Sign in to the Microsoft Entra admin center.
- If you have access to multiple tenants, use the Settings icon in the top menu to switch to the tenant in which you want to register the application from the Directories + subscriptions menu.
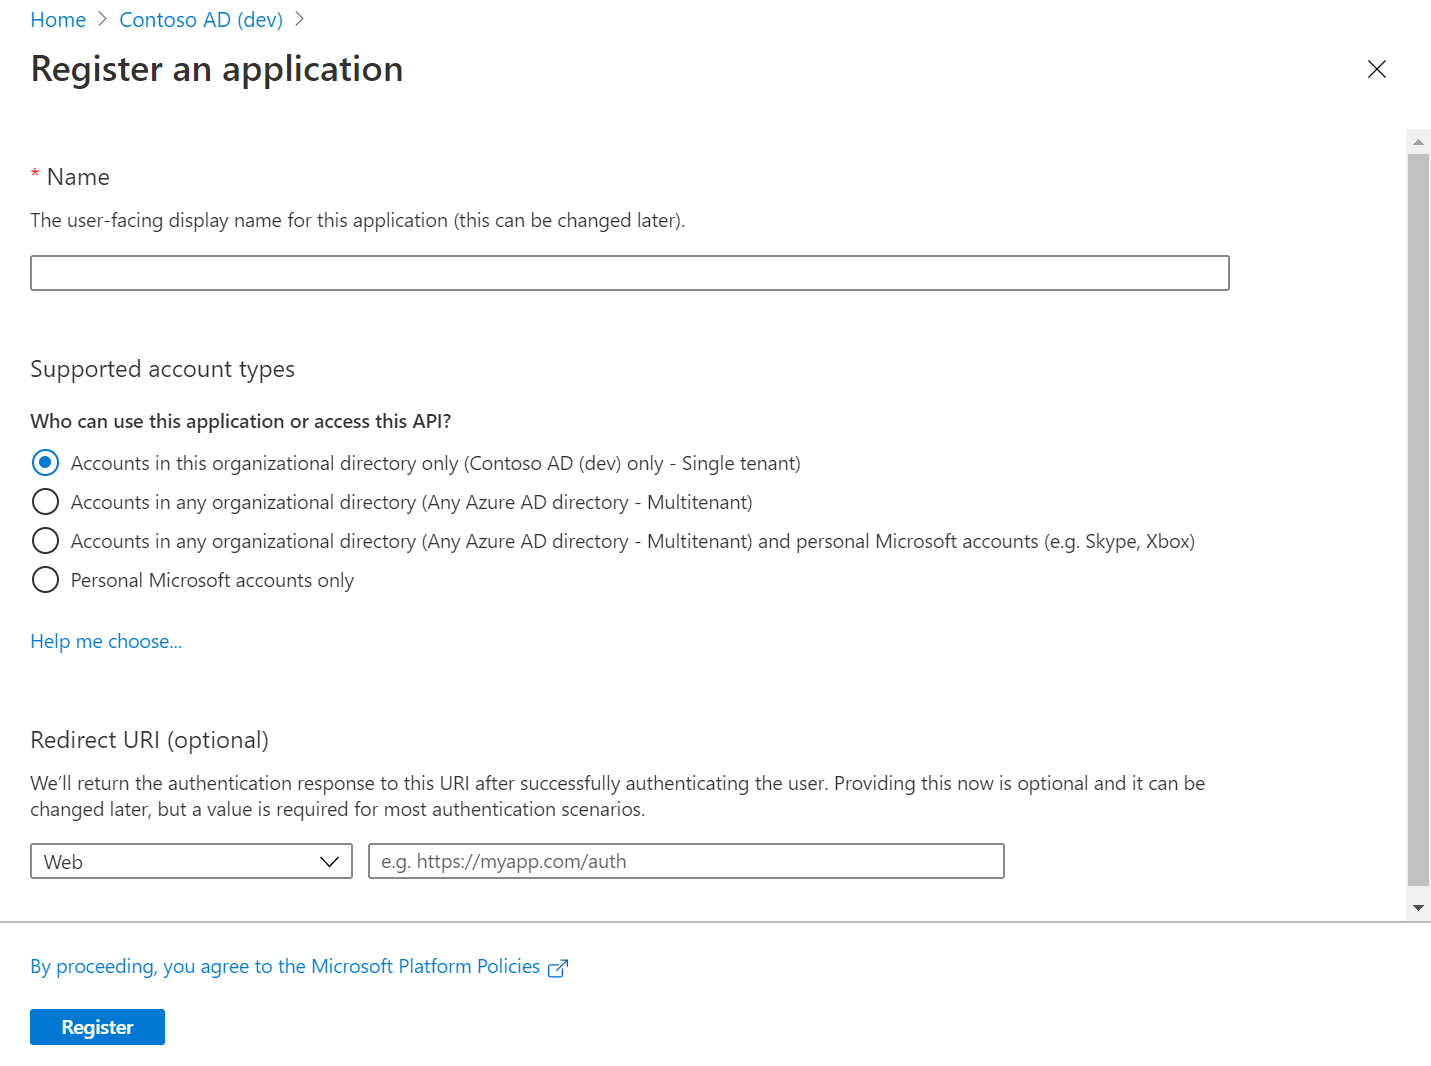
- Browse to Identity > Applications > App registrations and select New registration.
- Enter a display Name for the application.
- Specify who can use the application in the Supported account types section
- Select Register to complete the initial app registration.
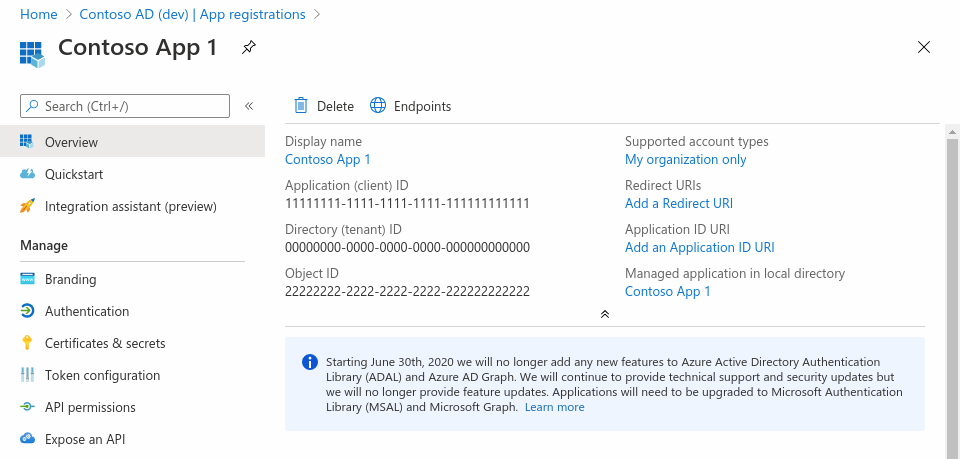
When registration finishes, the Microsoft Entra admin center displays the app registration's Overview pane. On this page, the app was assigned values for:
- Application (client) ID which uniquely identifies your application in the Microsoft cloud ecosystem, across all tenants.
- Object ID which uniquely identifies your application in your tenant.
Step 2: Generate Client Secret
Credentials are used by confidential client applications that access a web API. Examples of confidential clients are web apps, other web APIs, or service-type and daemon-type applications. Credentials allow your application to authenticate as itself, requiring no interaction from a user at runtime.
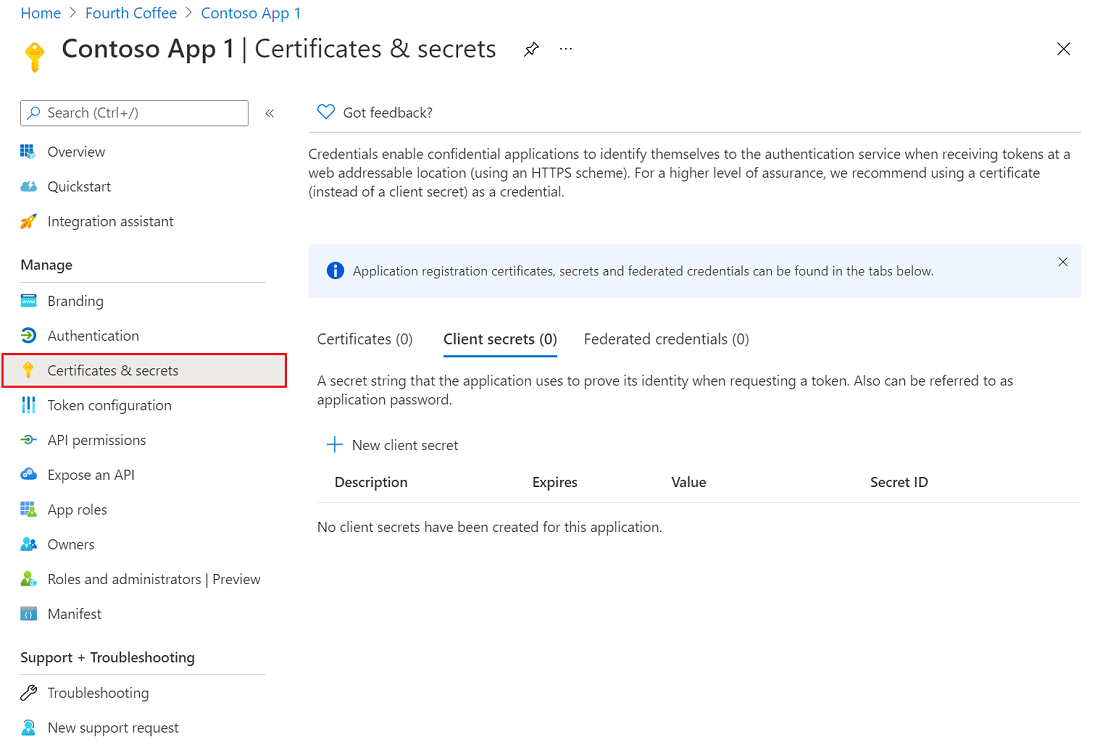
For this case, go to the Client Secrets tab, to generate a new Client Secret. The generated secret's value will be the one that will be used in Unified's authentication process.
Step 3: Configure permissions for Microsoft Graph
Microsoft Graph exposes application permissions for apps that call Microsoft Graph with their own identity. These permissions always require administrator consent.
Preconfigure the application permissions the app needs when you register the app. An administrator can consent to these permissions either by using the Microsoft Entra admin center when they install the app in their organization, or you can provide a sign-up experience in the app through which administrators can consent to the permissions you configured. Once Microsoft Entra ID records the administrator consent, the app can request tokens without having to request consent again.
To configure application permissions for the app in the app registrations experience on the Microsoft Entra admin center, follow these steps:
- On the application's API permissions page, choose Add a permission.
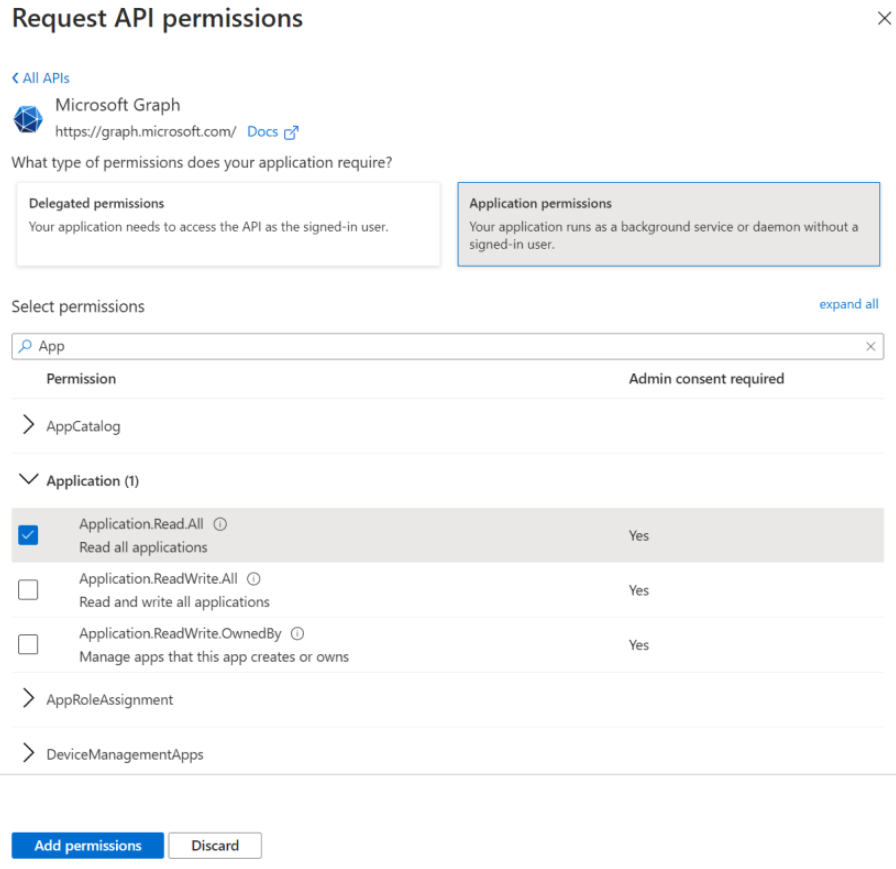
- Select Microsoft Graph > select Application permissions.
- In the Select Permissions dialog, choose the permissions to configure to the app.
The following screenshot shows the Select Permissions dialog box for Microsoft Graph application permissions.
Step 4: Grant tenant-wide admin consent in Enterprise apps pane
You can grant tenant-wide admin consent through the Enterprise applications pane if the application is already provisioned in your tenant. For example, an app could be provisioned in your tenant if at least one user consents to the application. For more information, see How and why applications are added to Microsoft Entra ID.
To grant tenant-wide admin consent to an app listed in Enterprise applications pane:
- Sign in to the Microsoft Entra admin center as at least a Cloud Application Administrator.
- Browse to Entra ID > Enterprise apps > All applications.
- Enter the name of the existing application in the search box, and then select the application from the search results.
- Select Permissions under Security.

- Carefully review the permissions that the application requires. If you agree with the permissions the application requires, select Grant admin consent.
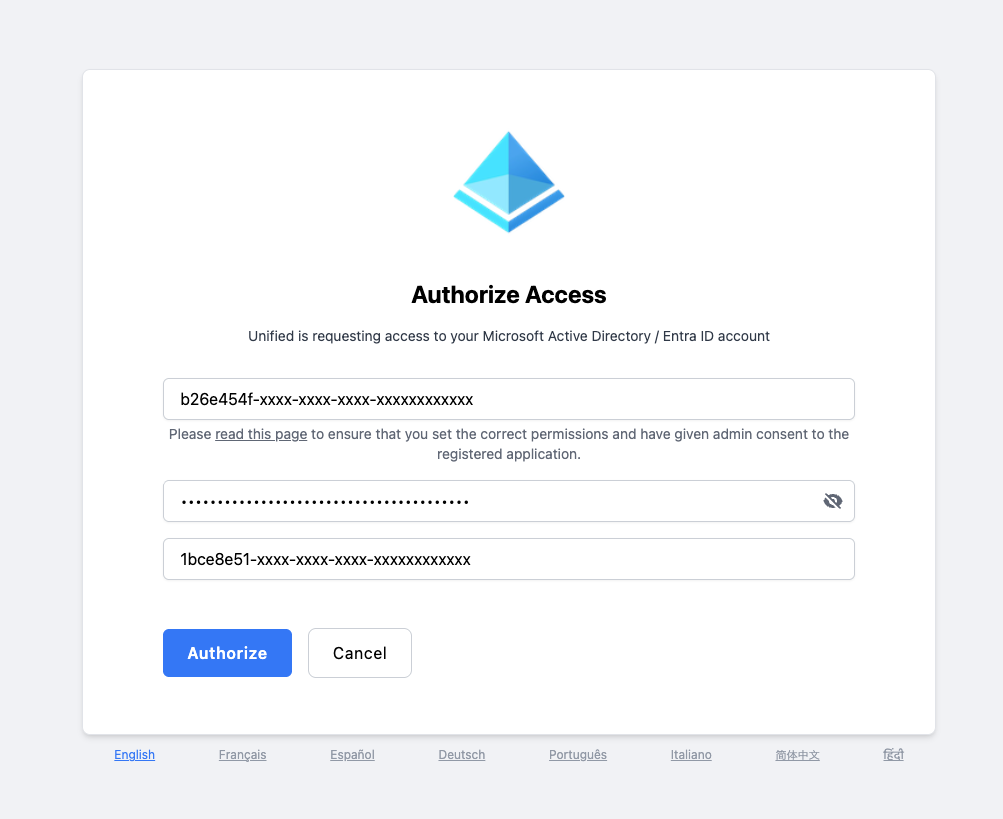
Step 5: Setup Authentication in Unified
Setup the Authentication credentials in Unified using the client ID, and generated secret, along with the tenant ID
You've now created your Microsoft Active Directory / Entra ID Client ID, Client Secret and Tenant ID - just one of many if you support multiple vendors. Each one adds new auth flows, schema differences, and ongoing maintenance.
Unified.to removes that overhead with unified objects that work across 475 APIs. Map once, launch everywhere. Your team ships features instead of debugging vendor-specific edge cases.
Book a demo to see how much faster you can launch customer integrations with Unified.to.