How to get your HiBob Service User ID and Service User Token: Step-by-step guide
April 24, 2023
If you're building an integration with HiBob, you'll need an Service User ID and Service User Token from your customer's HiBob account to authenticate requests.
This guide shows you (or your customers) how to generate one from HiBob's account settings.
Step 1: Create a service user
Service Users are created and managed in the Service Users section in Bob.
- If you have direct access to Bob: Go to the Service Users configuration page to create a new user and copy the ID and token. See Manage service users.
- If you don't have direct access to Bob: Ask a Bob Admin to generate the credentials for you.
You'll need this ID and token to authenticate your API requests.
Step 2: Creating a permission group
By default, service users have no access permissions.
To assign them access:
- Create a dedicated Permission Group.
- Add the Service User to this group.
This group should include only the permissions required for the API operations the service user will perform.
- If you have access to Bob: Create a service user permission group.
- If not: Ask a Bob Admin to create one and assign the user to it.
Step 3: Set permissions
A new permission group does not have any permissions enabled by default.
Notes:
- **Ask Bob Admin** to help determine which permissions are required for this service user. To learn more, see [Manage service users](https://help.hibob.com/hc/en-us/articles/27875098648465).
- **Default employee data permissions**: To read basic employee data via the People search API, assign the Default Employee Fields permissions. This includes access to the "root," "about," "employment," and "work" categories. To learn more, see [Permissions for Default Employee Fields in People Search API](https://help.hibob.com/hc/en-us/articles/27875098648465#h_01JB9DYK9SZEJ7MF4DA7RHJE03).
Permissions are grouped into:
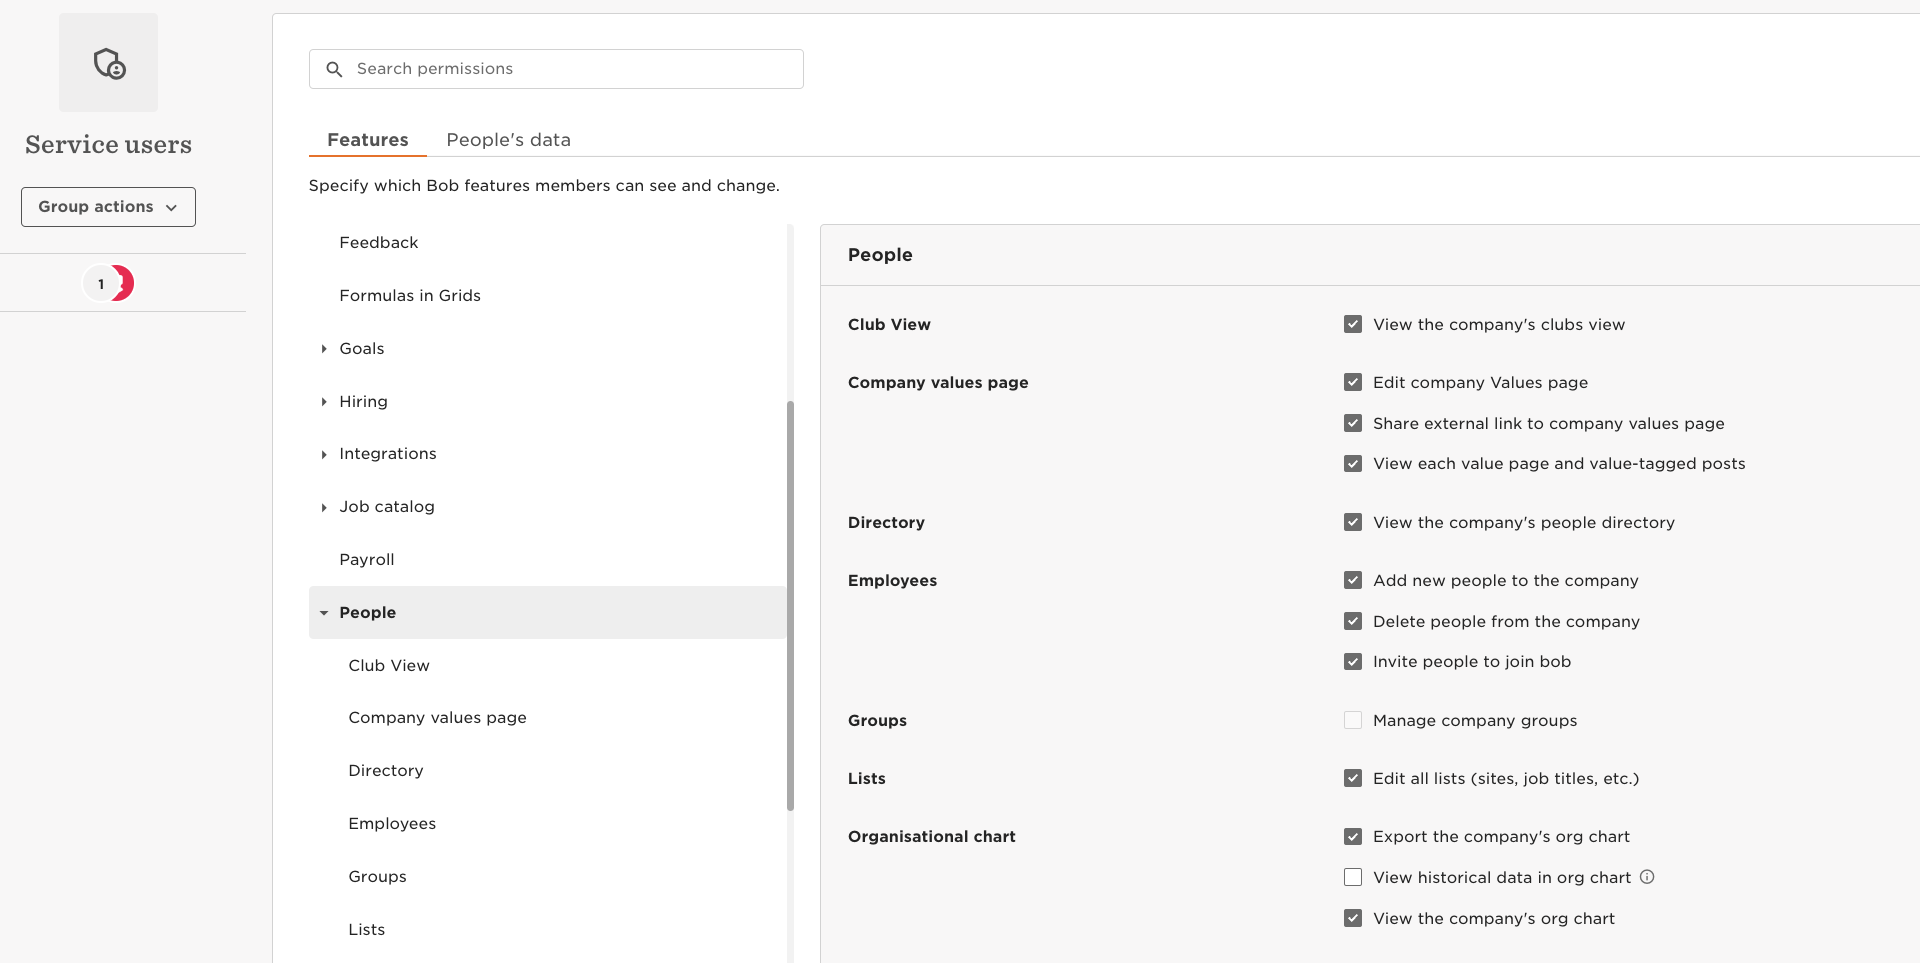
3.1 Features
Grant access to Bob features you need to access via the API you plan to use with this service user. For example, if you want to access reports, you may need to activate some options in Features > Reports.
- From the top right, click Edit.
- Select the area of Bob you'd like to manage.
- Check or uncheck the permissions this group should have.
3.2 People's data
Grant access to people's data in each area of Bob for the API you plan to use with this service user.
- From the top right, click Edit.
- Select the area of Bob you'd like to manage.
- Mark the checkbox(es) to enable or disable the permissions you'd like to give the service users in this group.
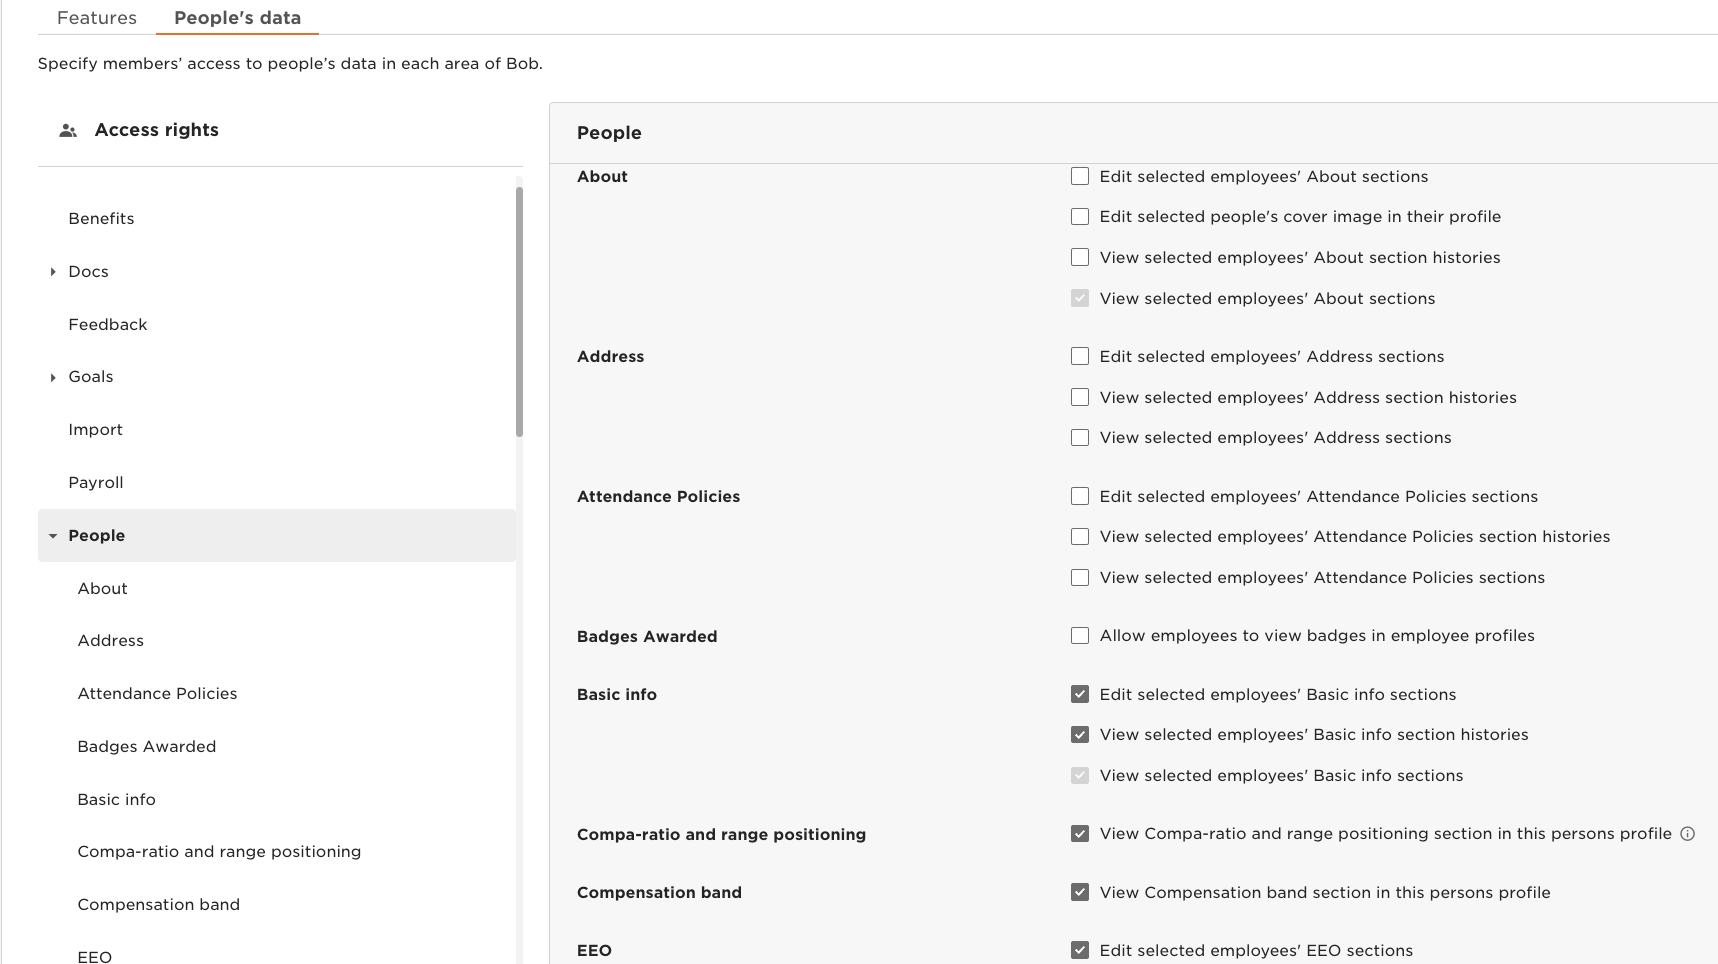
'View', 'edit' and 'view history'
To access Employee data via the API you need to grant basic view access to each category:
- **View all employees' [Category name] sections**
If you want to access history data (such as all the entries in the Lifecycle or Work table), you also need to grant the history access:
- **View all employees' [Category name] section histories**.
If you want to update data or access sensitive data that requires an extra layer of permissions, you need to grant the edit permission:
- **Edit all employees' [Category name] sections**
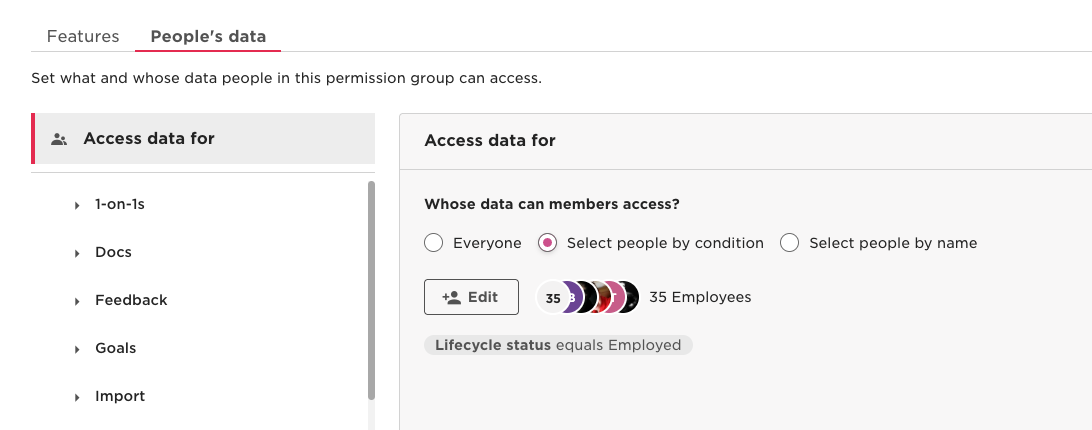
3.3 Access rights
Grant access to the people whose data you want to access via the API you plan to use with this service user.
- From the People's data tab, click Access data for.
- Select whose data these permissions apply to (by default, the access rights are set to all employees using the Lifecycle status equals Any condition). Options are:
- Everyone: all employees marked as Employed in the system.
Note: By default, the service user's permission group grants access to all active employees. To access inactive employees you need to use select by condition and remove the condition: Lifecycle status equals Employed from the permission group's Access data for settings.
- Select people by condition: click Edit, select conditions from the dropdown menu, then click Apply.
- Select people by name: click Edit, select specific employees, then click Apply.
- Everyone: all employees marked as Employed in the system.
To learn more, see Create a service user permission group.
You've now created your HiBob Service User ID and Service User Token - just one of many if you support multiple vendors. Each one adds new auth flows, schema differences, and ongoing maintenance.
Unified.to removes that overhead with unified objects that work across 475 APIs. Map once, launch everywhere. Your team ships features instead of debugging vendor-specific edge cases.
Book a demo to see how much faster you can launch customer integrations with Unified.to.