How to create Connection with Hubspot
December 17, 2025
Hubspot provides Free Developer Sandbox Account. You can create that from following link .
- Create an account.

- Provide name of the account
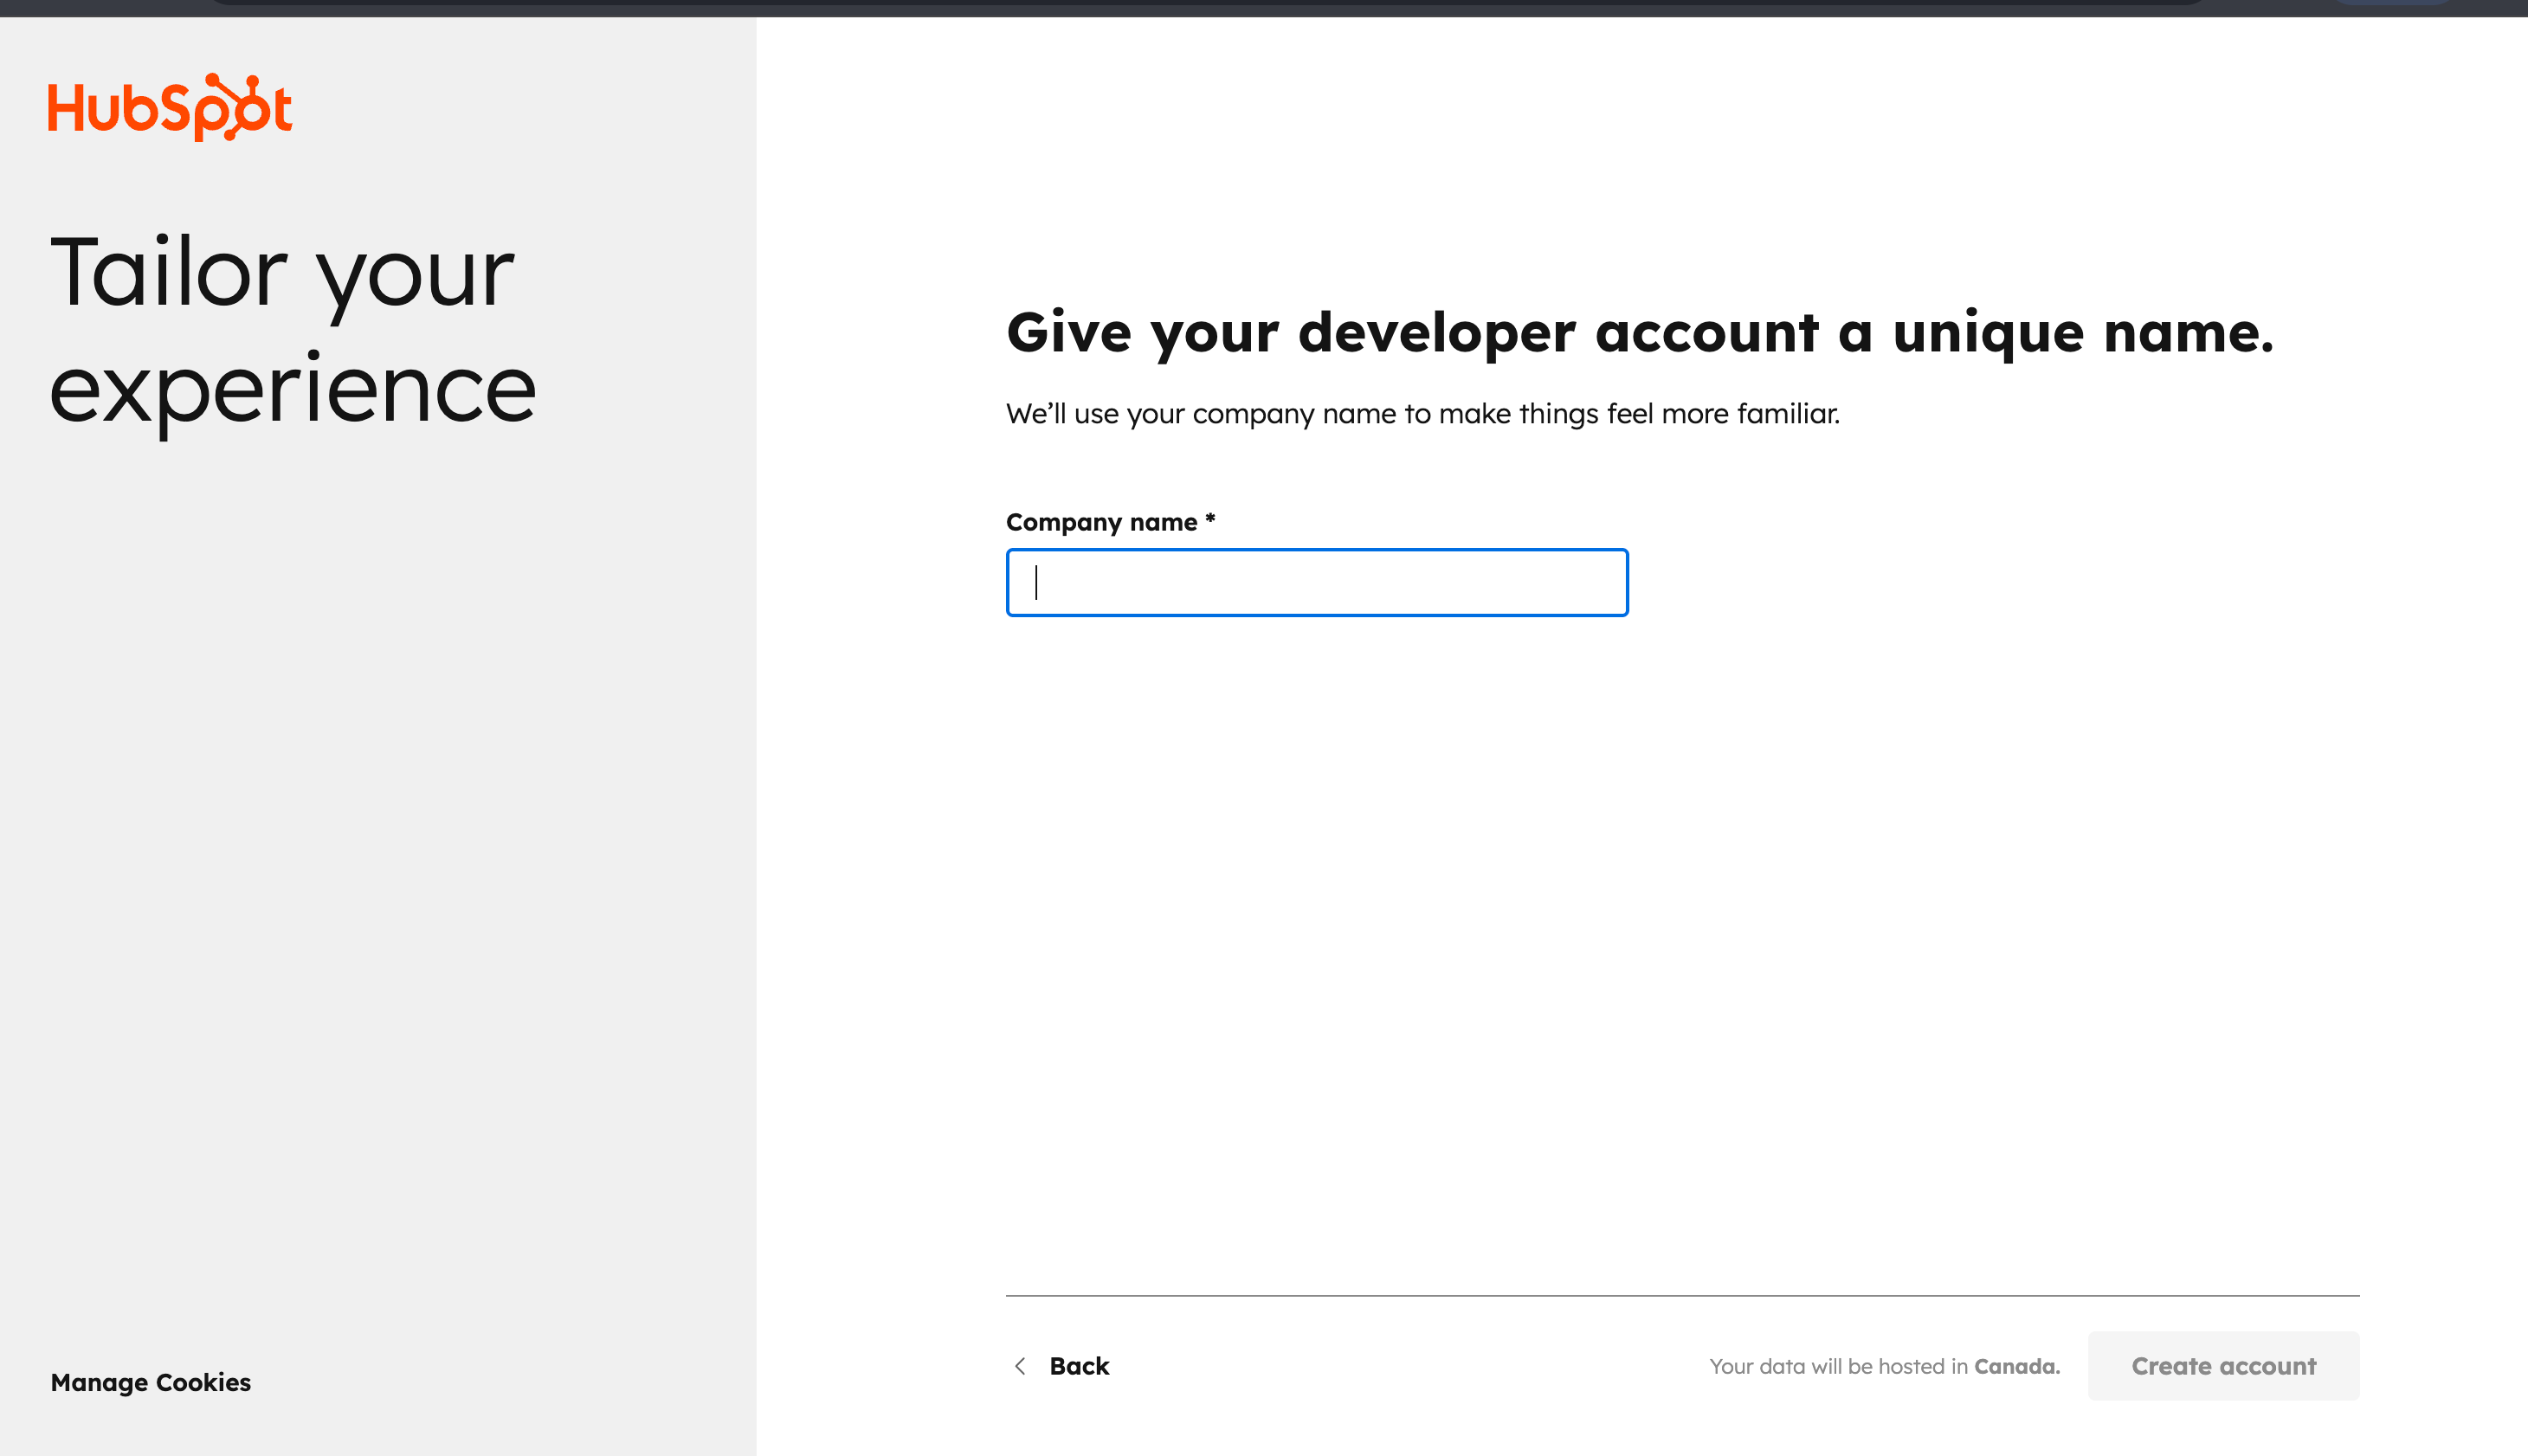
After account is created it will redirect you to following page:-

- Goto Development page from the size menu
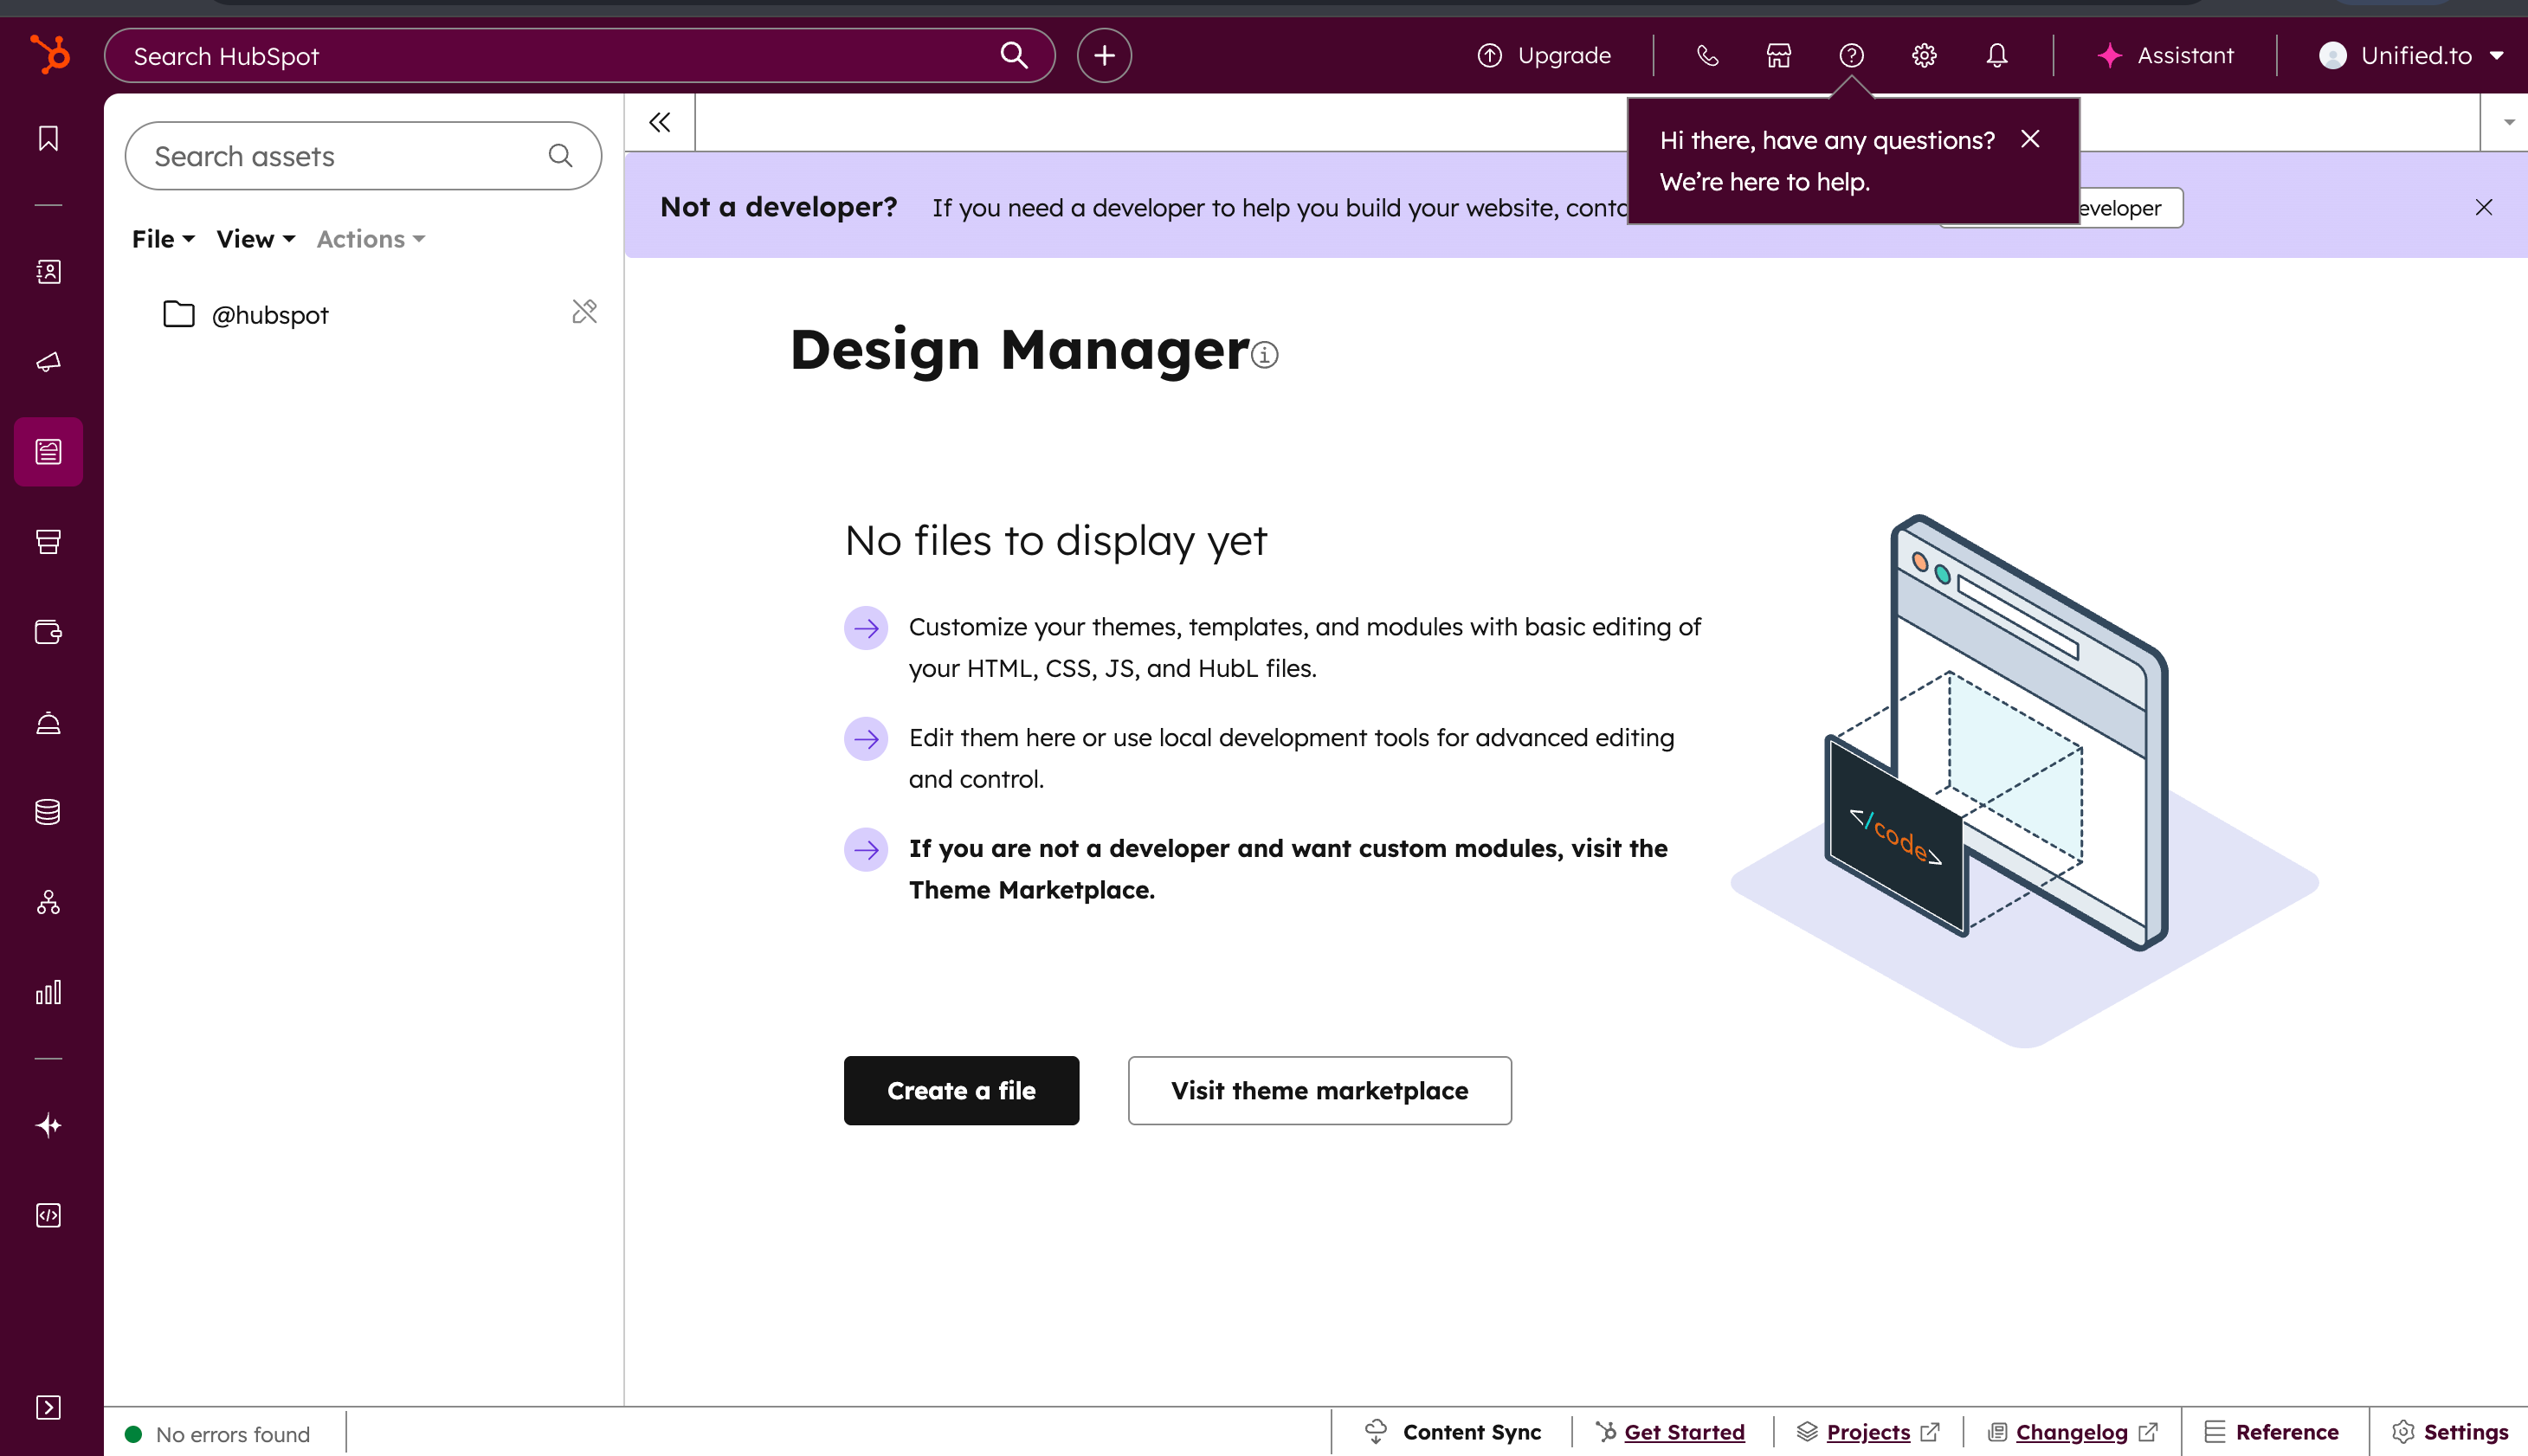
- Create a project in IDE and install and install using following command
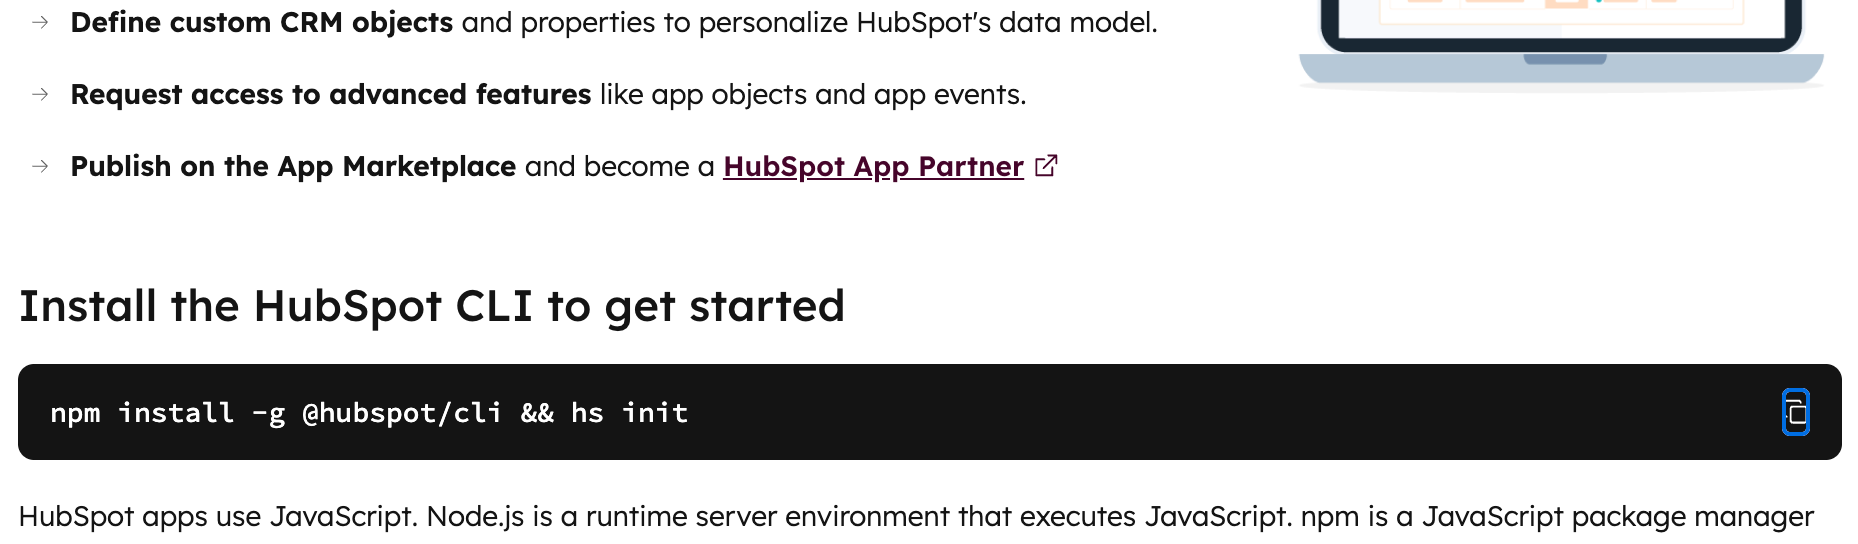
npm install -g @hubspot/cli && hs init
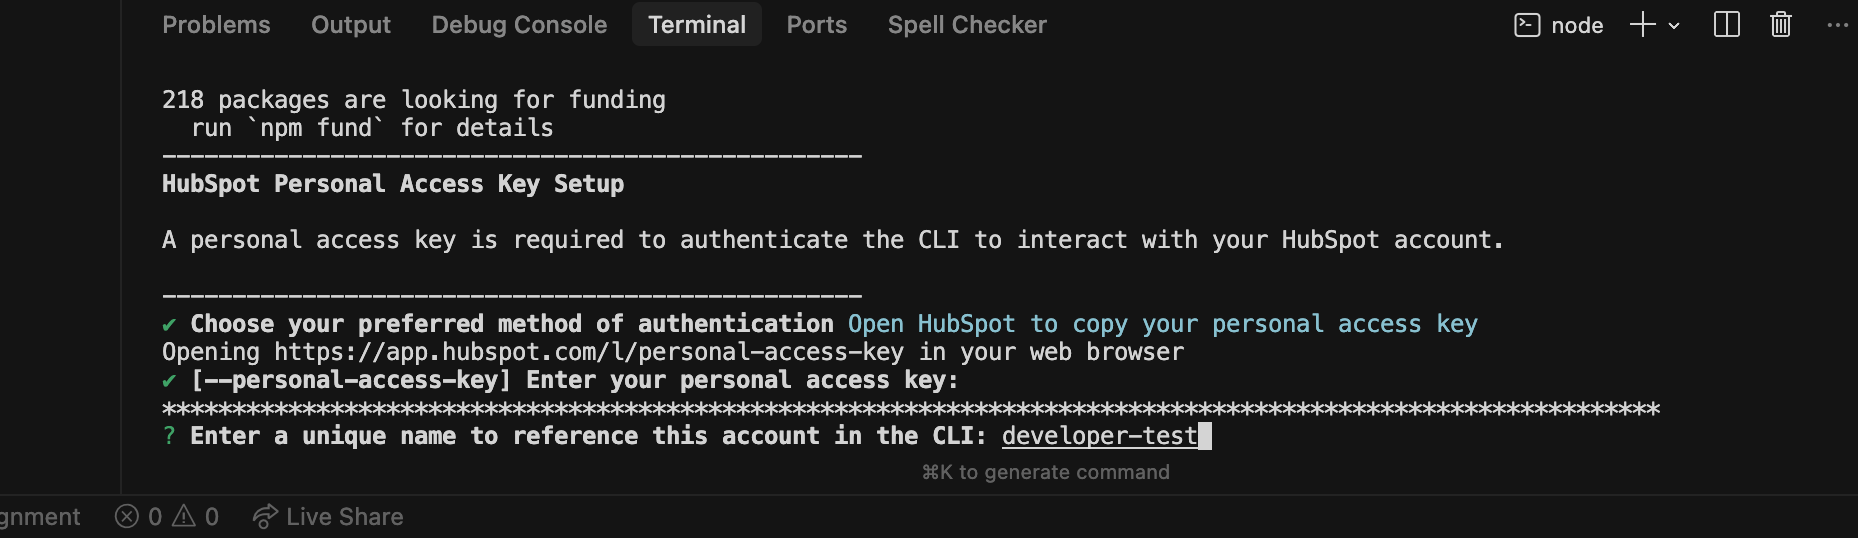
- Create your Personal Access Key. It will be inside the keys menu
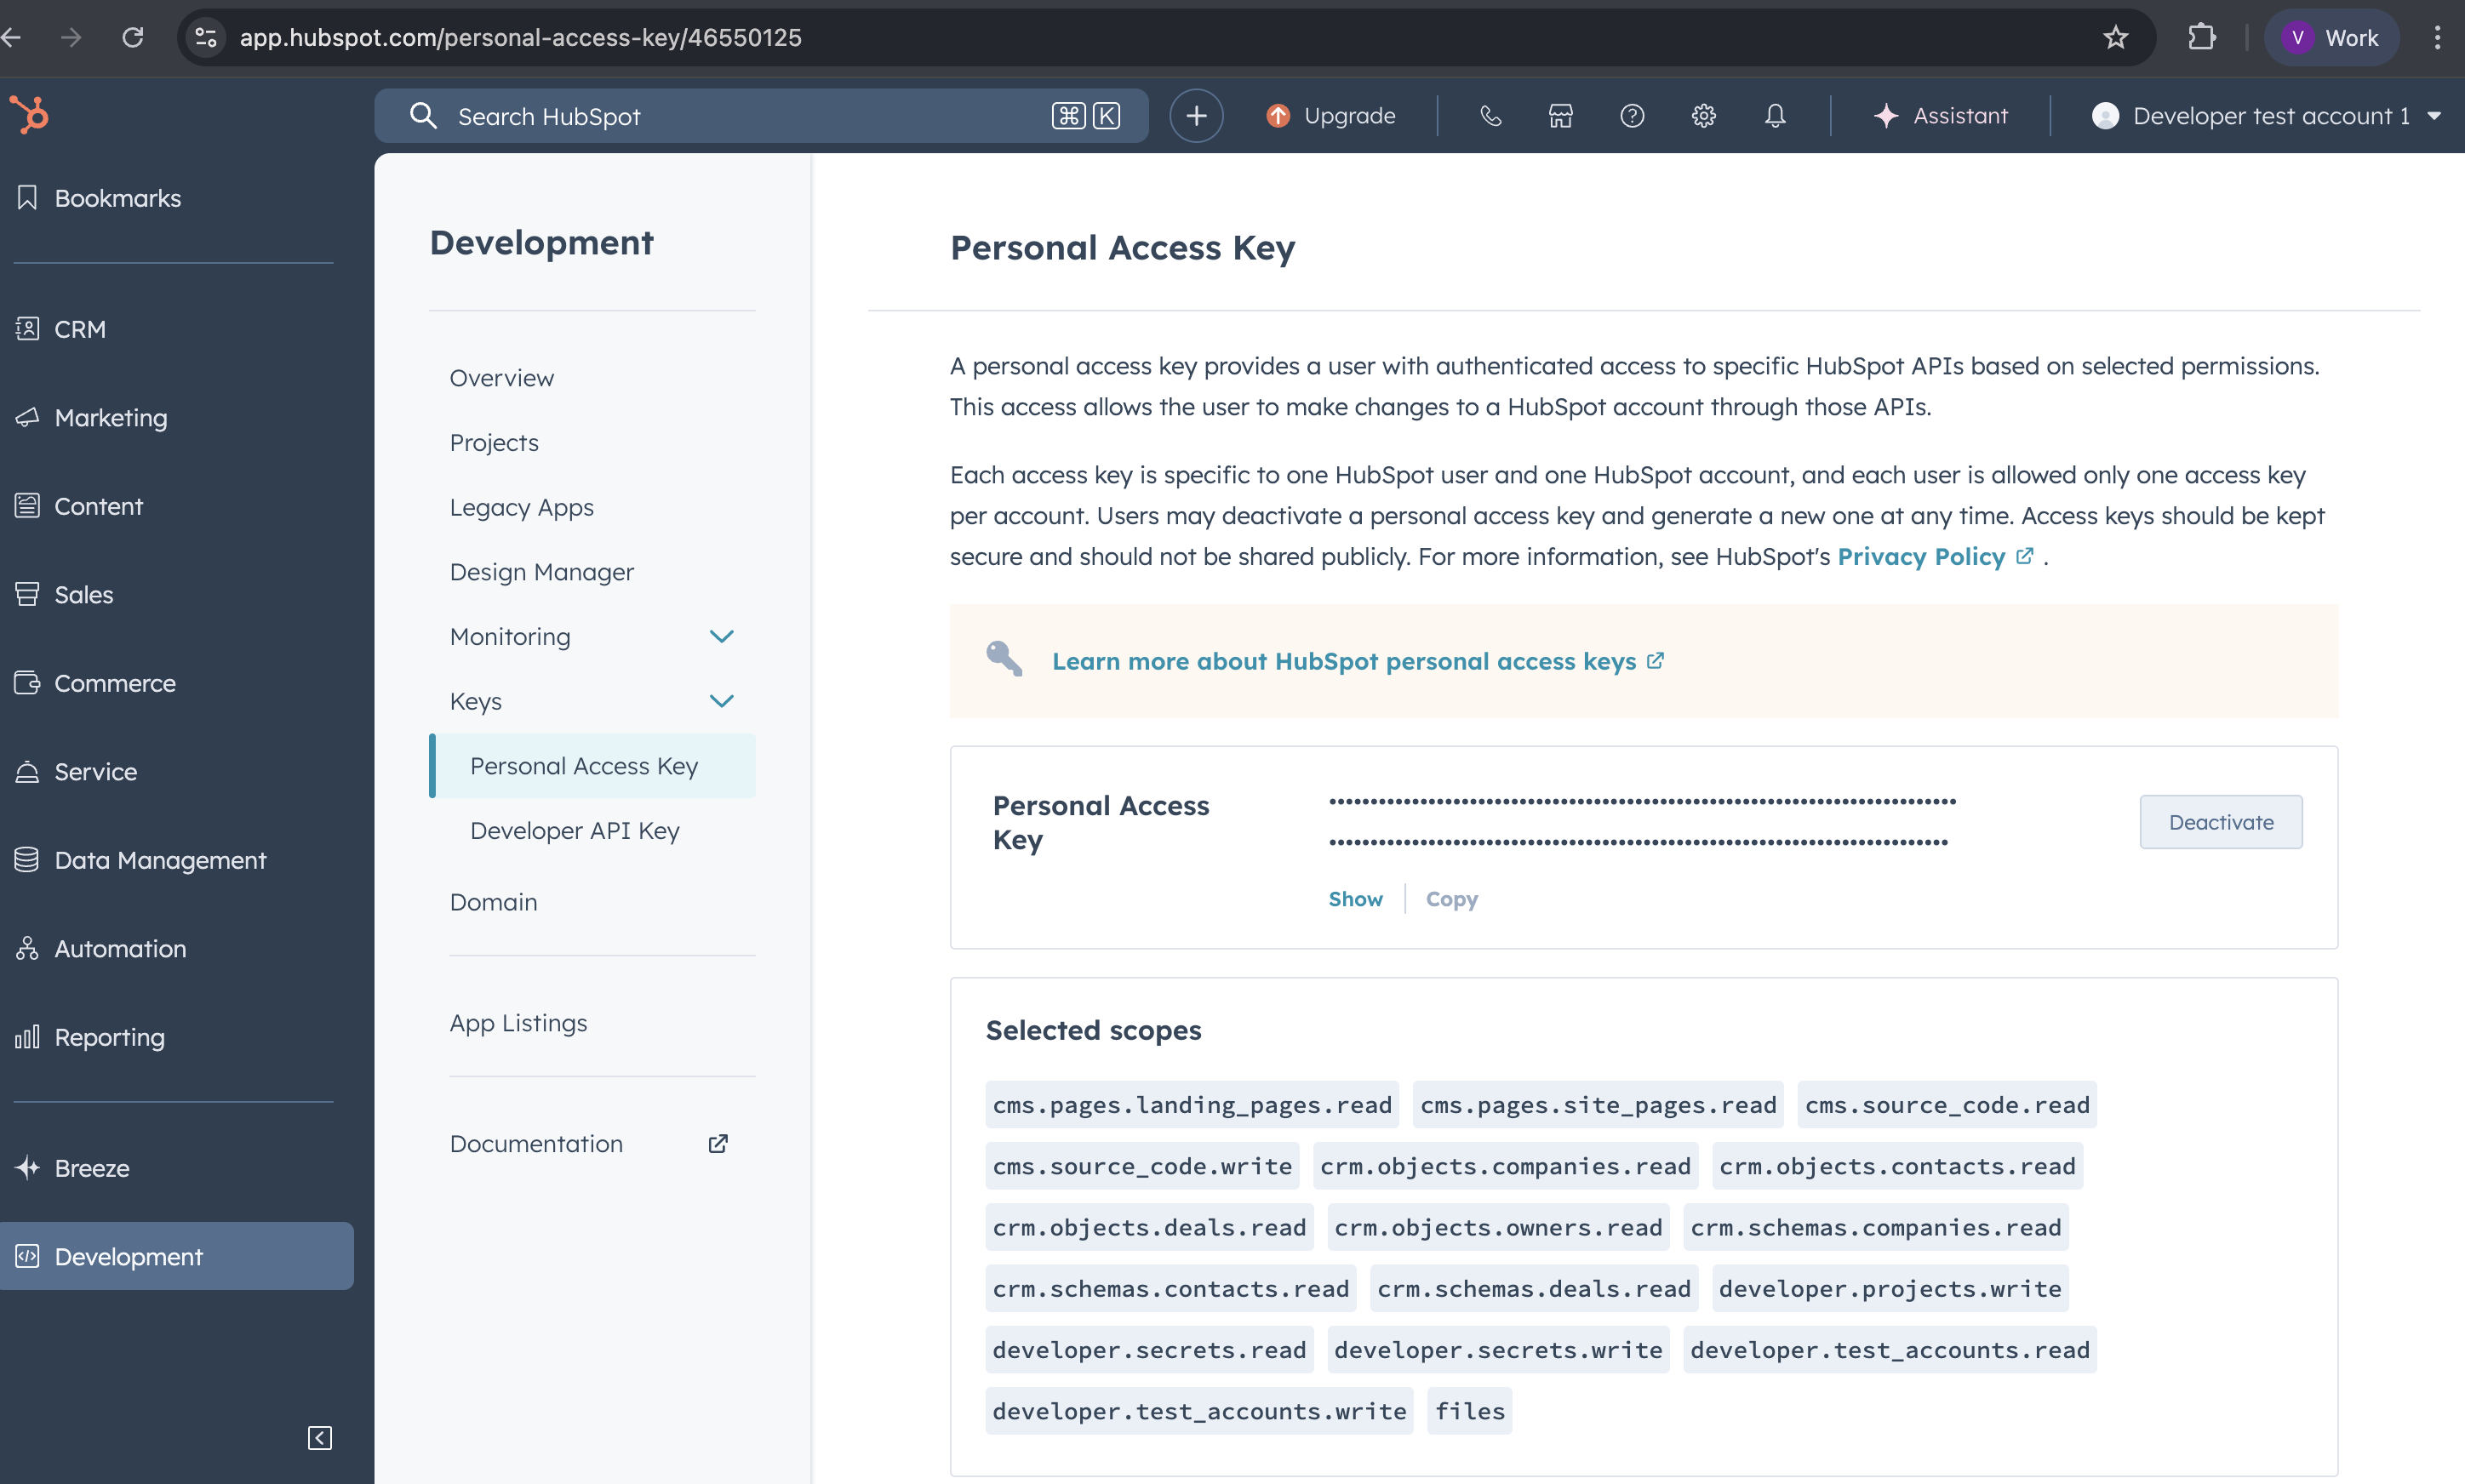
- Paste that key in your terminal when your hubspot application ask for it.
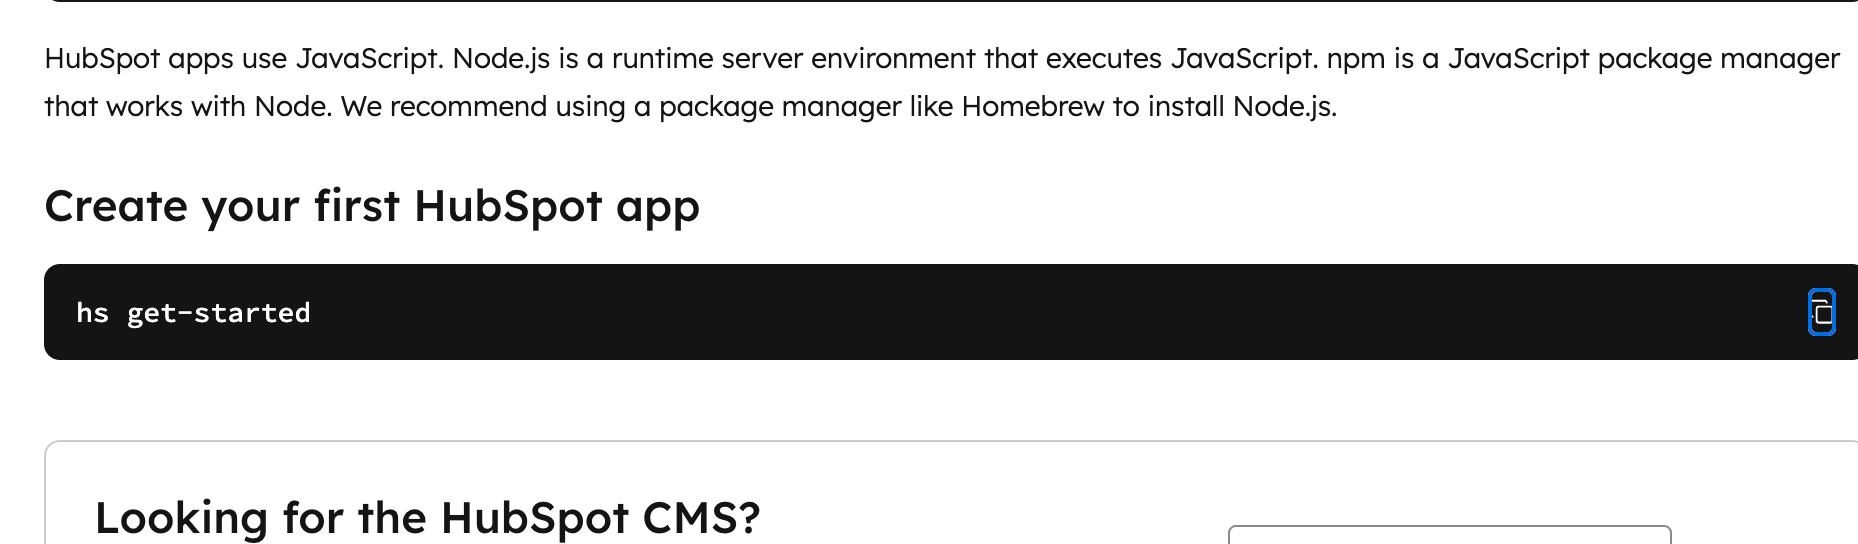
- Now we will create a project. run following command in that same project.
hs get-started
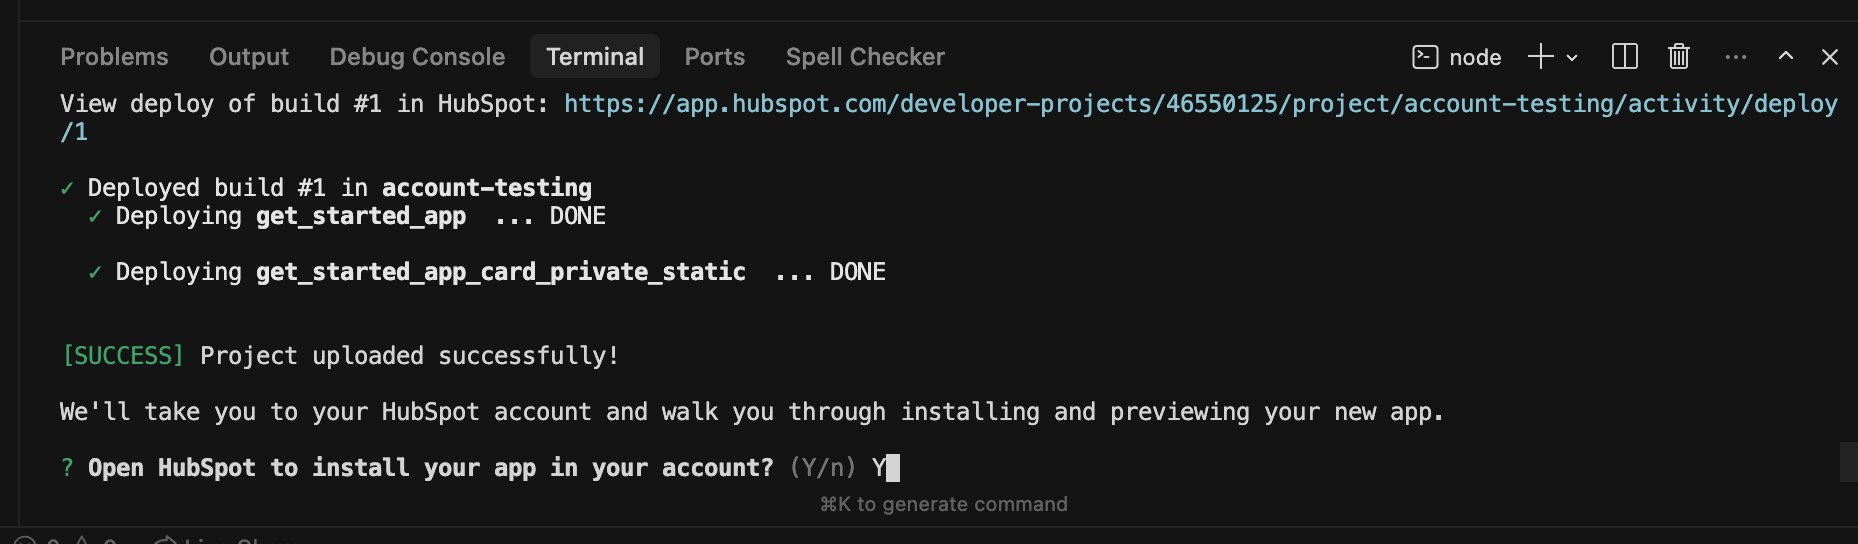
- Write Y to upload that project in the hubspot application.

- Again select Y for following
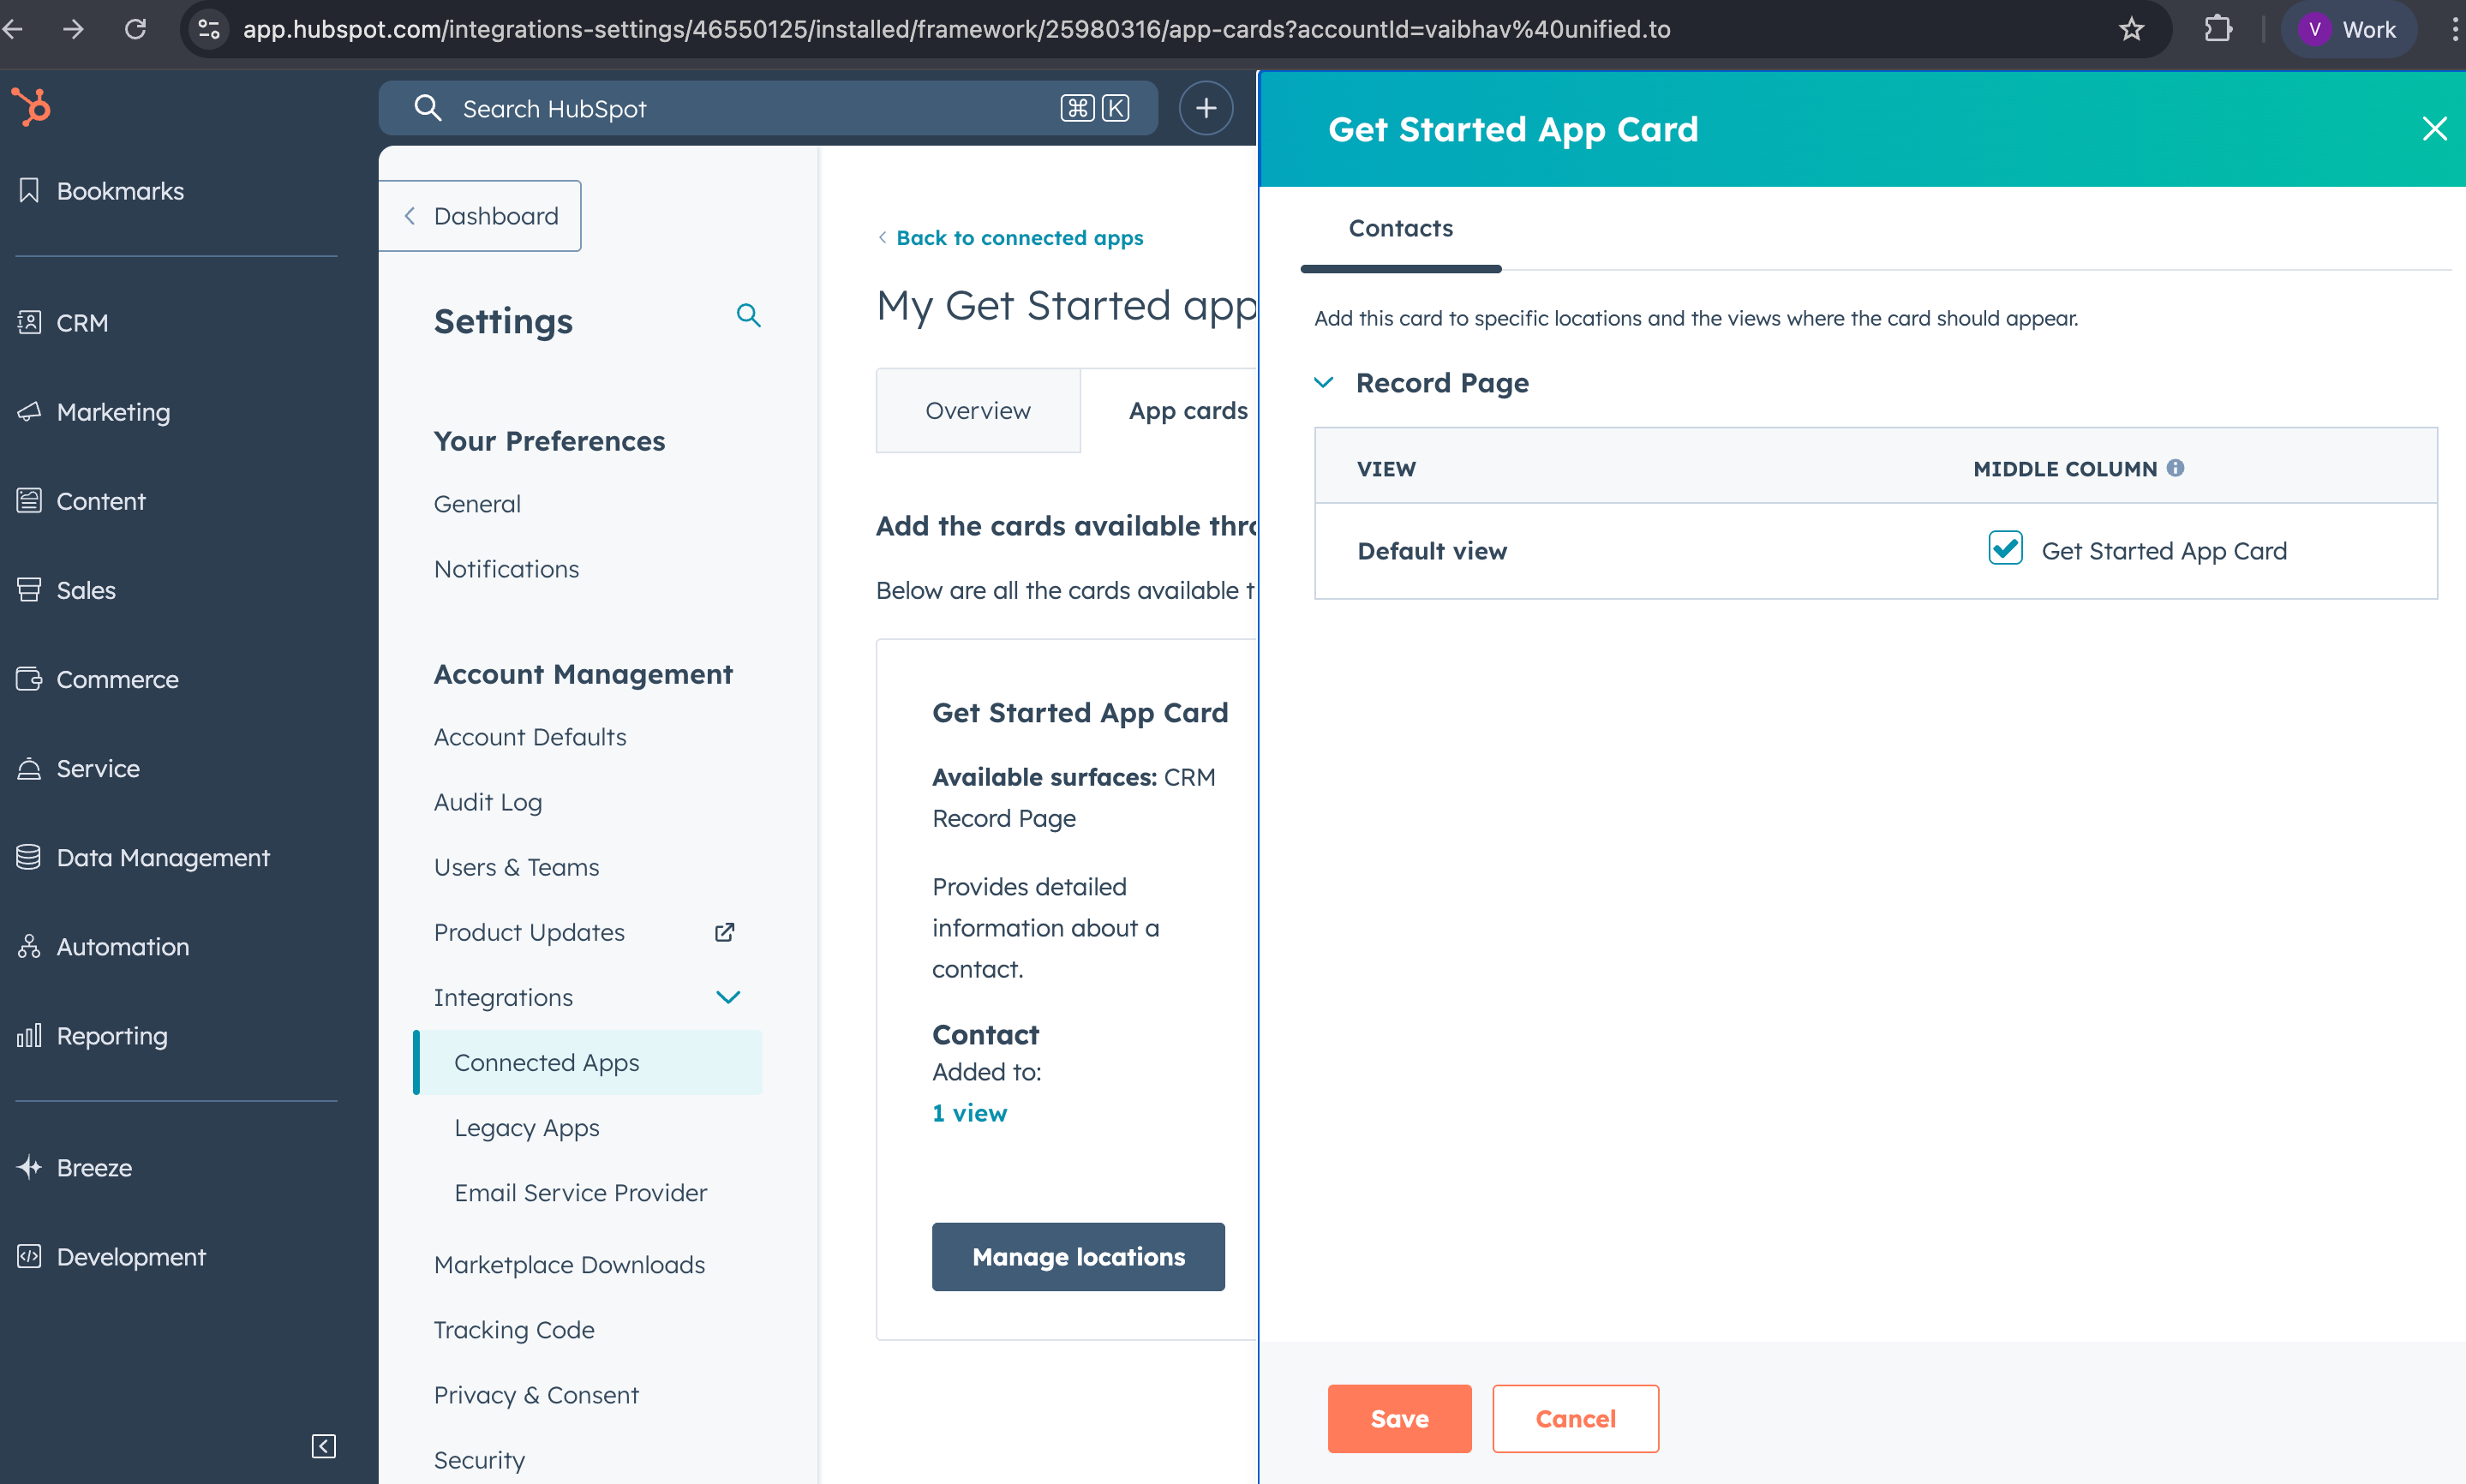
- It will redirect to hubspot page. goto to following page:- Connected Apps→ Manage Location → click the check box → Save.
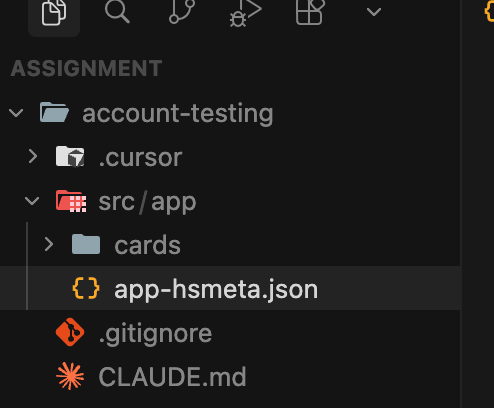
- In your project(code) you will see following folder structure. GOTO→ yourproject (account-testing) → app-hsmeta.json
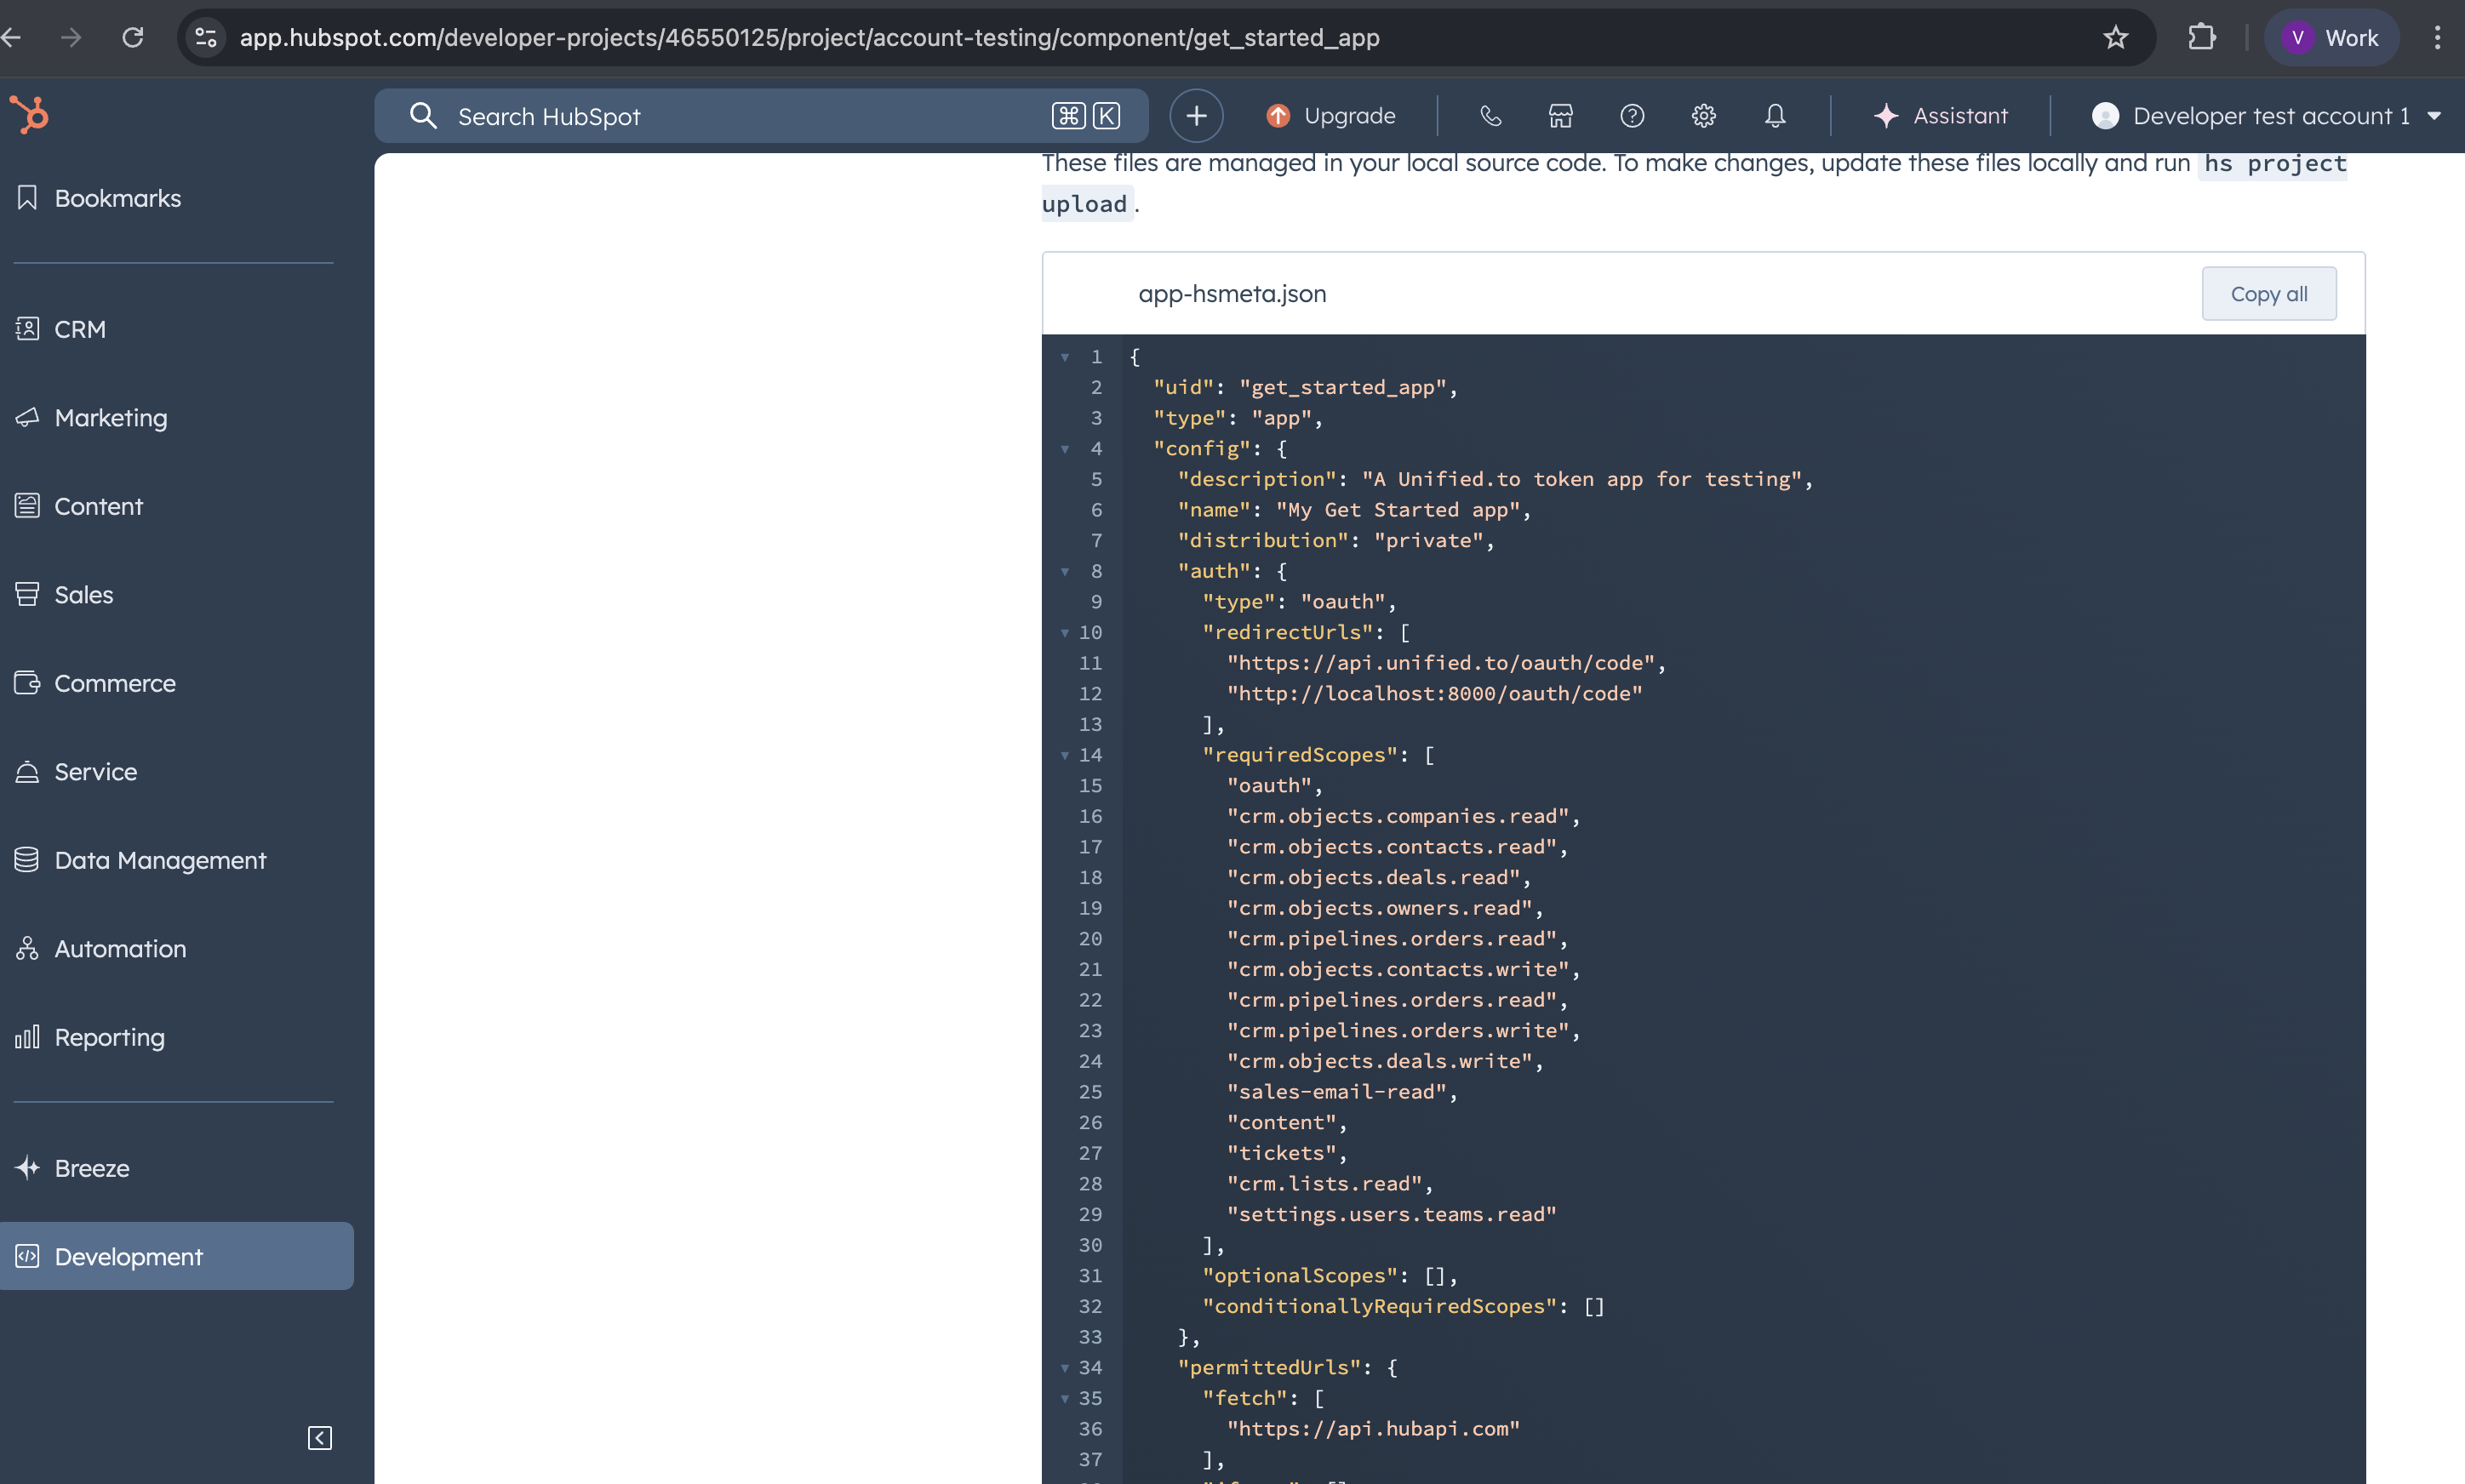
- Following will be the scopes and redirect URL. You can remove which you want. However, do remember those removed scopes before creating a connection in unified. Also remember to add redirect URL as follows.
{
"uid": "get_started_app",
"type": "app",
"config": {
"description": "A Unified.to token app for testing",
"name": "My Get Started app",
"distribution": "private",
"auth": {
"type": "oauth",
"redirectUrls": [
"https://api.unified.to/oauth/code",
],
"requiredScopes": [
"oauth",
"crm.objects.companies.read",
"crm.objects.contacts.read",
"crm.objects.deals.read",
"crm.objects.owners.read",
"crm.pipelines.orders.read",
"crm.objects.contacts.write",
"crm.pipelines.orders.read",
"crm.pipelines.orders.write",
"crm.objects.deals.write",
"sales-email-read",
"content",
"tickets",
"crm.lists.read",
"settings.users.teams.read"
],
"optionalScopes": [],
"conditionallyRequiredScopes": []
},
"permittedUrls": {
"fetch": ["https://api.hubapi.com"],
"iframe": [],
"img": []
},
"support": {
"supportEmail": "support@example.com",
"documentationUrl": "https://example.com/docs",
"supportUrl": "https://example.com/support",
"supportPhone": "+18005555555"
}
}
}
- You can update those changes using following command in terminal.
hs project upload
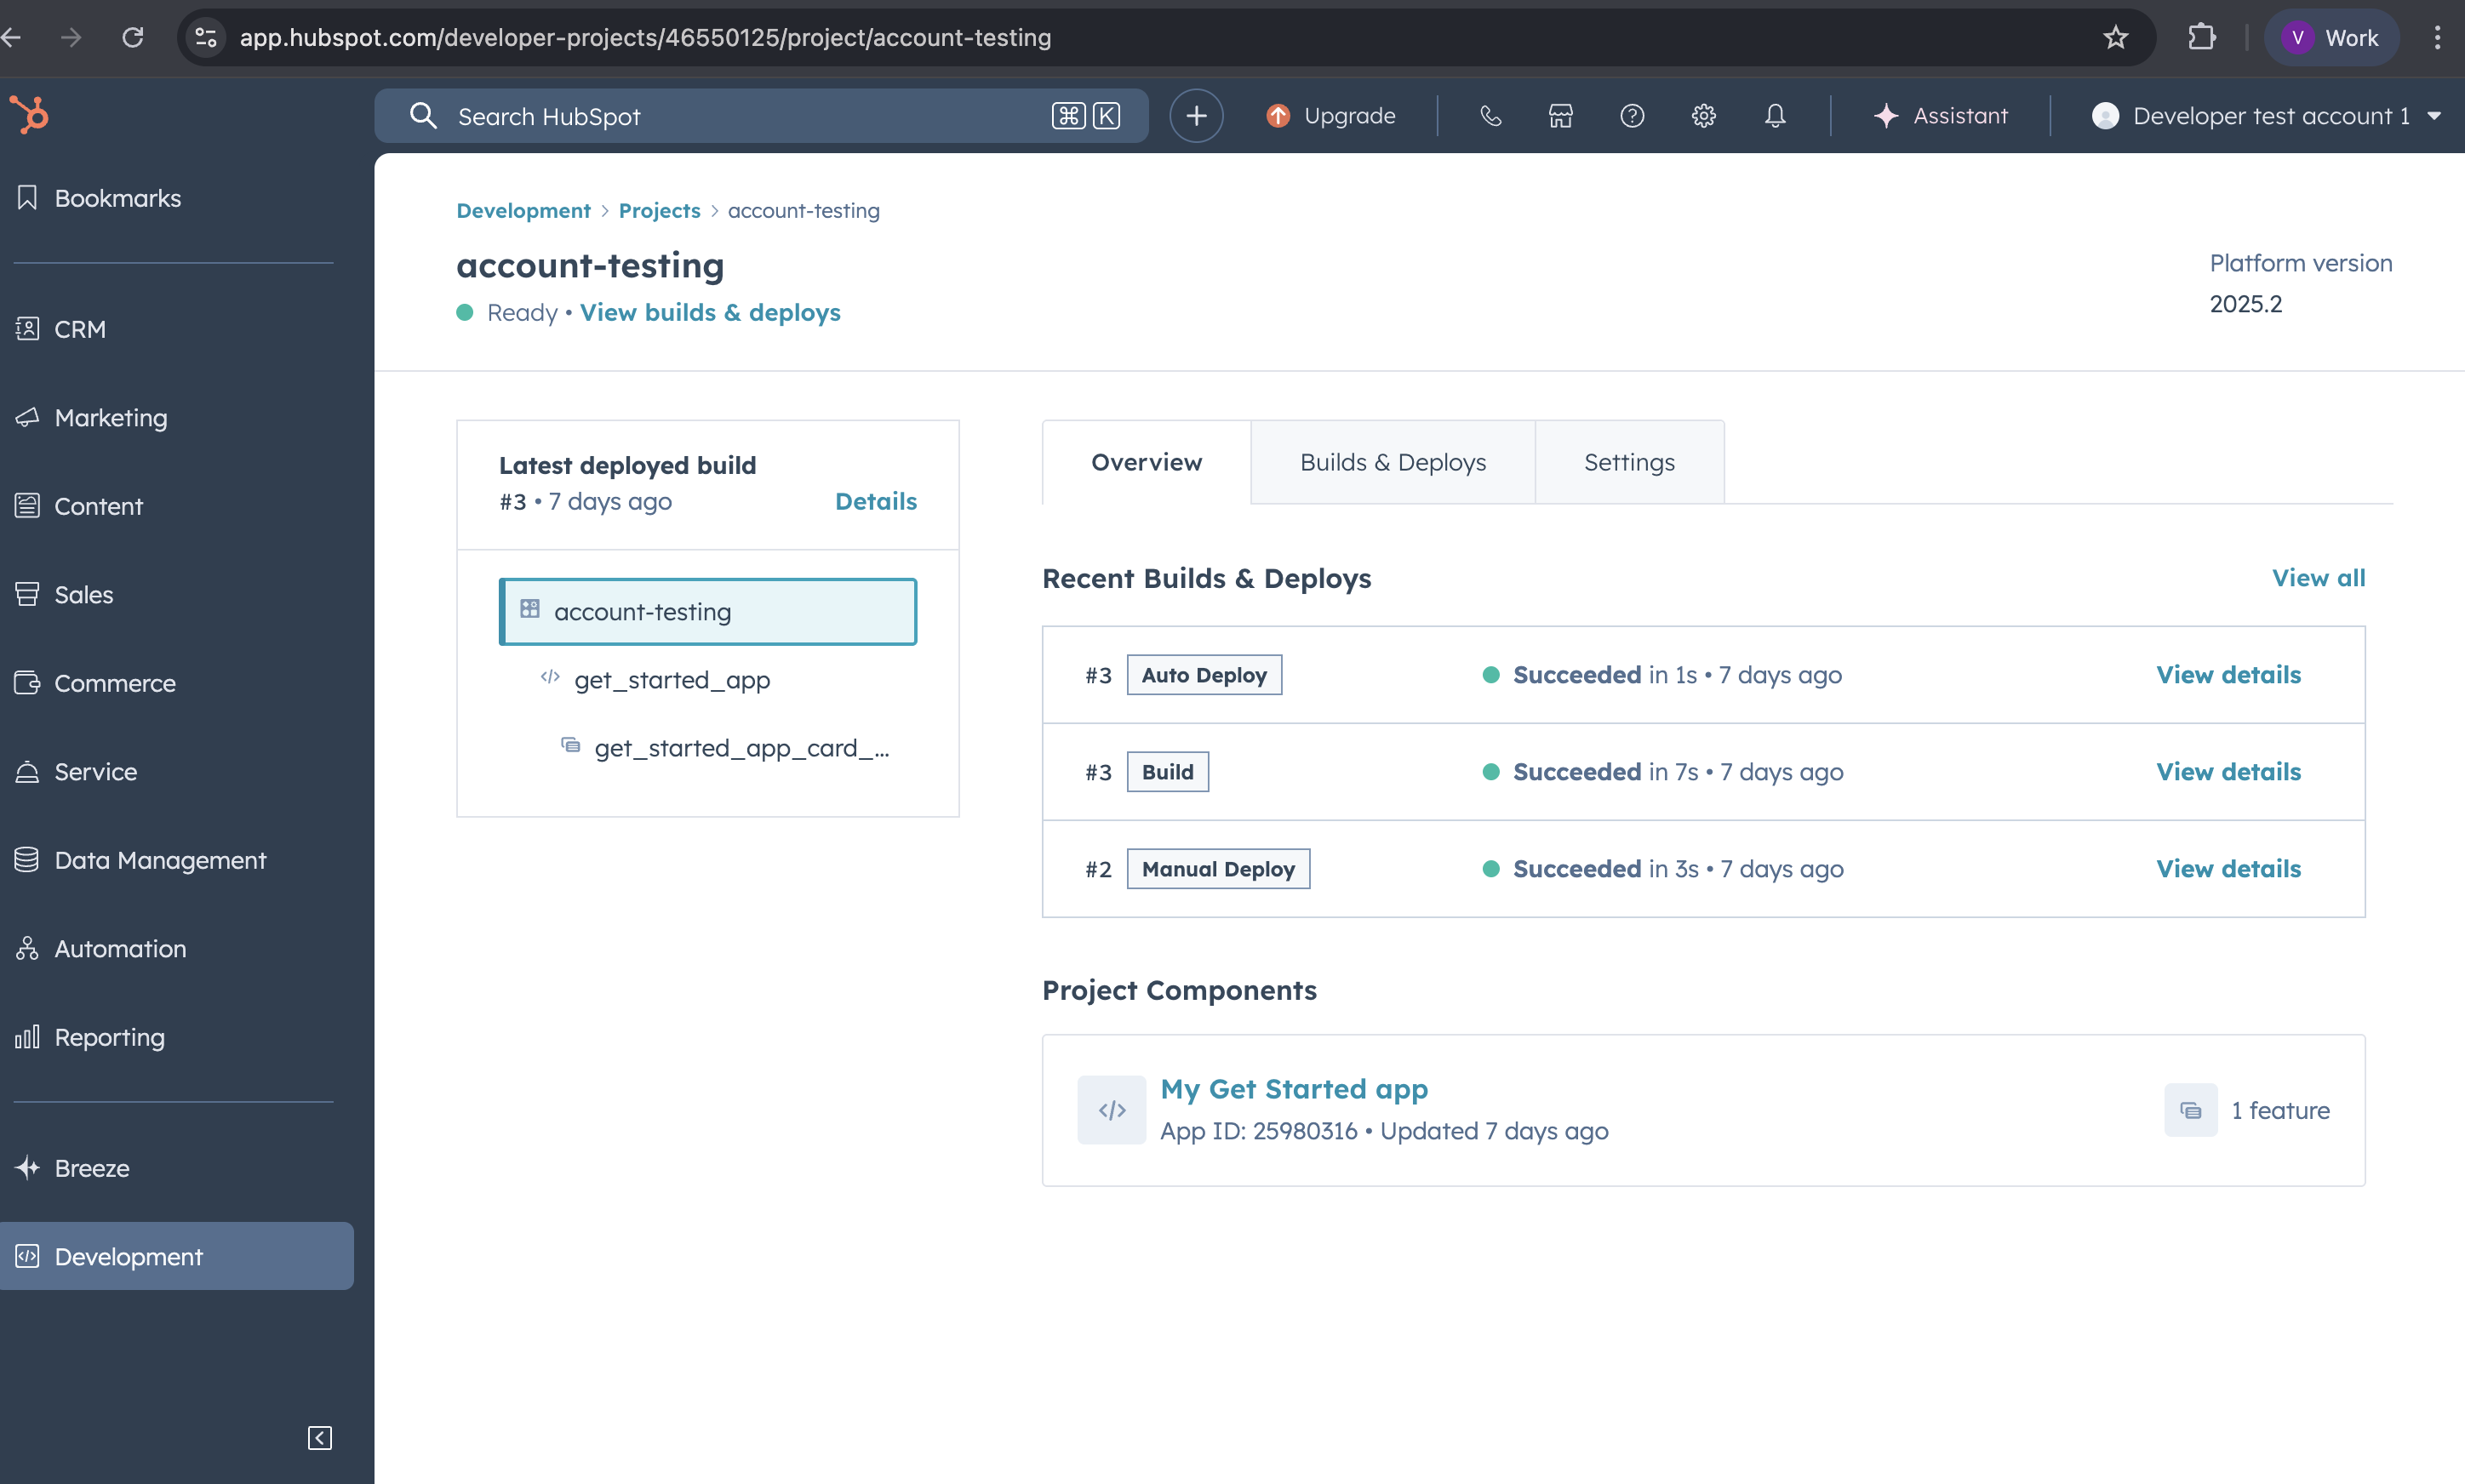
- When the code is uploaded successfully you can check that by going to following Development→ Project → Select your project.
- To check your scopes click on the project Component. It will show your app-hsmeta.json
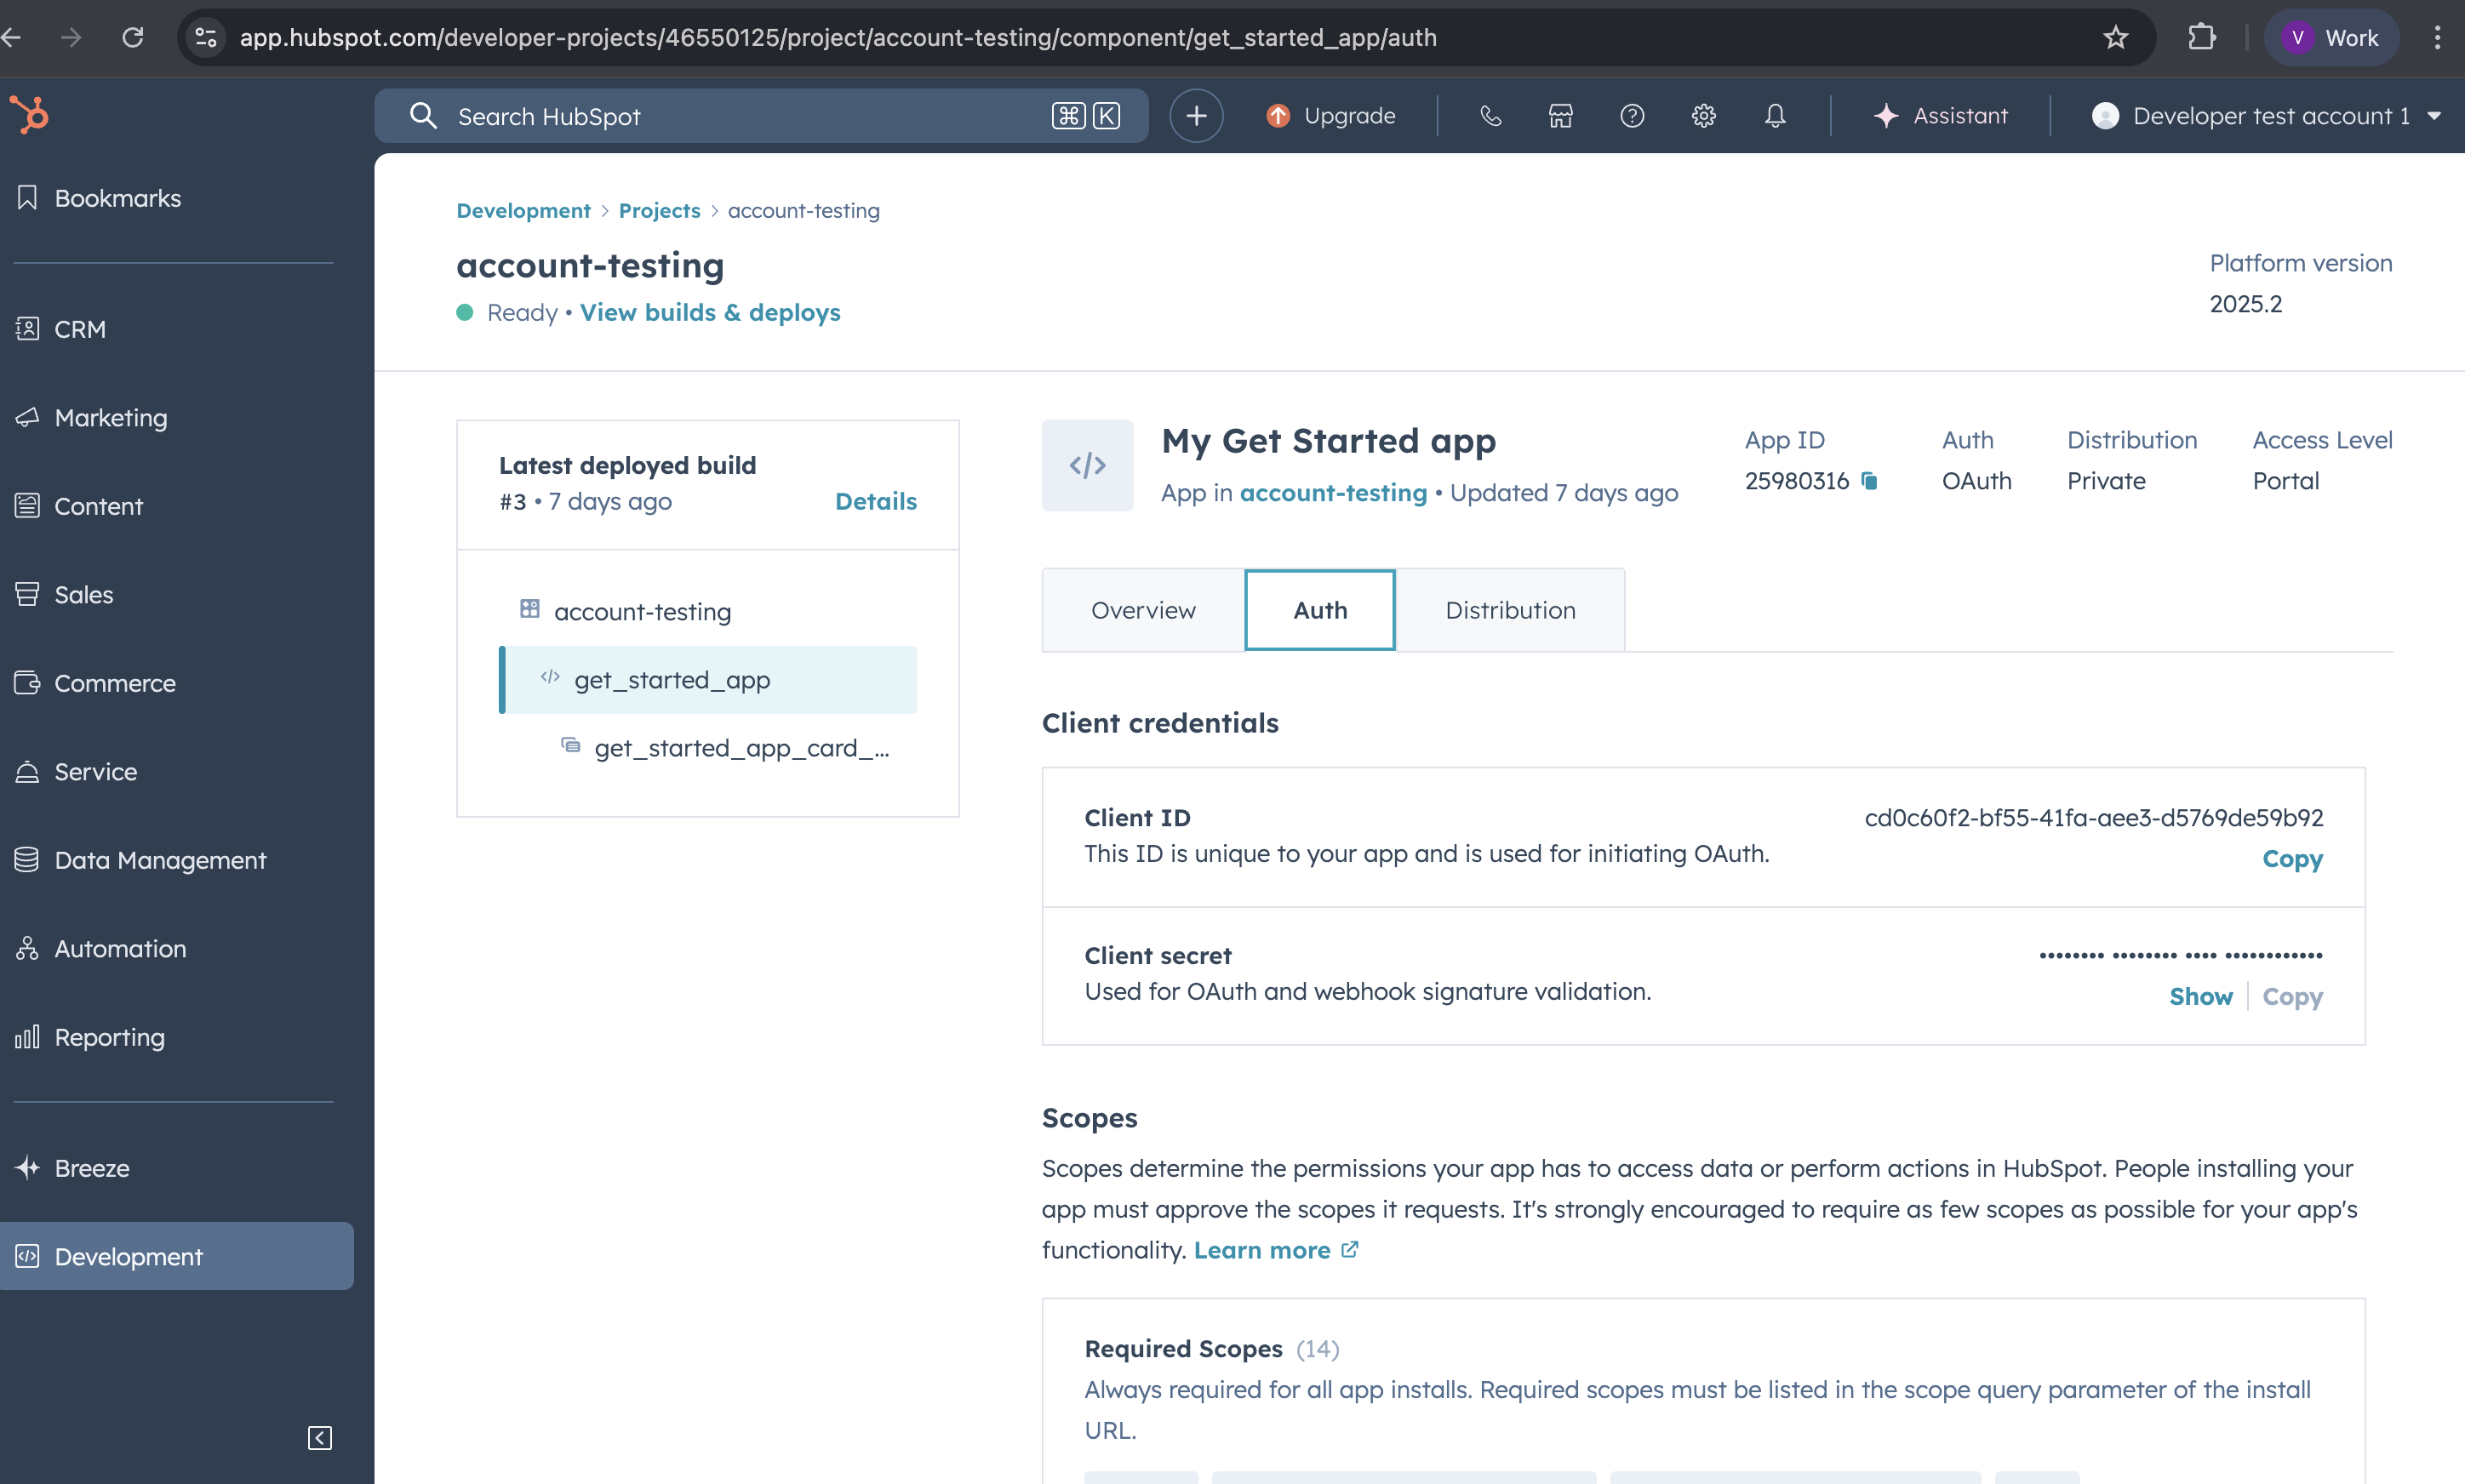
- To get the client ID and Client Secret click on the Auth button in your project component.
- Paste the Client ID and Client Secret in the app.unified.to

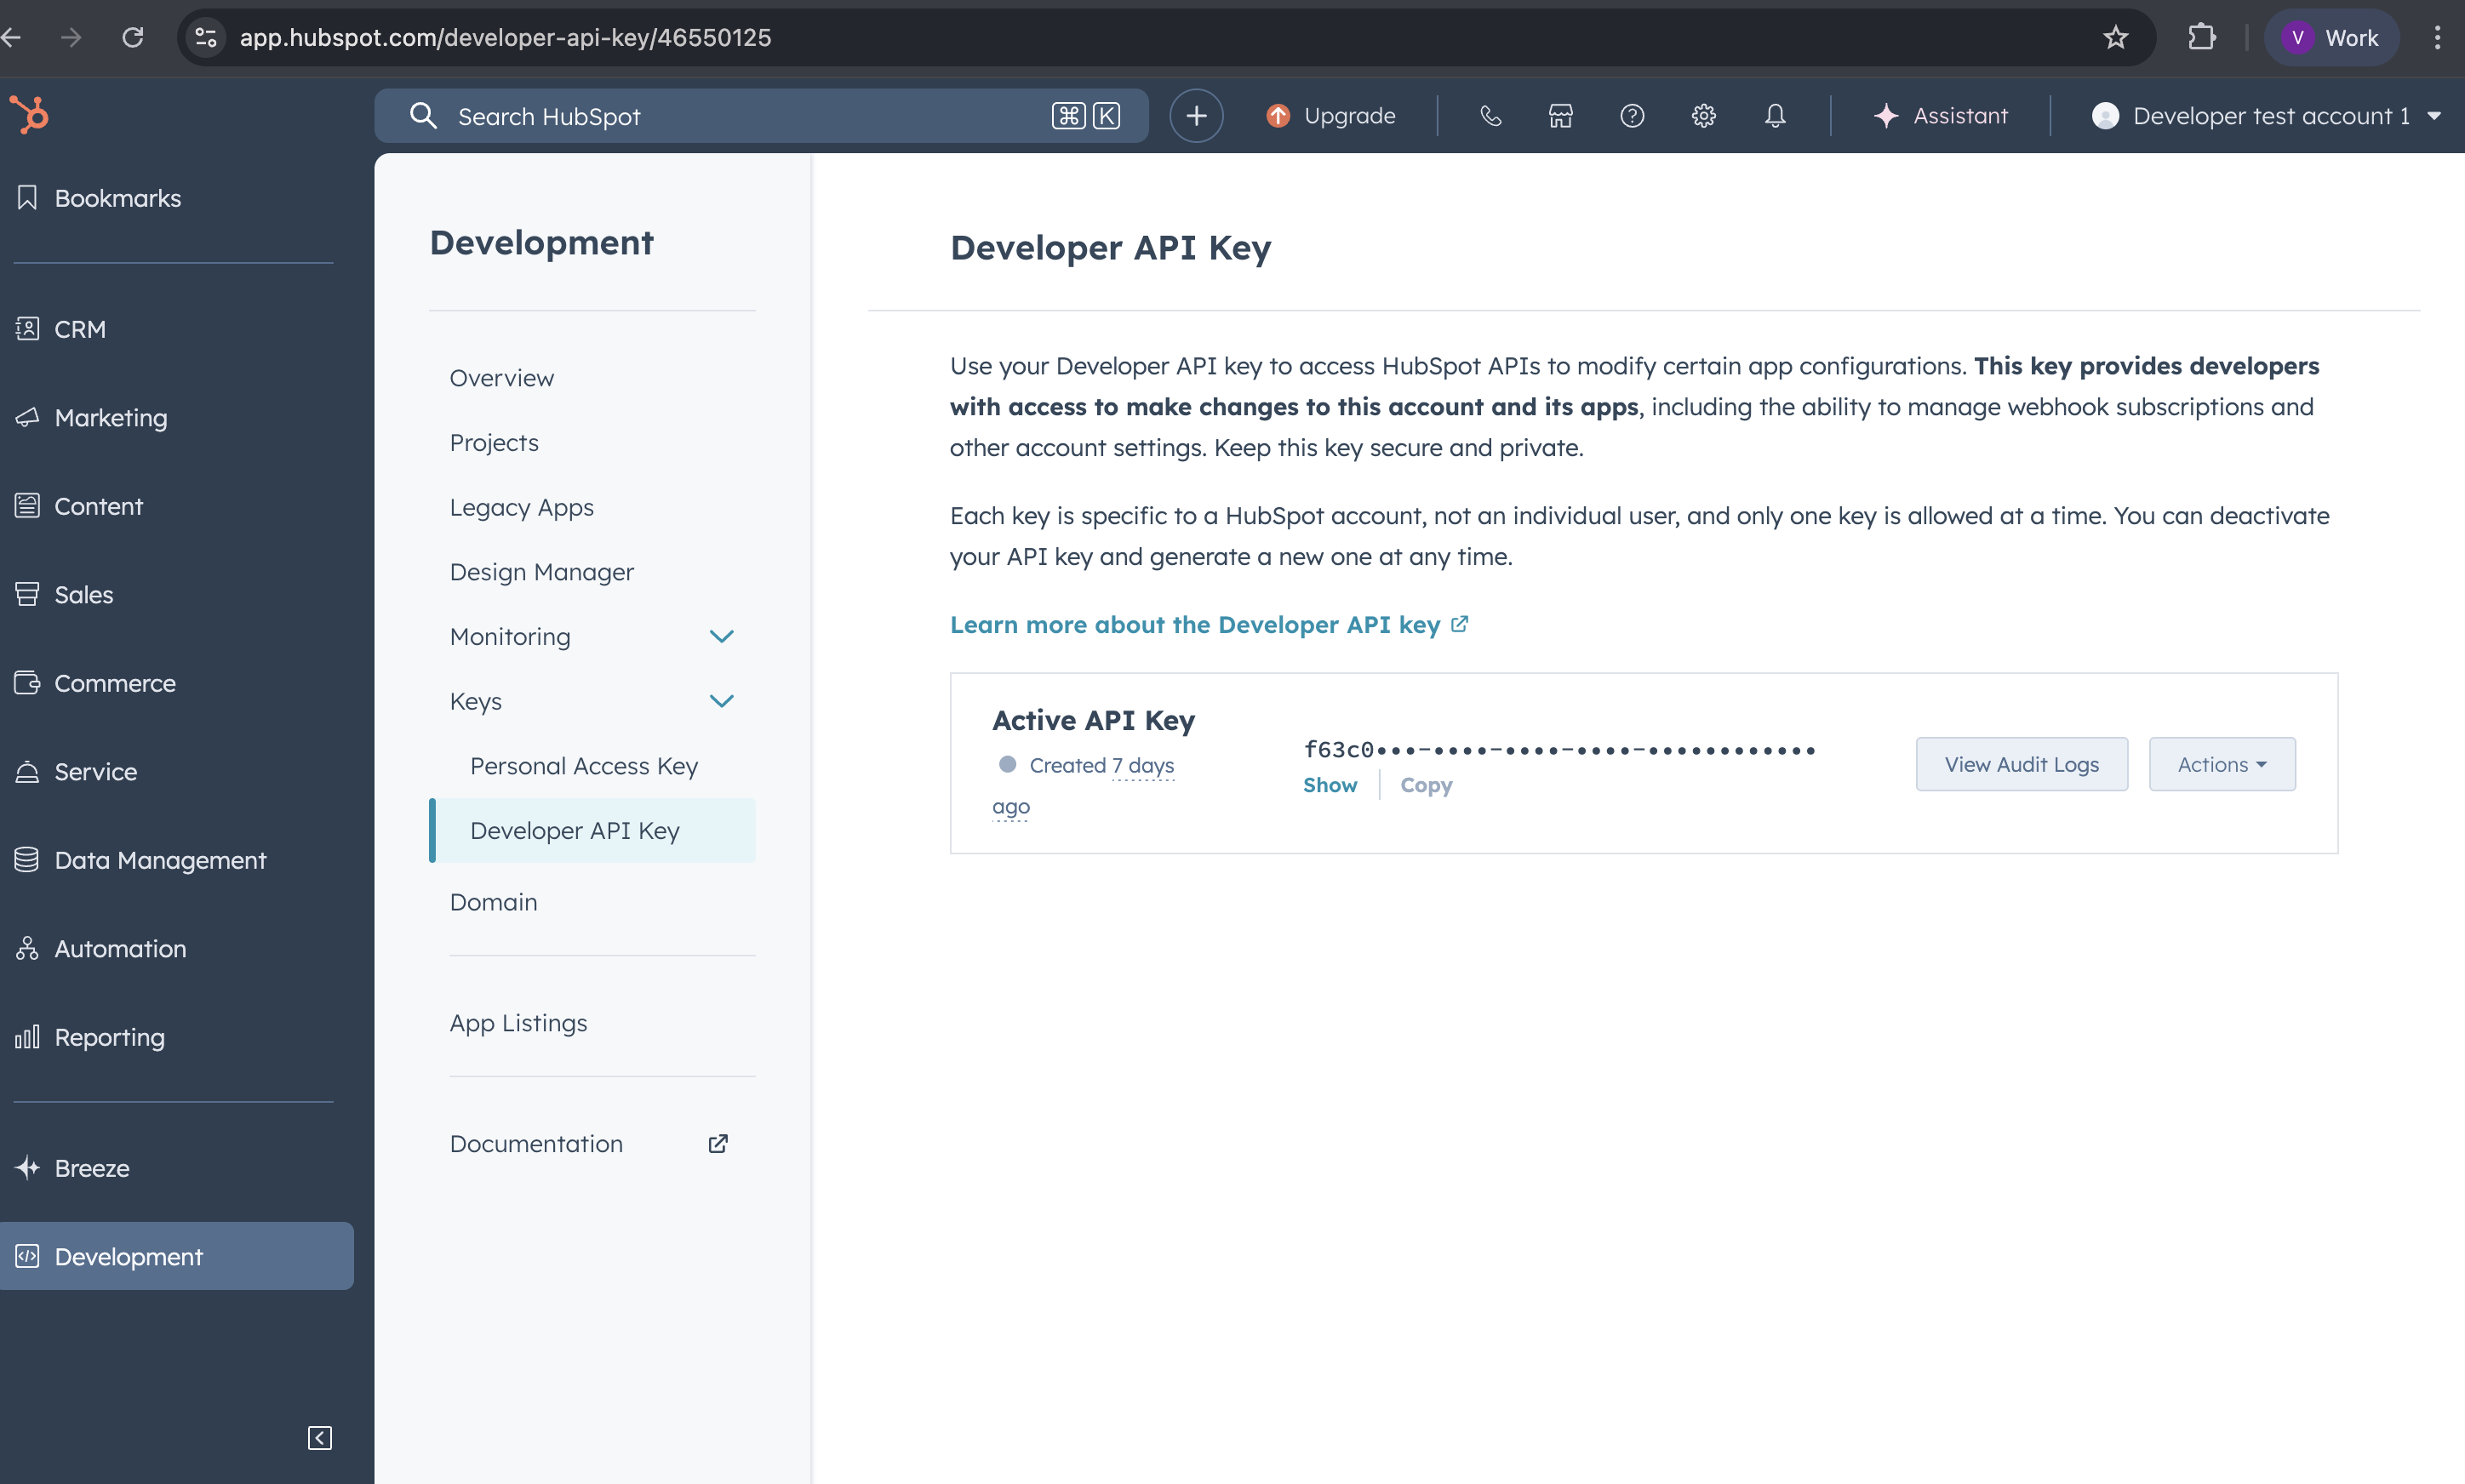
- To get developer key goto Development→ keys → developer API key. If no keys are present than generate developer api key.
- Paste that key in the app.unified.to and click activate.
- Goto Embedded components→ click on hubspot→ select your project→ click on approve.
Your Hubspot application is created.