Use Unified to sign in your users into your application
August 31, 2023
Before your users can utilize your application and any of Unified.to's integrations, they need to sign in to your application.
Luckily, we've simplified user authentication through our Unified Authentication API. Just follow these steps.
1. Activate Authentication integrations
1.1 Click on the 'Integrations' menu, and then on the 'Authentication Integrations' option.

1.2 Activate the integrations that you would like to use to sign-in your users into your application by clicking on each desired integration.
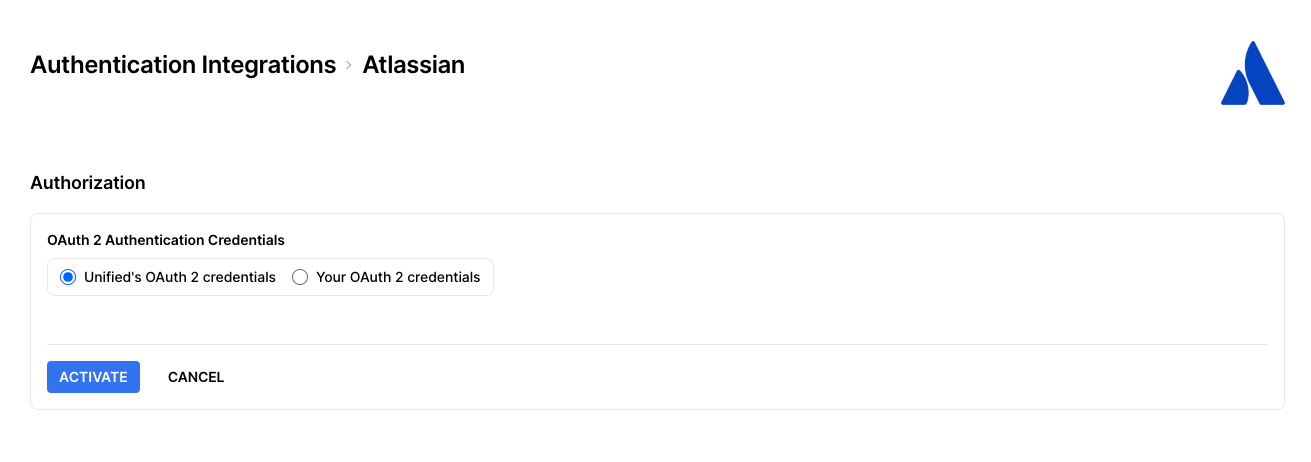
1.3 If available, you can chose to use Unified's branding and name on the authentication page that your users see with signing-in to your application. We don't recommend this for production applications, but this is a great option to test the authentication feature.
1.4 If you want to add your own branding to the authentication pages, then you will need to first obtain your own OAuth2 application credentials from the specific integration vendors (eg. Google). For help on creating your own OAuth2 application, please see Generating OAuth2 Credentials or click on the 'Get your own OAuth2 credentials' link. Once you have that, enter your client ID and client secret that you obtained from the integration vendor.
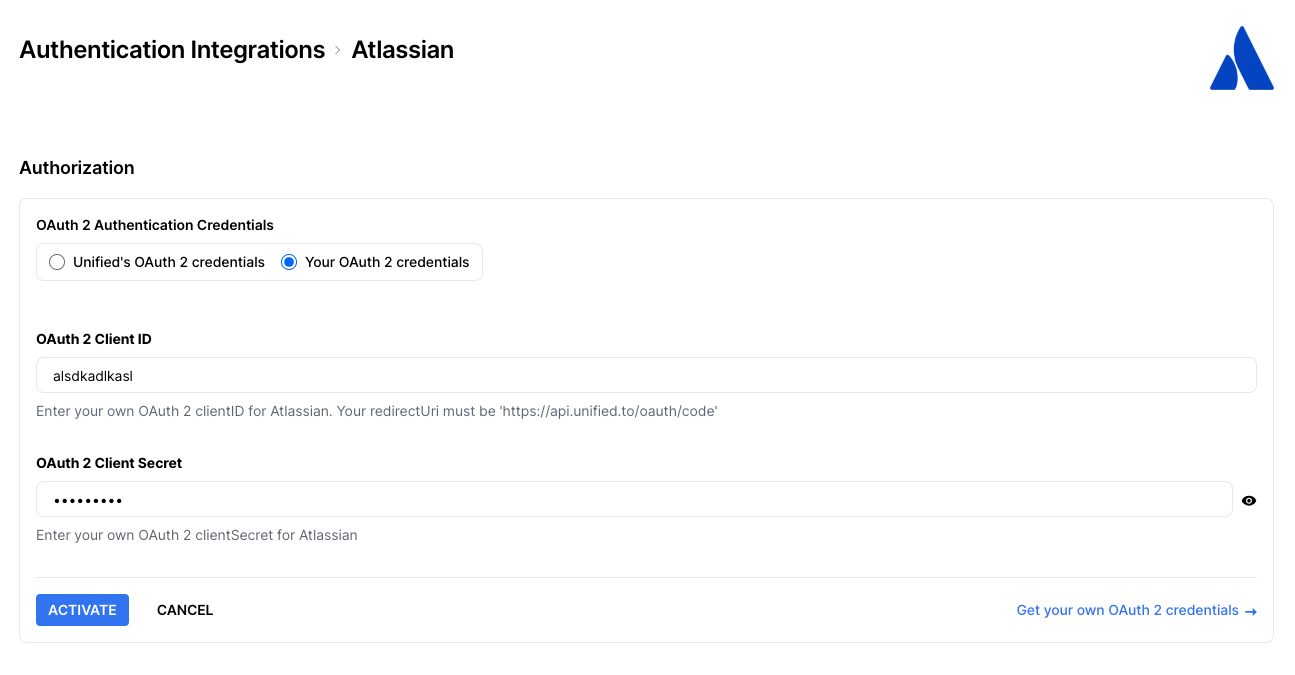
1.5 Click on the 'Activate' button to enable this integration.
1.6 Repeat for all of the integrations that you want to use to authenticate your users.
2. Display sign-in links to your users
Now that you have a list of Authentication connections, you can incorporate them into your application.
You have two options:
- Remember the integration types (ie. google, discord, workday) and create links that point to our authentication API endpoint:
https//api.unified.to/unified/integration/login/{workspace_id}/{integration_type}?redirect=true. You can style that link however you like. - Call the our API that returns a list of integrations;
https//api.unified.to/unified/integration/workspace/{workspace_id}?summary=true&active=true&categories=auth. This will return all activated Authentication integrations and each will have information that you can use to style your Sign-in links;
[
{
logo_url: "http://localhost:8000/docs/images/google.png",
name: "Google",
type: "google"
}
]
The Sign-in URL can have the following optional parameters:
redirect - true to redirect the user or if empty, will return the URL as string in its response
success_redirect - the URL that the user will be redirected to once they have successfully authenticated with that integration vendor
failure_redirect - the URL that the user will be redirected to if there is an error or other issue preventing the user from being authenticated by the integration vendor
state - a string that will be sent back to the success_redirect. You can use this to remember a user ID or other identifier.
- An alternative to building your own Sign-in page is to use our Embedded Sign-in widget. Click on the Settings menu and then on the Embedded Sign-in option.
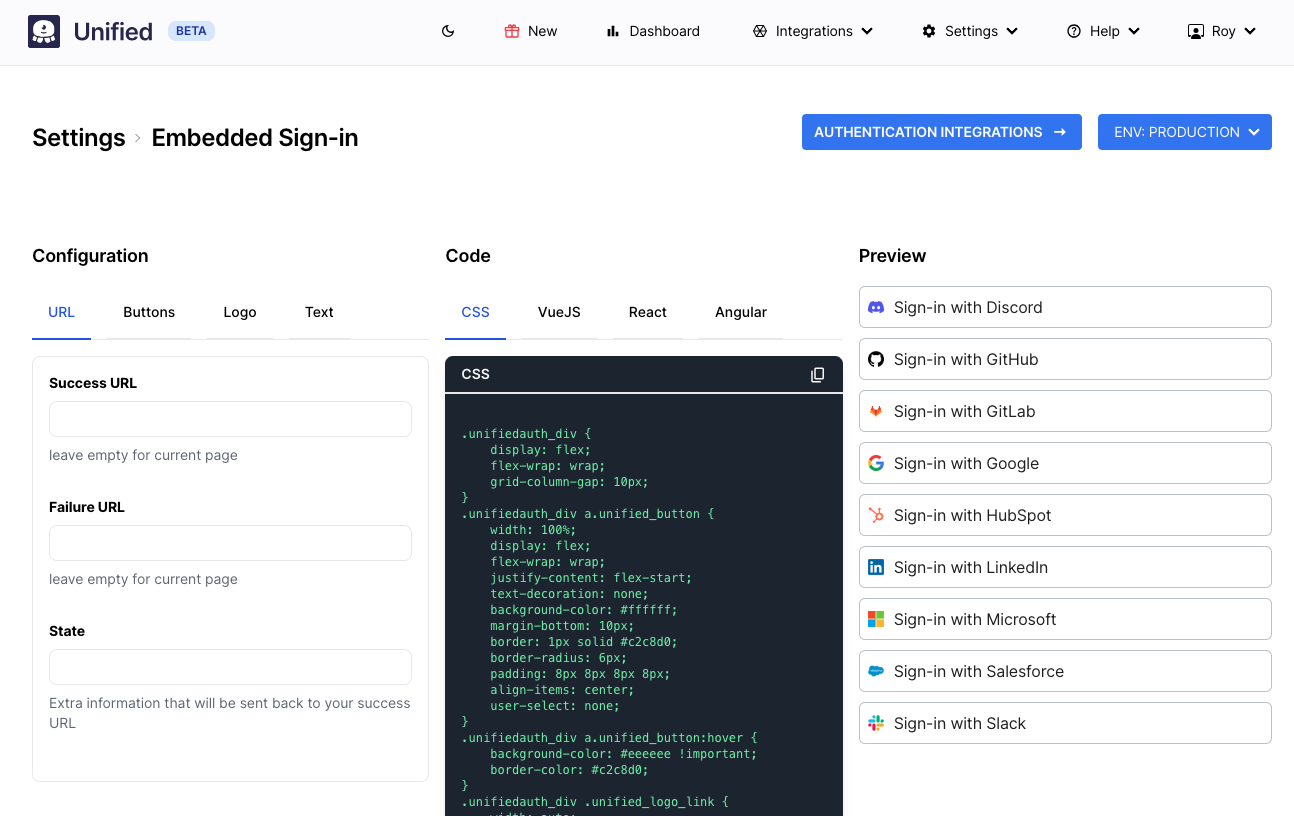
Copy the CSS and code and insert it into your own application.
Step 3: Verify a sign-in attempt
Once the user clicks on the authentication button/link, they will be redirect to the integration vendor's authentication page.
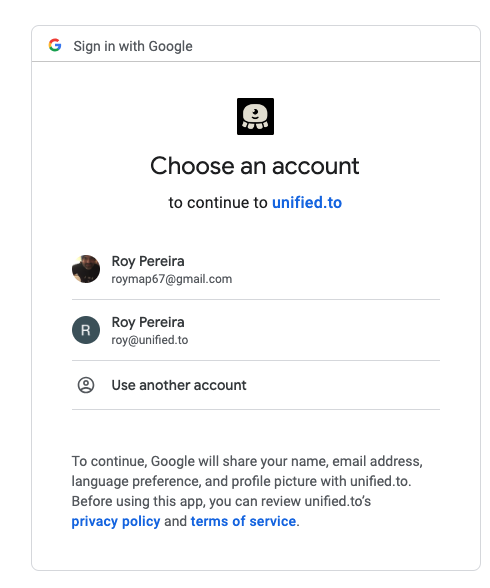
btw: it is important to note that the authentication pages are not Unified's pages but that of the integration vendor. Unified never sees the user's login credentials including their password.
Once the user successfully signs-in, they are redirected back to your application (or to the location of the success_redirect URL parameter from step 2). A jwt parameter will be appended to that URL.
The jwt is a base64 encoded JWT and is signed with your Workspace Secret. Verify the JWT with your workspace secret on your server (NOT in your browser as the workspace secret is not public).
Example code to verify a JWT on a NodeJS server:
try {
let result = JWT.verify( req.payload.jwt, workspace.secret )
} catch (err) {
console.error(err);
}
The decoded JWT will contain a name and emails field:
{
name: "Jane Smith",
emails: ["jane@foo.com", "jsmith89@gmail.com"]
}
Use the user's email to log them into your application as it is verified by the integration.