How to set up your scopes in HubSpot
June 11, 2024
This guide explains how to correctly configure the advanced scopes settings in your HubSpot developer app for seamless integration with Unified.to. We'll cover setting up both required and optional scopes, and address some common issues you might encounter.
Before you begin
This guide assumes you have a basic understanding of:
- Scopes
- How to create a connection (Project)
- How to get your HubSpot developer key and OAuth 2 credentials (Legacy App)
Set up required scopes in HubSpot (Project)
- Go to https://offers.hubspot.com/free-cms-developer-sandbox, Sign in.
- Development → Project → select your project
- In your project(code) you will see following folder structure. GOTO→ yourproject (account-testing) → app-hsmeta.json

- Following will be the scopes and redirect URL. You can remove which you want. However, do remember those removed scopes before creating a connection in unified. Also remember to add redirect URL as follows.
{
"uid": "get_started_app",
"type": "app",
"config": {
"description": "A Unified.to token app for testing",
"name": "My Get Started app",
"distribution": "private",
"auth": {
"type": "oauth",
"redirectUrls": [
"https://api.unified.to/oauth/code",
],
"requiredScopes": [
"oauth",
"crm.objects.companies.read",
"crm.objects.contacts.read",
"crm.objects.deals.read",
"crm.objects.owners.read",
"crm.pipelines.orders.read",
"crm.objects.contacts.write",
"crm.pipelines.orders.read",
"crm.pipelines.orders.write",
"crm.objects.deals.write",
"sales-email-read",
"content",
"tickets",
"crm.lists.read",
"settings.users.teams.read"
],
"optionalScopes": [],
"conditionallyRequiredScopes": []
},
"permittedUrls": {
"fetch": ["https://api.hubapi.com"],
"iframe": [],
"img": []
},
"support": {
"supportEmail": "support@example.com",
"documentationUrl": "https://example.com/docs",
"supportUrl": "https://example.com/support",
"supportPhone": "+18005555555"
}
}
}
- You can update those changes using following command in terminal.
hs project upload
- When the code is uploaded successfully you can check that by going to following Development→ Project → Select your project.

- To check your scopes click on the project Component. It will show your app-hsmeta.json

Set up required scopes in HubSpot (Legacy App)
Note: If you are using webhooks, please refer to: How to configure webhooks in HubSpot
- Go to https://offers.hubspot.com/free-cms-developer-sandbox, Sign in.
- Development → Legacy App→ Your New App
- In the same Auth tab, scroll
- If you are not using webhooks, then Unified.to only requires two scopes to be set as Required:
crm.objects.owners.readandoauth- Click + Add new scope
- Select
crm.objects.owners.read - Set it as a Required scope
- Save your changes

Setup optional scopes
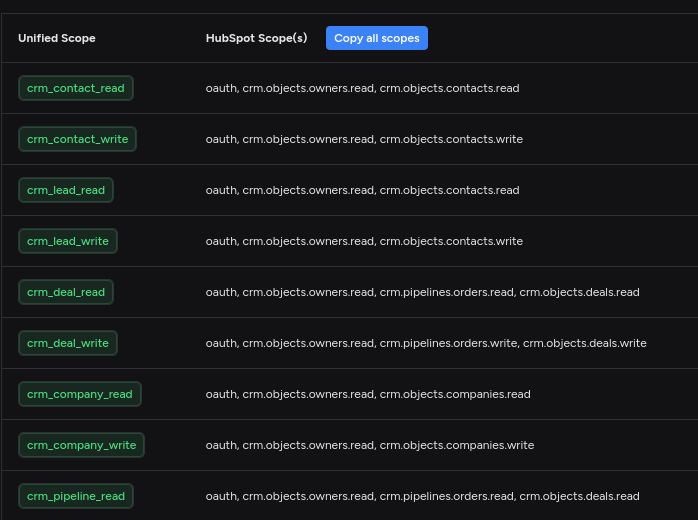
- You can see the list of scopes required for the objects you need at https://app.unified.to/integrations/hubspot?tab=oauth2
- Make sure to select optional
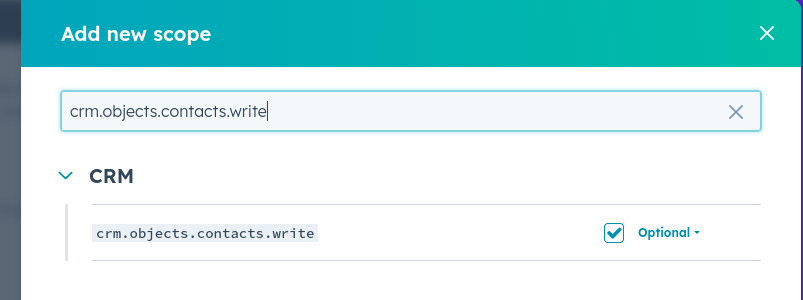
- Add all the scopes you need
- Save your changes
Configure your scopes on Unified.to
Be sure to also configure these scopes in your Unified.to settings. For instructions on how to do that, refer to our Scopes guide.
Understanding HubSpot's scope constraints
HubSpot has some specific rules about how scopes work:
- If you specify a scope as Required, it must be included in every authorization request.
- Note: If you intend to read data via a webhook, then the read scope for that object must be marked as Required in HubSpot.
- Optional scopes may or may not be included in the authorization.
- If you don't specify a scope at all, it cannot be included in the authorization request.
- The OAuth scope cannot be removed and must always be required.
Behind the scenes, Unified.to will request scopes according to what you have configured on the platform:
- We'll always request
crm.objects.owners.readas a Required scope - When you enable
webhookscopes on Unified.to, we convert every Hubspot scope ending with.readto required, assuming they'll all be used for webhooks. - Otherwise, if you have not enabled the
webhookscope, then all other scopes will be requested as Optional.
In general, we recommend that you only stick to requesting scopes for the data you actually need. For more instructions on setting up scopes to work with webhooks, please refer to: How to configure webhooks in HubSpot
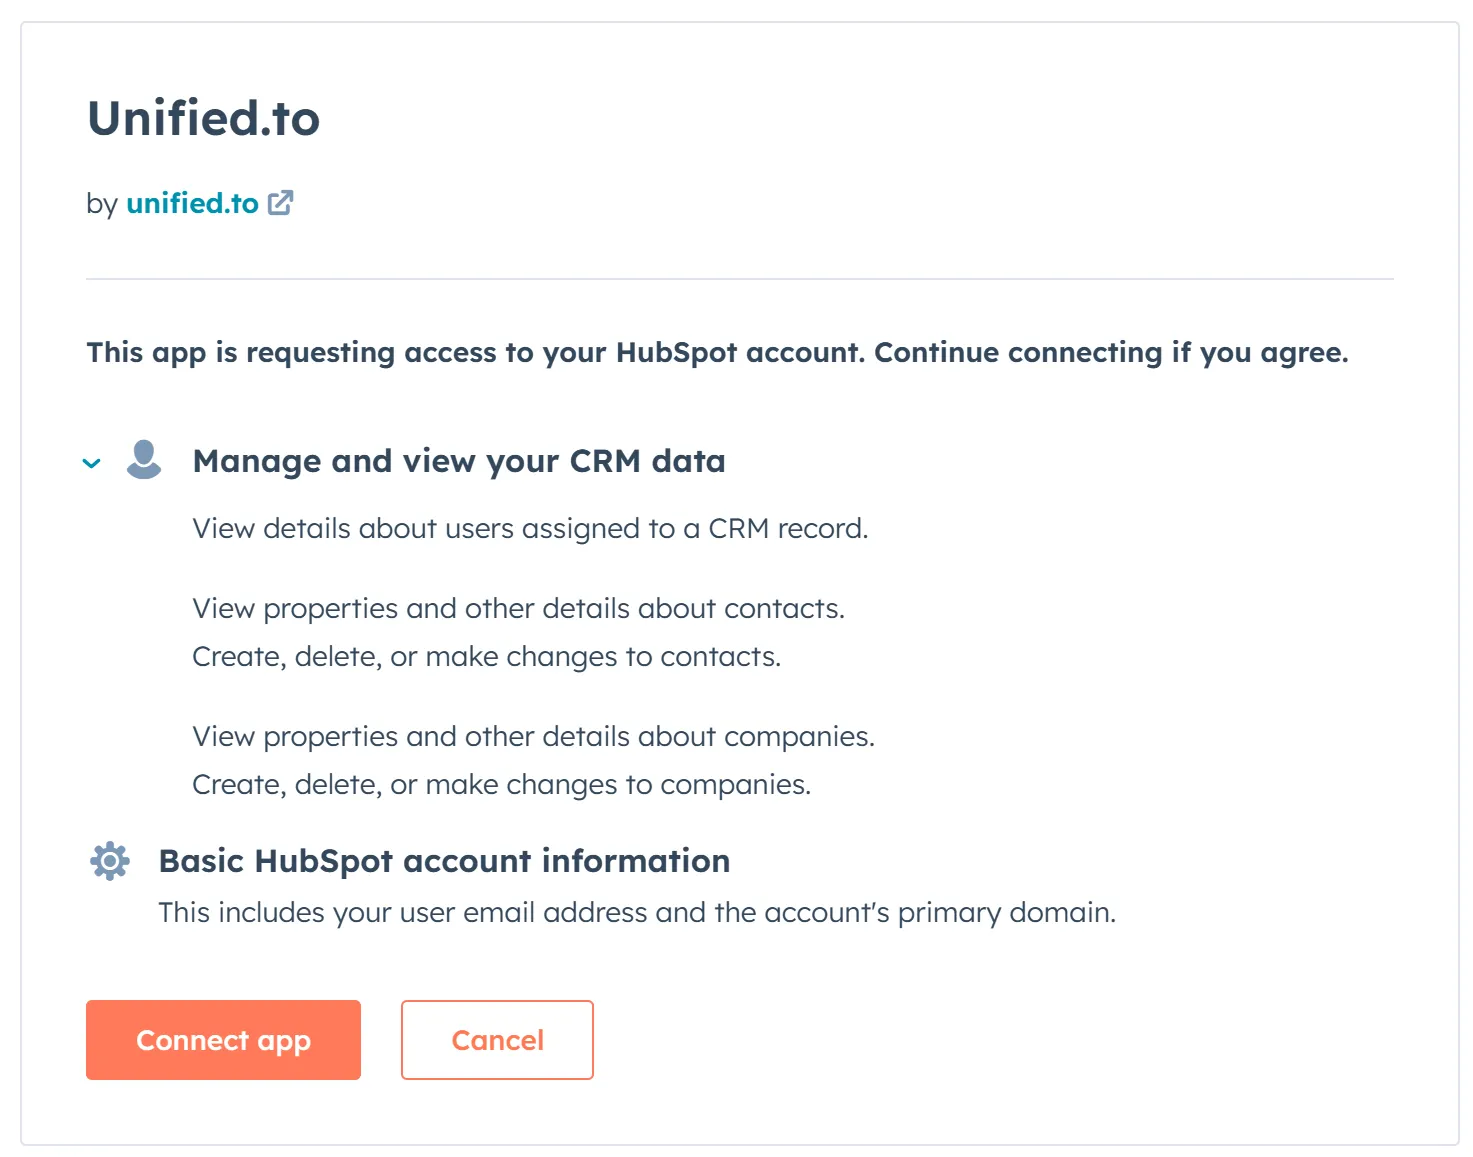
What your users will see
When your users sign in with HubSpot, they'll see a screen requesting access to the scopes you've specified:
- Required scopes will always be shown and cannot be deselected.
- Optional scopes will be shown and can be deselected by the user.
Specifying Required vs Optional Scopes
Unified tries to automatically classify scopes as required or optional. If you need additional control, you can always specify this information in the scopes URL parameter.
Just prefix the Hubspot-specific scope with required: or optional: and we will handle them correctly.
eg.
required:crm.objects.contacts.read
Troubleshooting
If your HubSpot scopes don't match the requested scopes via Unified.to, your users may see an error message about there being a scopes mismatch.
Double-check that:
- All scopes in your HubSpot app are included in every Unified.to request.
- All scopes requested by Unified.to are specified (either as required or optional) in your HubSpot app.
- If you're using webhooks, ensure all read scopes are set as Required in your HubSpot app.
- If you're not using webhooks, ensure all scopes aside from
oauthandcrm.objects.owners.readare set as Optional.