Set Environments for your Unified.to Workspace
June 7, 2023
We're eager to share the release of environments, a new feature that makes it easier to test and customize your integrations before releasing them to production. For example, you can create environments for staging and production, which gives you more control over testing integrations with our Unified API.
What is an environment?
Environments are configurable spaces that allow you to specify different integration credentials for different circumstances. Determine distinct access and configuration rules for various scenarios, such as production, staging, and testing, which gives you more flexibility and control over managing your release processes.
Environments can be added under any plan in your Unified.to account's Workspace.
Capabilities of environments
- Integration testing: Before releasing integrations to production, you can now test them in a different environment.
- Multiple environments: You can set up multiple environments such as production, staging, and others personalized to you and your team's needs.
- Environment-specific integrations: You can now decide which integrations are active in each environment.
- Application credential assignment: Choose which application credentials to use for each integration in each environment.
Benefits of environments
- Greater flexibility: You can tailor your integrations to meet the unique needs of each environment including client specifications.
- Reduced errors: Testing integrations in a staging environment before moving them to production helps minimize mistakes and unexpected errors.
- Increased productivity: This feature streamlines the management of your workspace, reducing time spent on setup and adjustments.
When to use multiple environments
Set multiple environments regardless of what plan you're on for different scenarios:
1. Localhost
Create a sandbox environment without disrupting your team's workflow or end-user experience
Example: Suppose Laura, a developer, is working on integrating a new batch of HR services. She creates her own personal authentication environment within Unified.to, complete with application credentials specific to her environment. This allows Laura to experiment freely without affecting her app's live features or her fellow developers' work.
2. Testing or QA
Try out new integrations and run tests before releasing them to production
Example: Once Laura has completed her initial development work, she simply copies the credentials to the testing environment. This environment has its own set of credentials and often uses mocked or dummy data for testing purposes. In this stage, Laura and her team run a battery of tests to ensure the new HR integrations work as expected and don't disrupt other functionalities within the app.
3. Staging
Mirror your production environment to finely-tune performance and perform final tests
Example: After the new HR integrations pass all tests in the testing environment, it's promoted to the staging environment. This environment is a mirror image of the production environment, complete with the same application credentials used in production. The HR integrations are tested under conditions that closely mimic the live application. This final testing phase ensures the new batch of integrations are ready for deployment in the production environment.
4. Production
Your live environment where your integrations run and are available to end-users
Example: This is the live environment where the application operates, interacts with real data, and serves actual users. It uses production application credentials. With the successful deployment of the new HR integrations, all users of the app can now benefit from the new integrations Laura has been working on.
How to set new environments
Implement this new feature in seconds. Follow these steps:
Setting up Environments
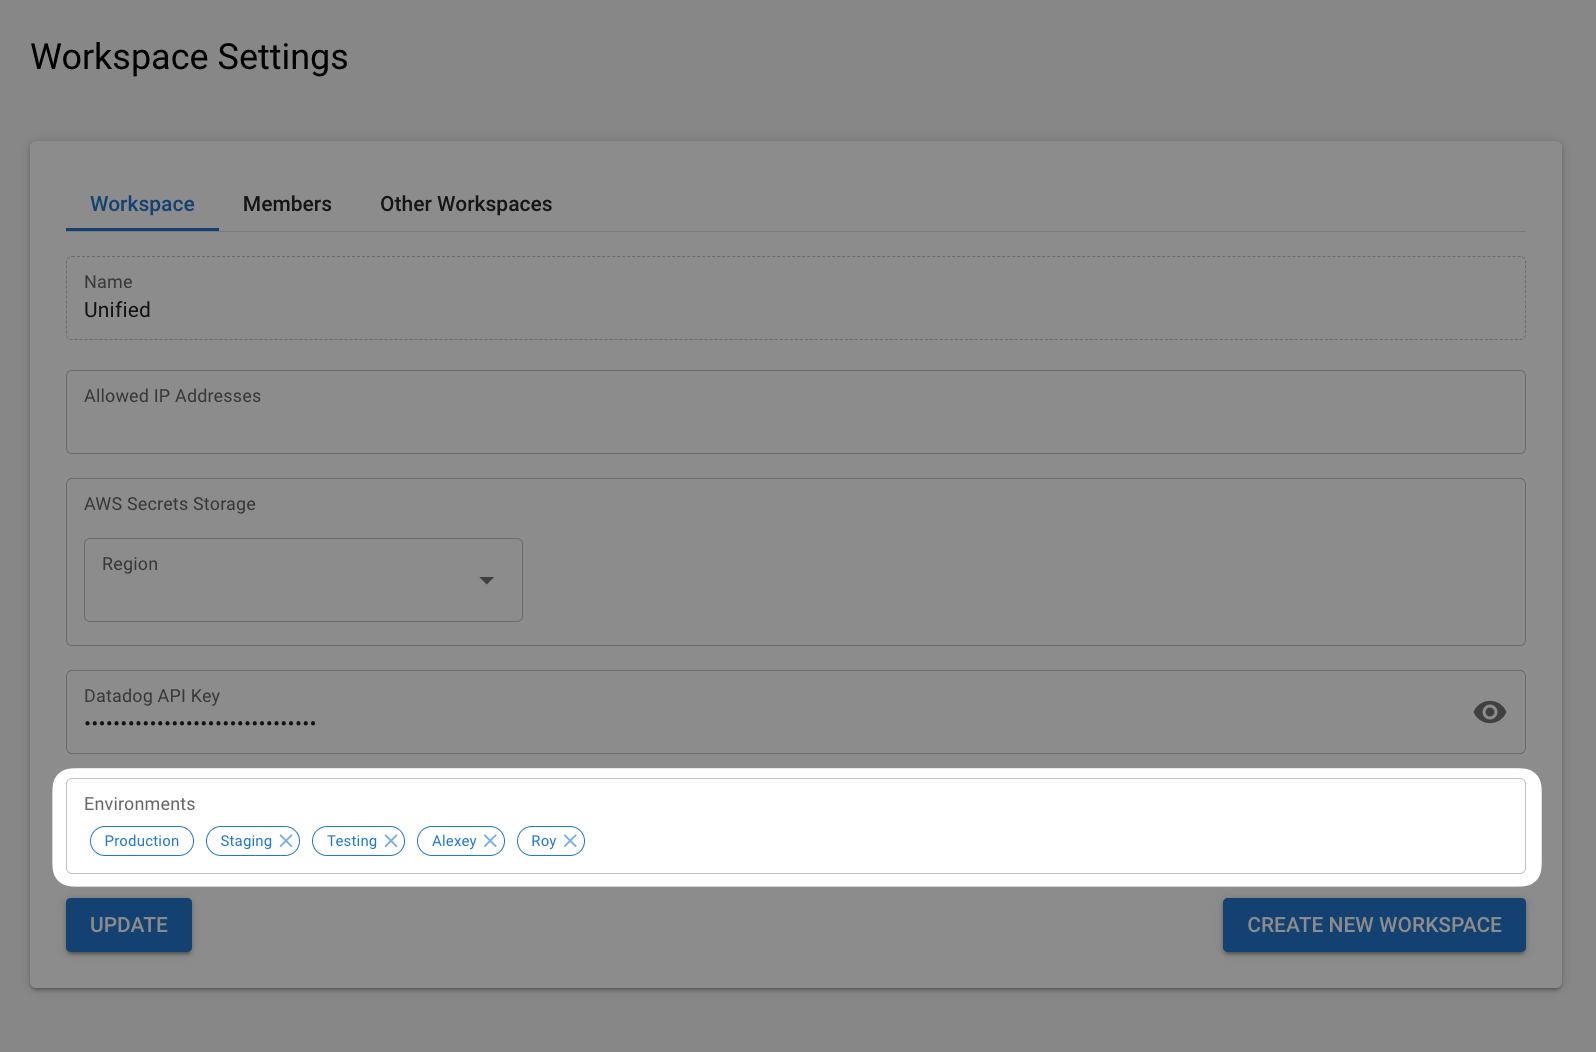
- Log in to or create a Unified.to account
- Go to Workspace Settings and insert the name of your new environment, (e.g., 'Staging') and press enter
- Once entered, your environment can be used for configuring individual integrations and generating an Embedded Directory
Configuring Integrations
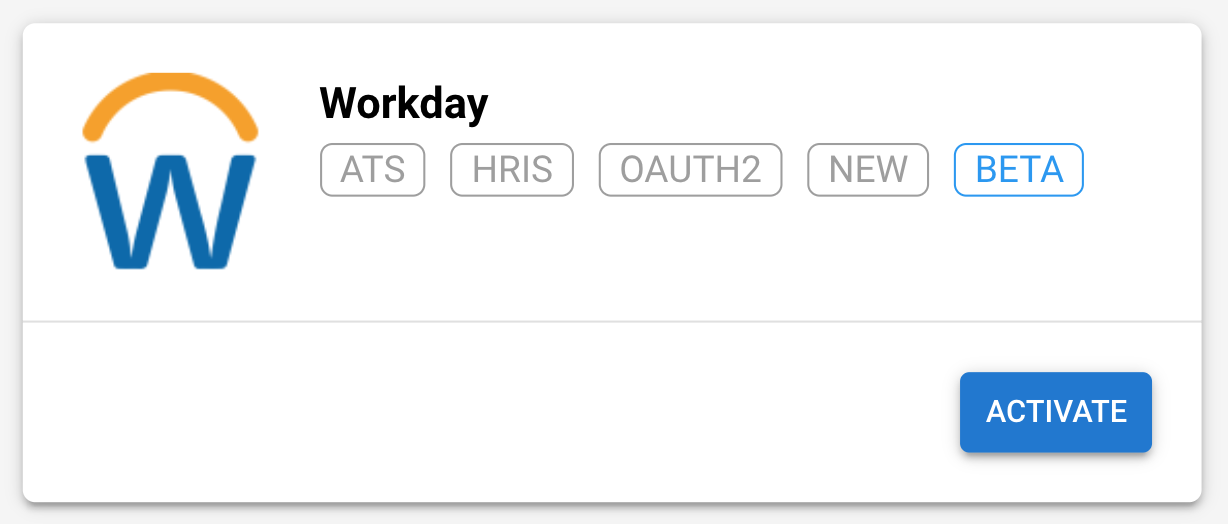
- Navigate to Integrations and click ACTIVATE on any integration, for example, Workday
- From the dropdown menu, select the environment where you to want to add credentials, such OAuth Client ID and Secret
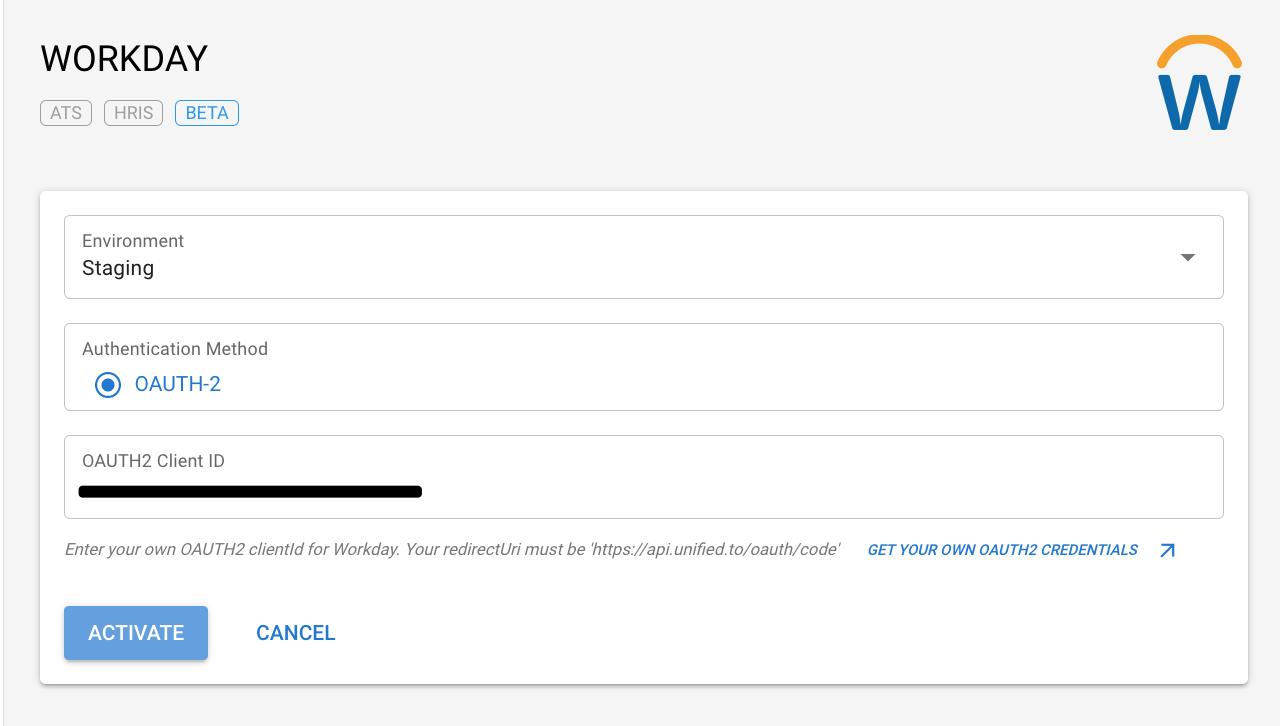
- Input your credentials for Workday for the selected environment and click ACTIVATE
- Repeat for any integration and environment
Embed Directory
After enabling integrations for a specific environment, you can generate an Embedded Directory for that environment.
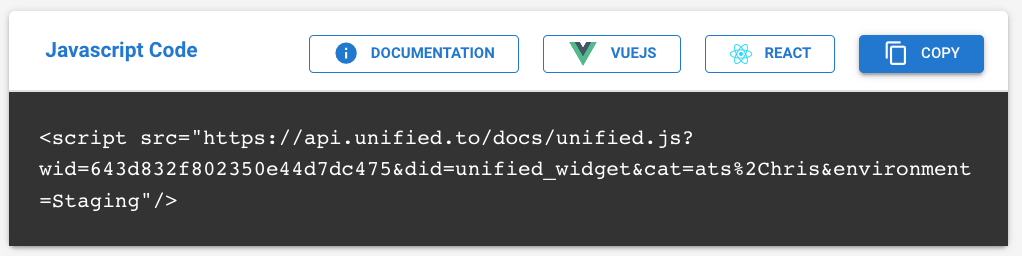
- Select the desired authentication environment from the dropdown menu.
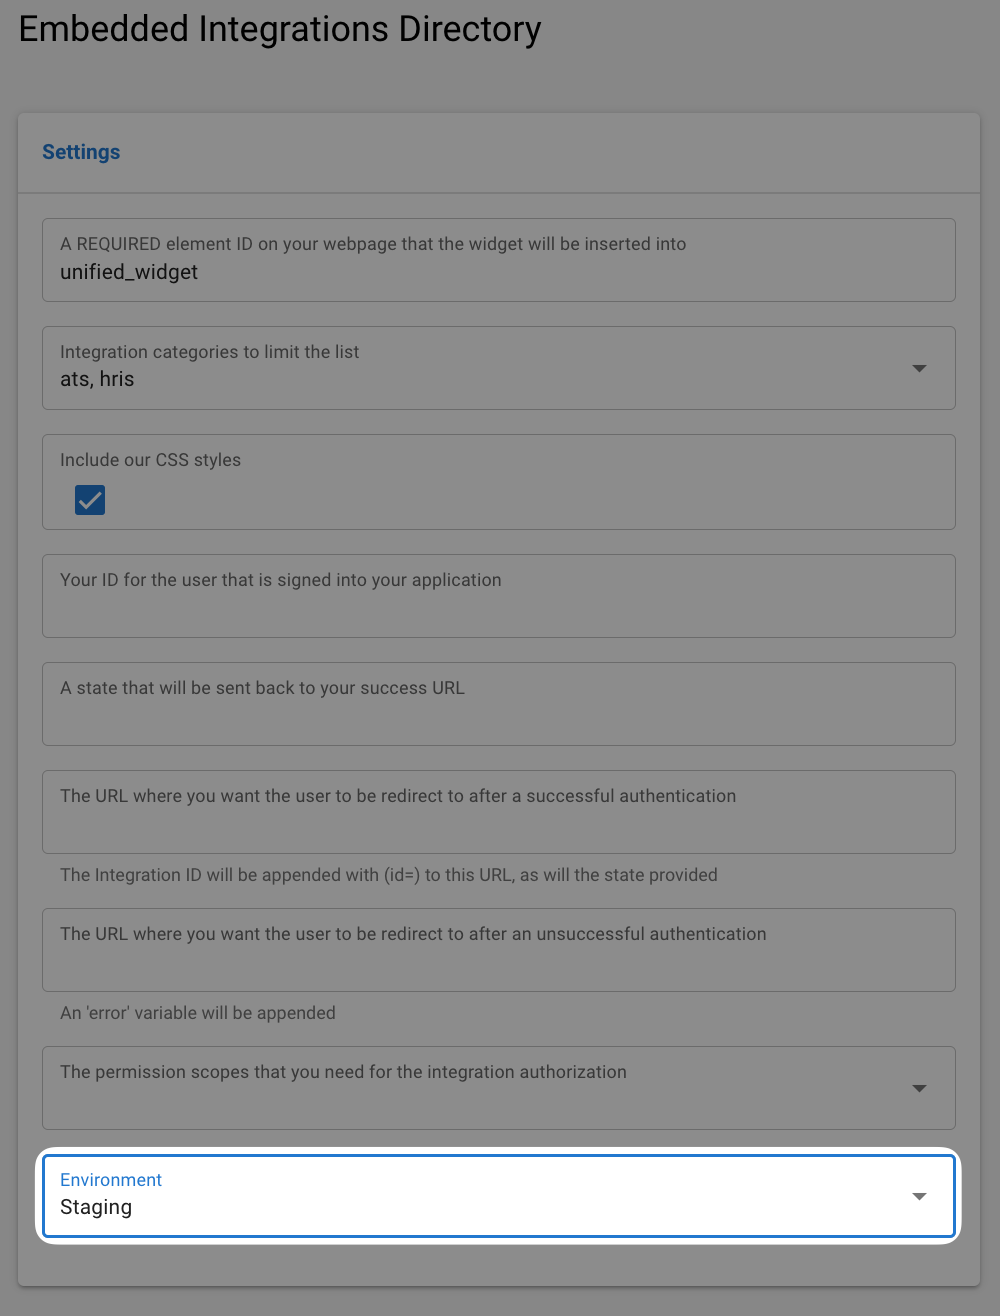
- This will generate a script with a new environment parameter for you.

If you're using our API to pull a list of active integrations for your directory, you can pass the environment query parameter to retrieve the correct integrations.
Building the ultimate Unified API solution for integrations
This new authentication environment feature is just one of the many ways we're making Unified.to work better for developers who want to build API-first integrations with industry-leading HR, Sales, Marketing, and Support apps. We're excited for you to try Authentication Environments and see the difference it makes in managing your integrations pre-launch.
Our team is here to support you every step of the way. Enjoy exploring Unified.to and let us know if you need a hand.
You can try setting Unified.to's Authentication Environments at unified.to/get-started.