Integration set-up guide for Lever
September 27, 2023
Easily add a Lever integration to your HR product. Access user data within Lever and other ATS systems through one API.
This article will take you through the steps to set up a Lever integration via Unified.to and connect your first Lever account.
Getting Started
If you haven't already signed up for a Unified.to account, do so now (it's free). You can log in through your preferred identity provider such as Google, Microsoft, or GitHub.
1. Activate Lever
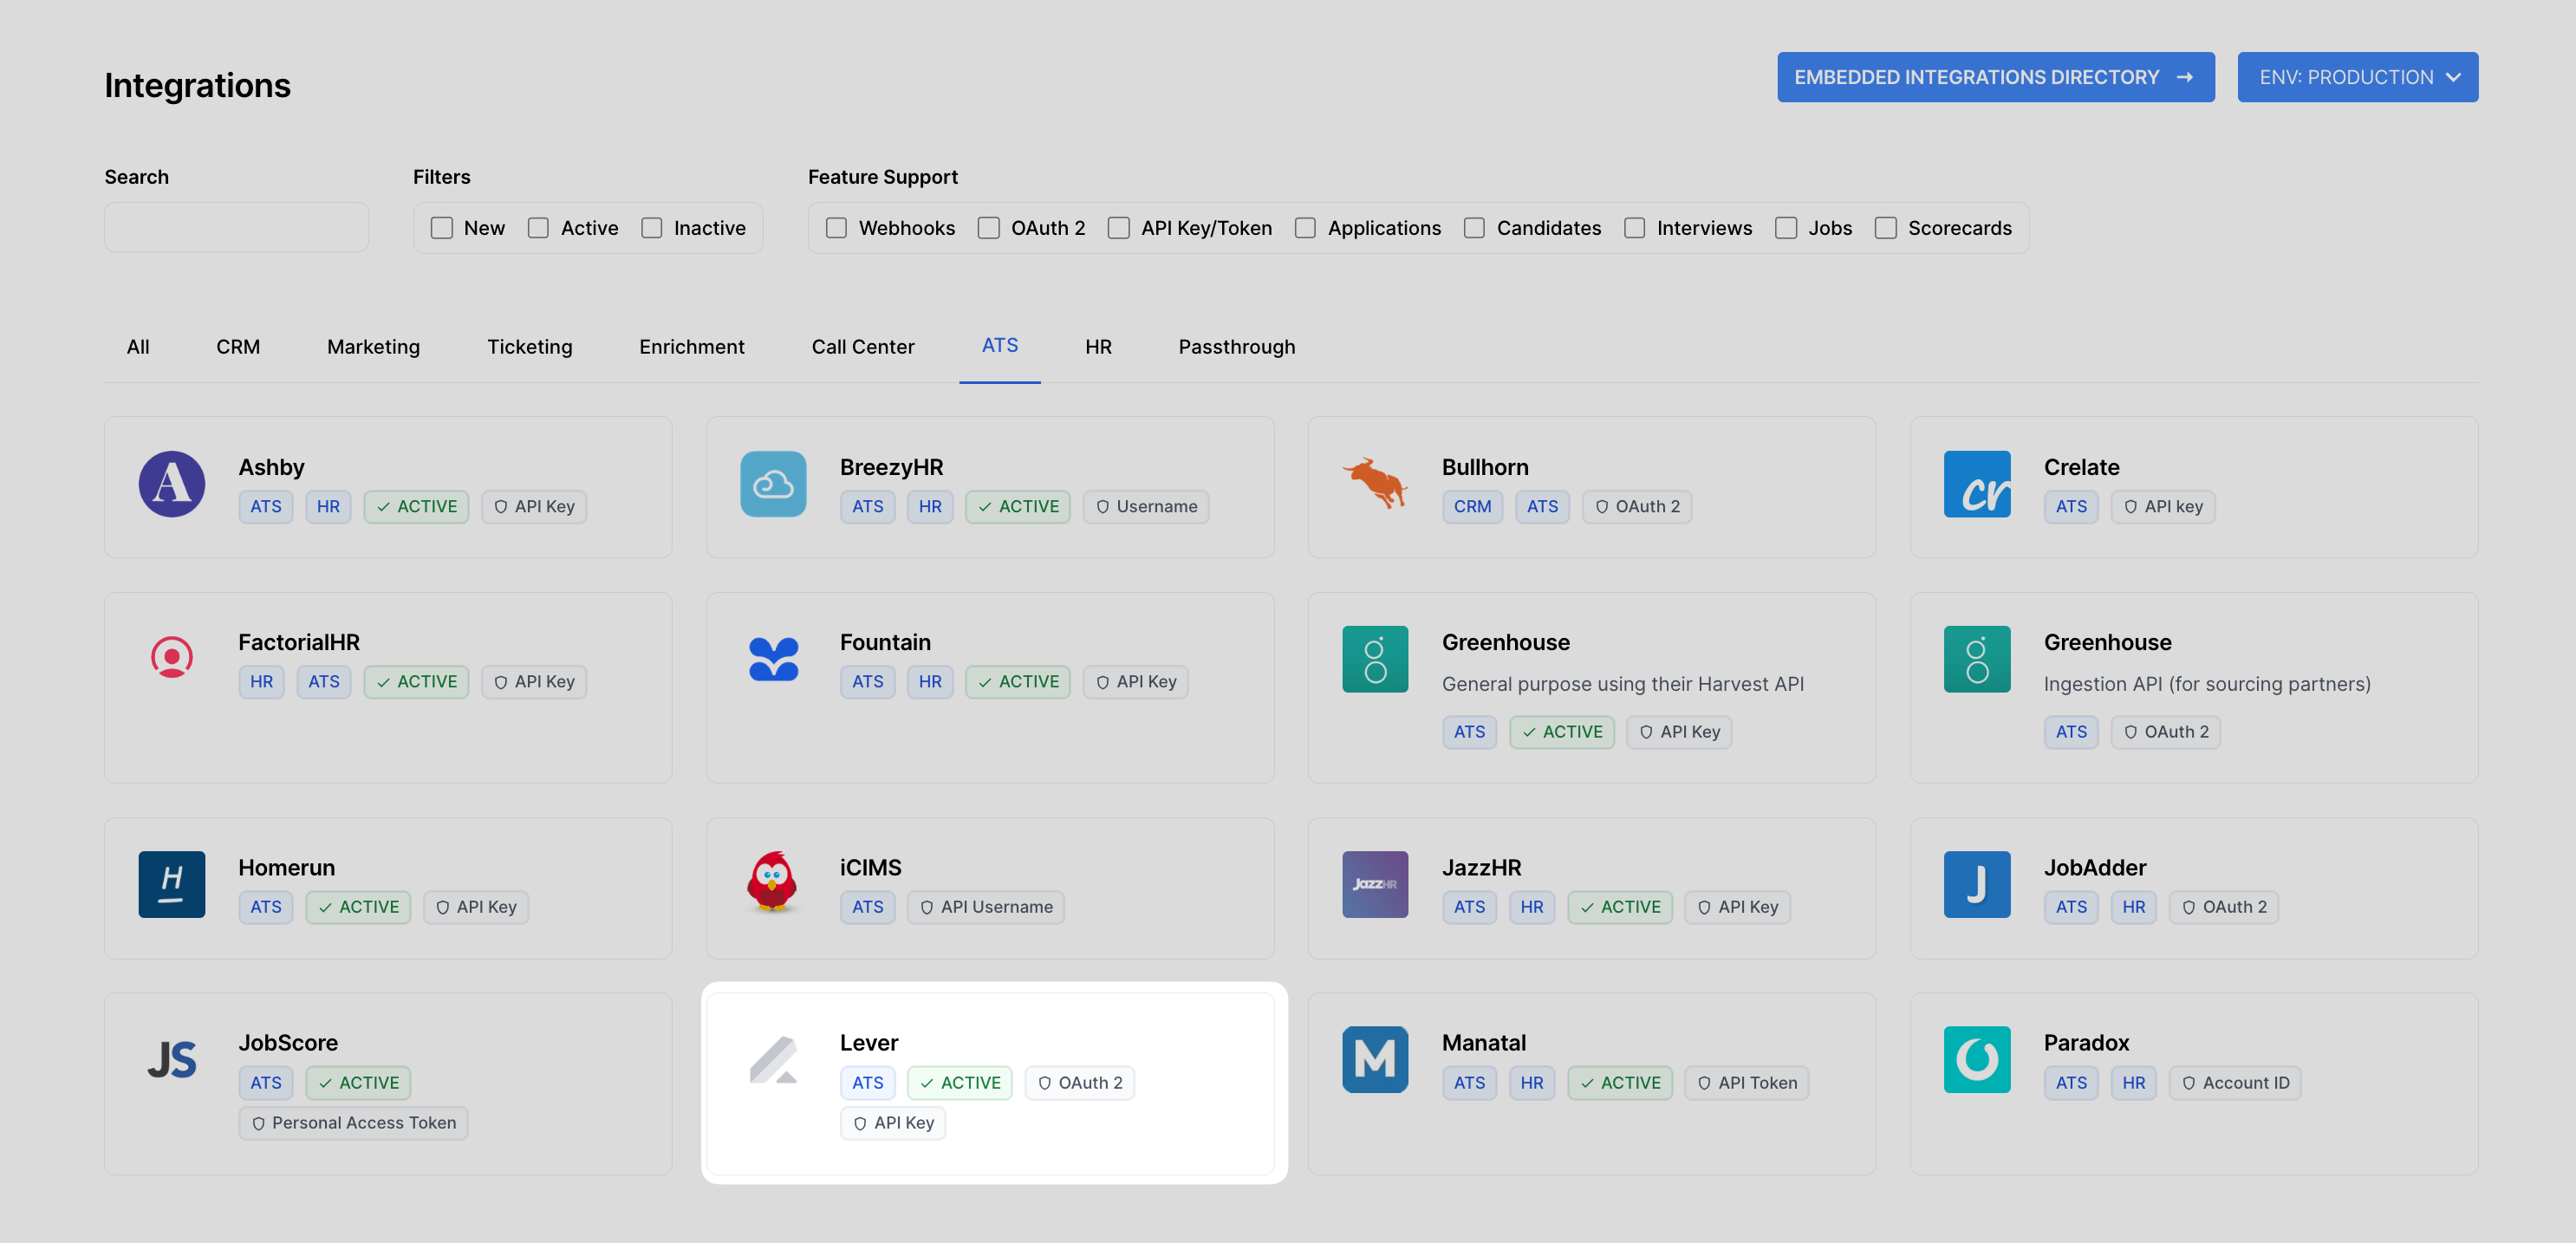
Once you've registered your Unified.to account, log in and go to Active Integrations to select Lever and any other pre-built integrations you'd like to activate.
You can use the search bar, filter by app categories like "HR" and "ATS" or view all of our available integrations at once. The integrations you activate are the ones you intend to enable for user authorization.
2. Use your OAuth 2 Credentials (Optional)
While most of our integrations can be activated in seconds, some integrations require OAuth 2 credentials.
To display your product's name and branding during the third-party authorization process, you will need to insert your OAuth 2 credentials. Follow the setup instructions linked below the integration ('Get your own OAuth 2 credentials →') to create and retrieve your credentials.
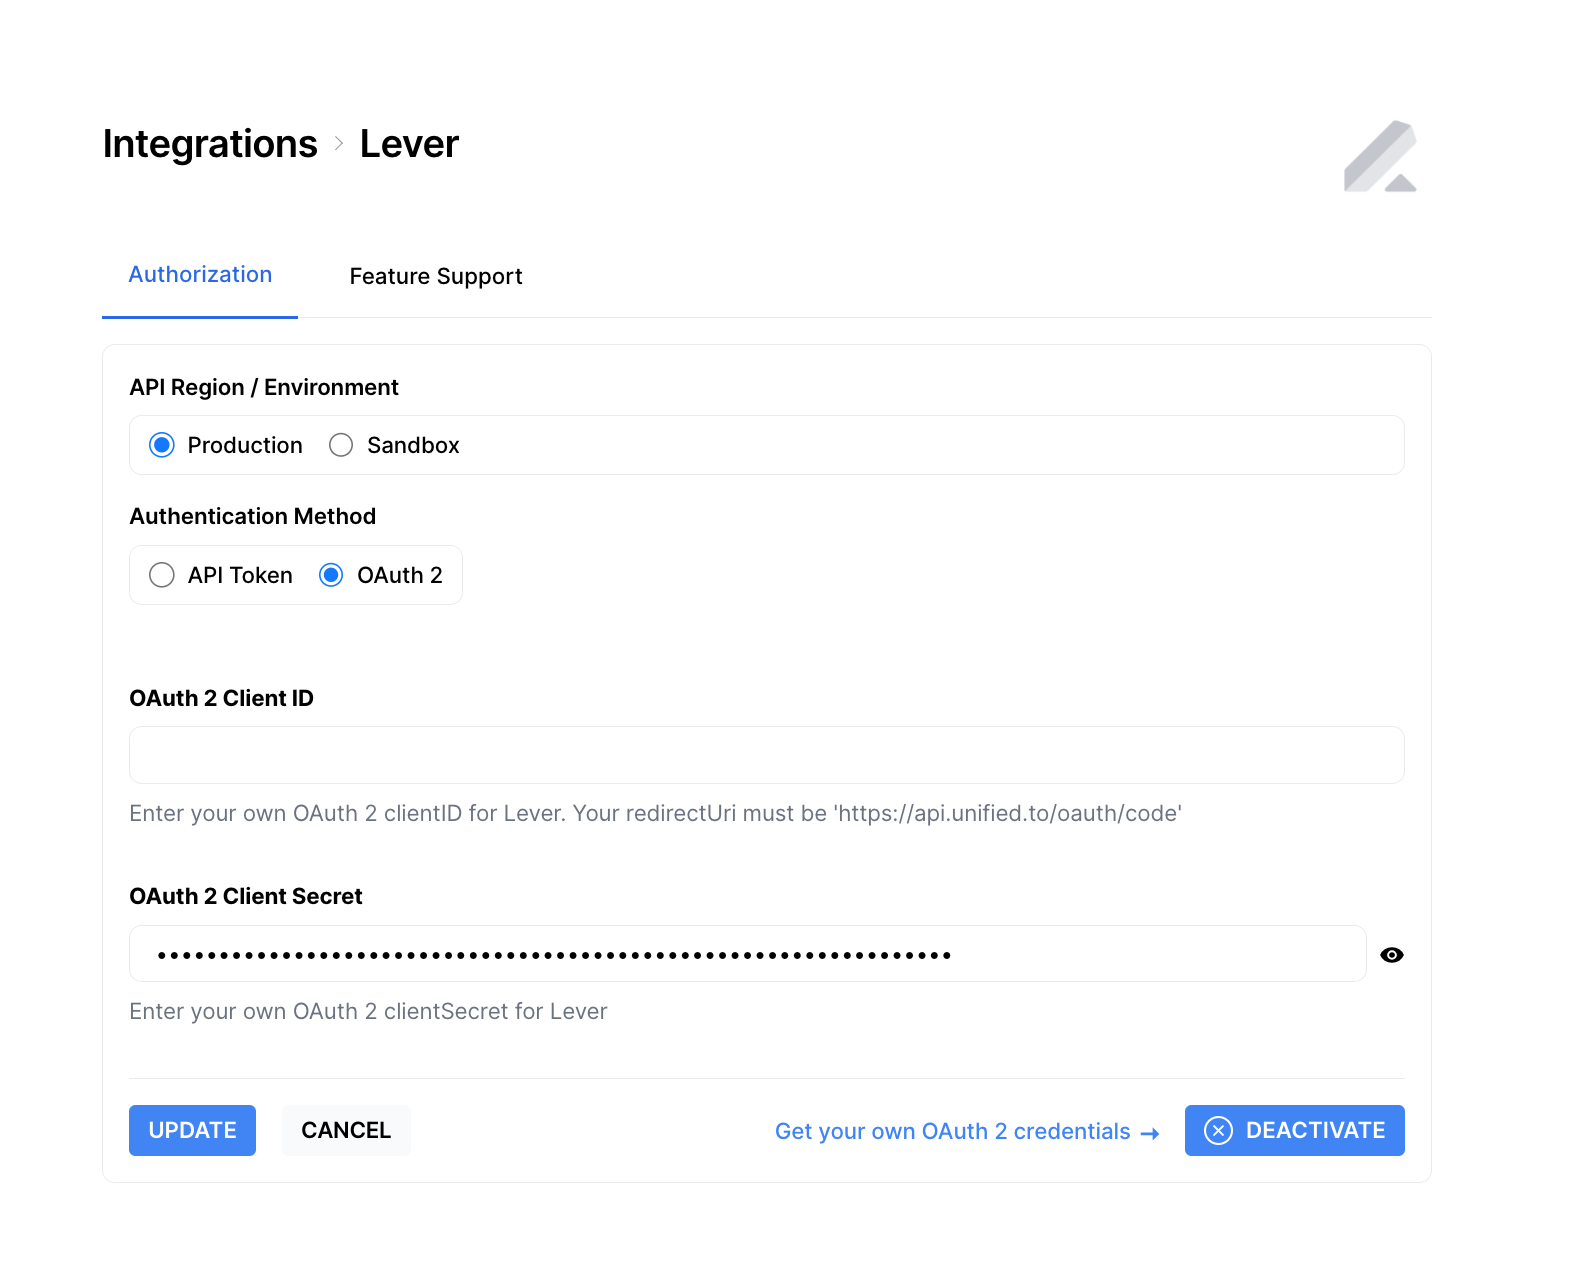
Insert your credentials (usually a Client ID and Secret) to activate the integration. If you'd like to test this integration with your Lever Sandbox account, select 'Sandbox' and provide your Lever Sandbox credentials.
3. Copy your Workspace ID
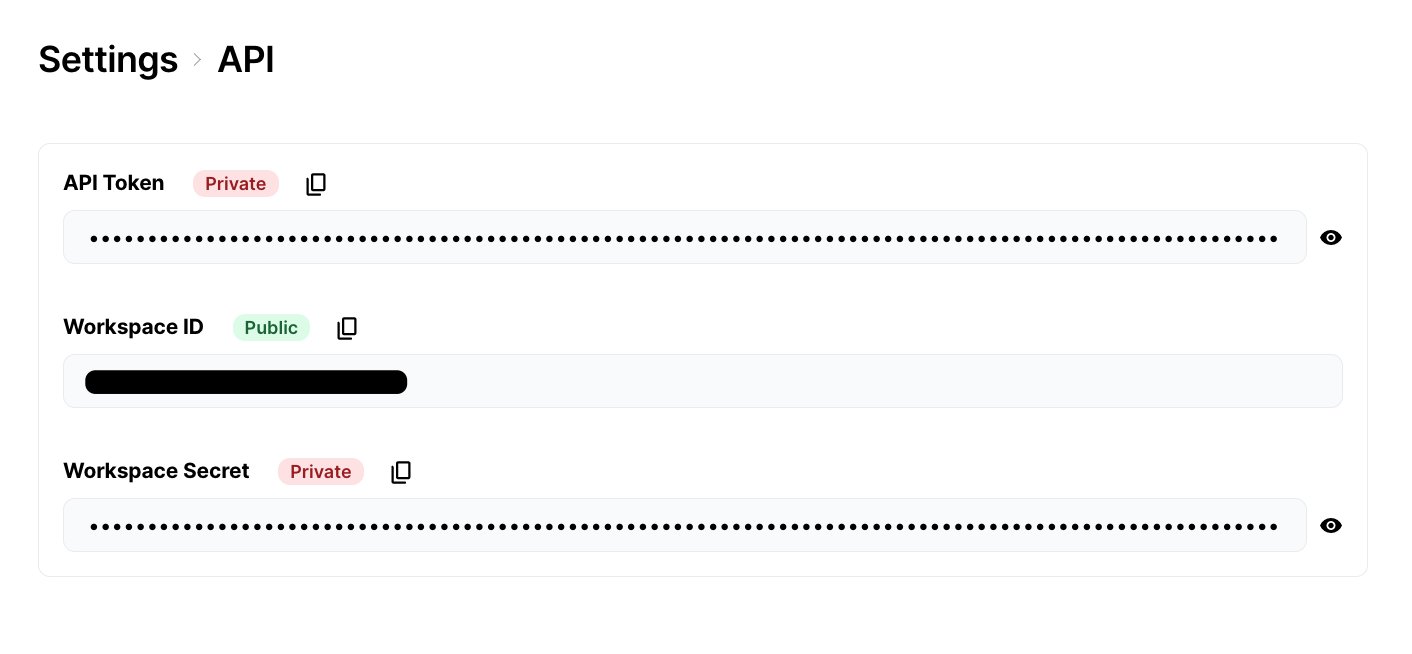
Your workspace represents your organization. You can have multiple workspaces, for instance, if you require team members to work in different workspaces. You will need your workspace ID to add Lever and any other integrations to your app.
Go to API Information found under Settings to copy your workspace ID
Note: you can create multiple environments in each workspace with distinct access and configuration rules for testing, staging, production, and more.
4. Add your Lever integration to your app
Once you've activated Lever and any other integrations, you'll be able to add them to your app. Go to Settings > Embedded Directory to copy one line of code to insert the embedded directory widget into your product. You can try out the user experience by interacting with the directory preview.
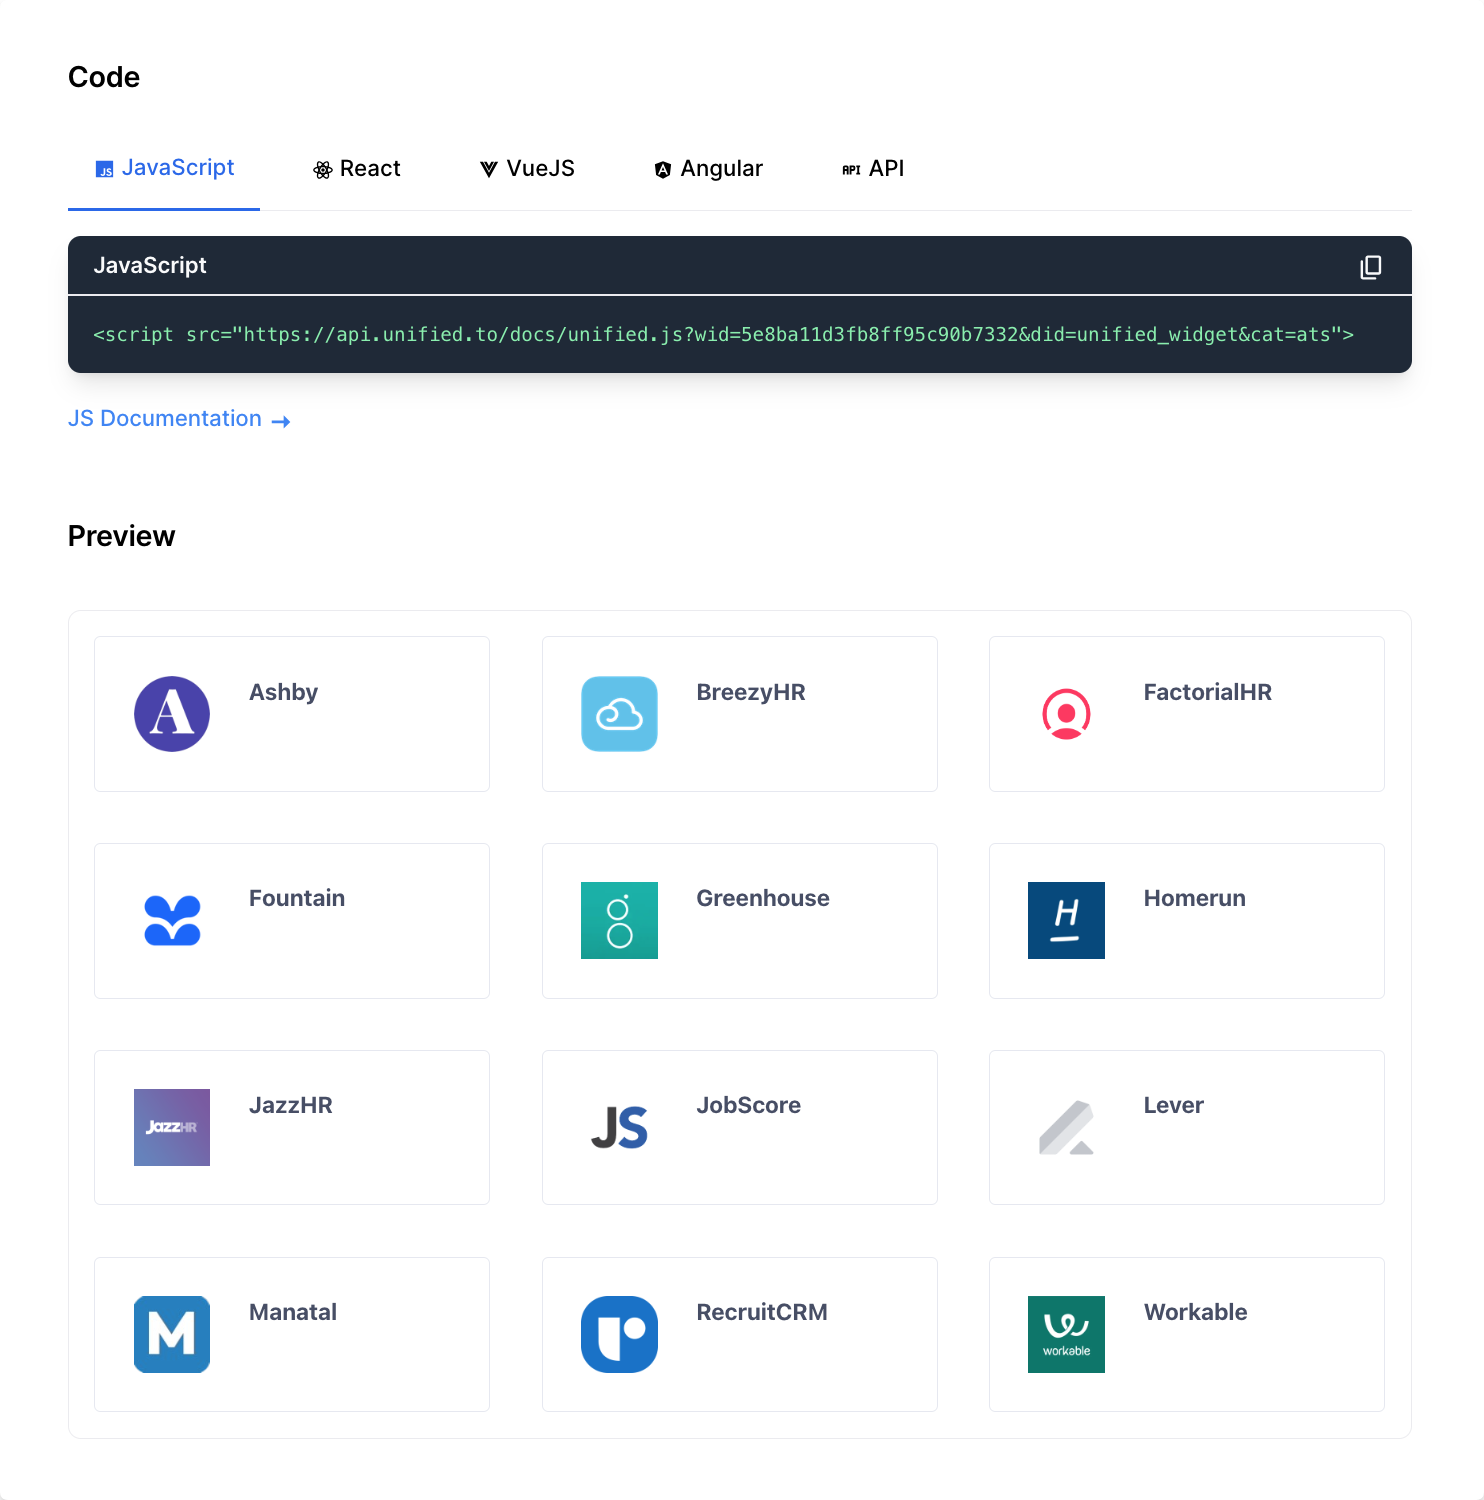
Alternatively, you can use our VueJS, React, or Angular components. Place the code into your app along with your workspace ID.
If you want an alternative to using our UI component, you can do either of the following:
- Call our API to get a list of active integrations to display in your app
- If you have your user's API
5. Perform Actions with your User Connections
Now you can start adding code to your app to access your user data and perform actions with their connections. If you're using NodeJS, we also have an SDK library available.
Alternatively, you can use our Mock API to see our data model in action. In your Sandbox environment, add env=Sandbox query parameter to your API calls to get mock data.
User connections represent a specific authentication of an integration, which means you can now:
- Access your customers' third-party data in Lever
- Leverage user connections to automate workflows and personalize interactions
- Extend your app's functionality with new features and expanded capabilities
Need support? Email us at hello@unifited.to or chat with our team on Discord.
Keep learning: