How to get your OAuth 2 credentials for Microsoft Dynamics 365
October 29, 2024
Last updated: May 2026
This guide explains how to obtain your OAuth 2.0 credentials and configure API permissions for Microsoft Dynamics 365 business applications in Microsoft Entra ID (formerly Azure Active Directory).
Background
Business applications in Microsoft Dynamics 365 use Microsoft's identity platform, Entra ID, for secure authentication. By registering your application, you establish a trusted connection that allows Unified.to to access Dynamics 365 data through the Dynamics 365 Web API (Dataverse) and, where applicable, Microsoft Graph and other Microsoft APIs. This works through:
- Delegated access: Your application acts on behalf of the signed-in user. The user is redirected to Microsoft's sign-in page, authenticates, and grants your application consent, with permissions approved by both the administrator and the user.
- OAuth 2.0 credentials: A client ID (which identifies your application) and a client secret (which serves as your application's password).
- Permissions: Specific capabilities your application requests, which must be approved by an administrator.
For more information, see What is the Microsoft identity platform?
Before you begin
Ensure you have:
- Access to the Microsoft Entra admin center (entra.microsoft.com)
- Administrator access to Microsoft Entra ID
Register your application
You'll first register an application in the Microsoft Entra admin center. This provides you with a client ID and client secret.
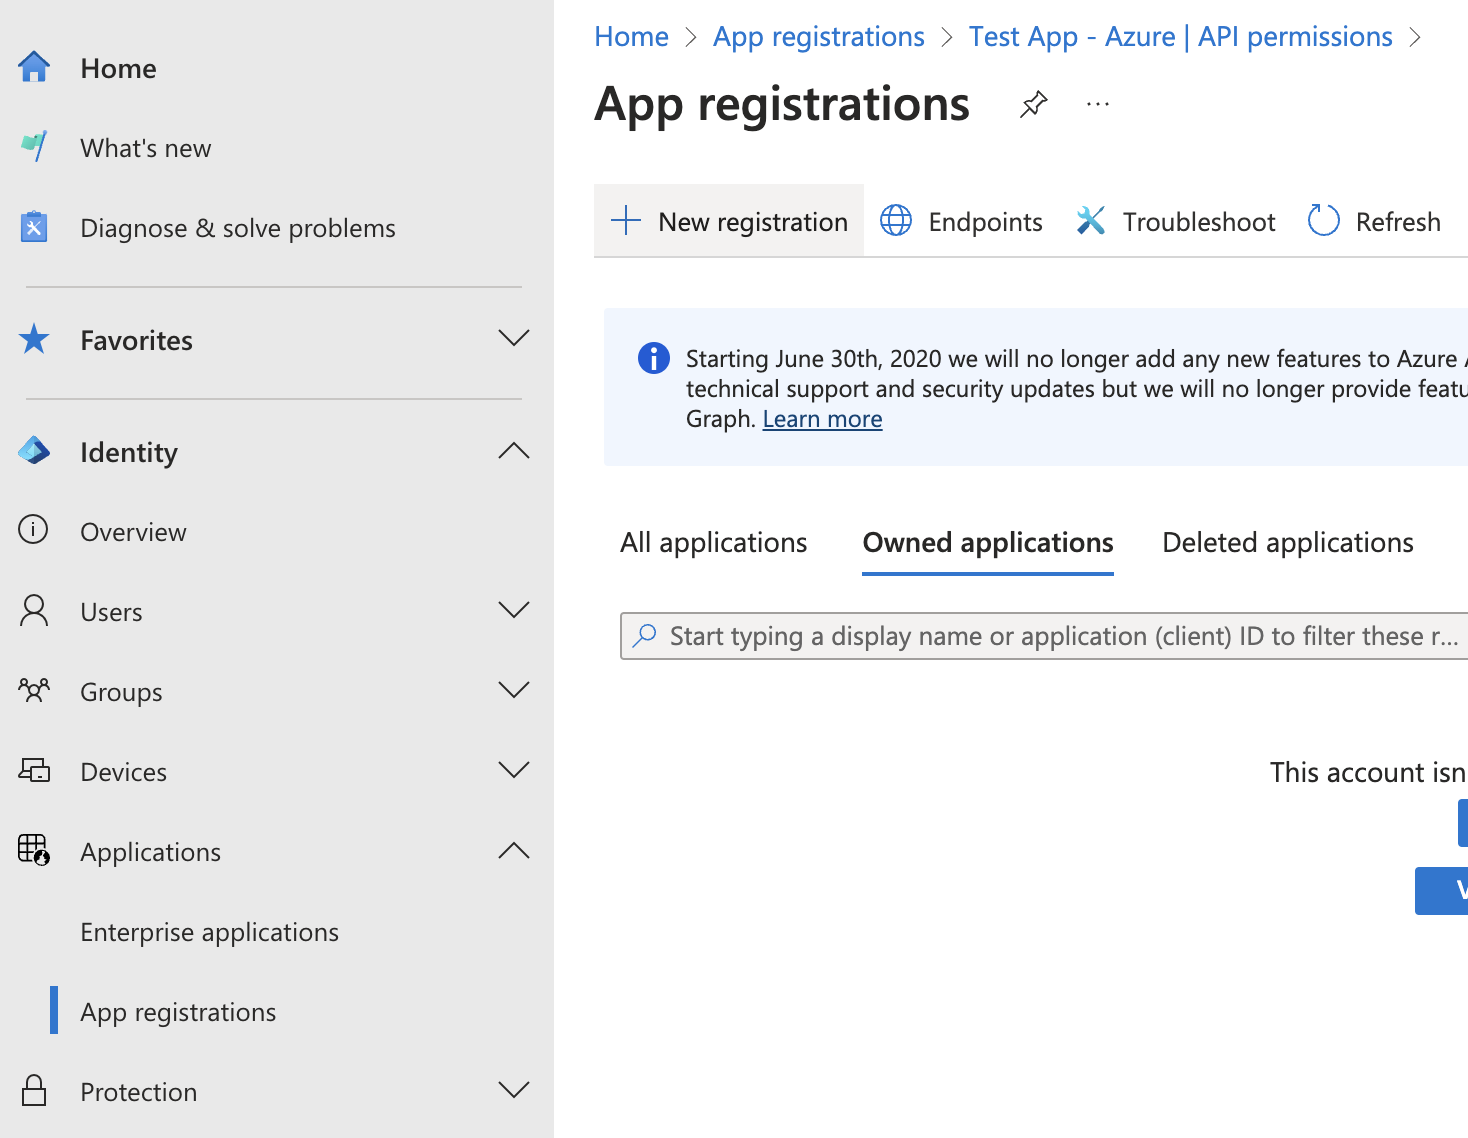
- Sign in to the Microsoft Entra admin center.
- In the left sidebar, go to App registrations, then click New registration.
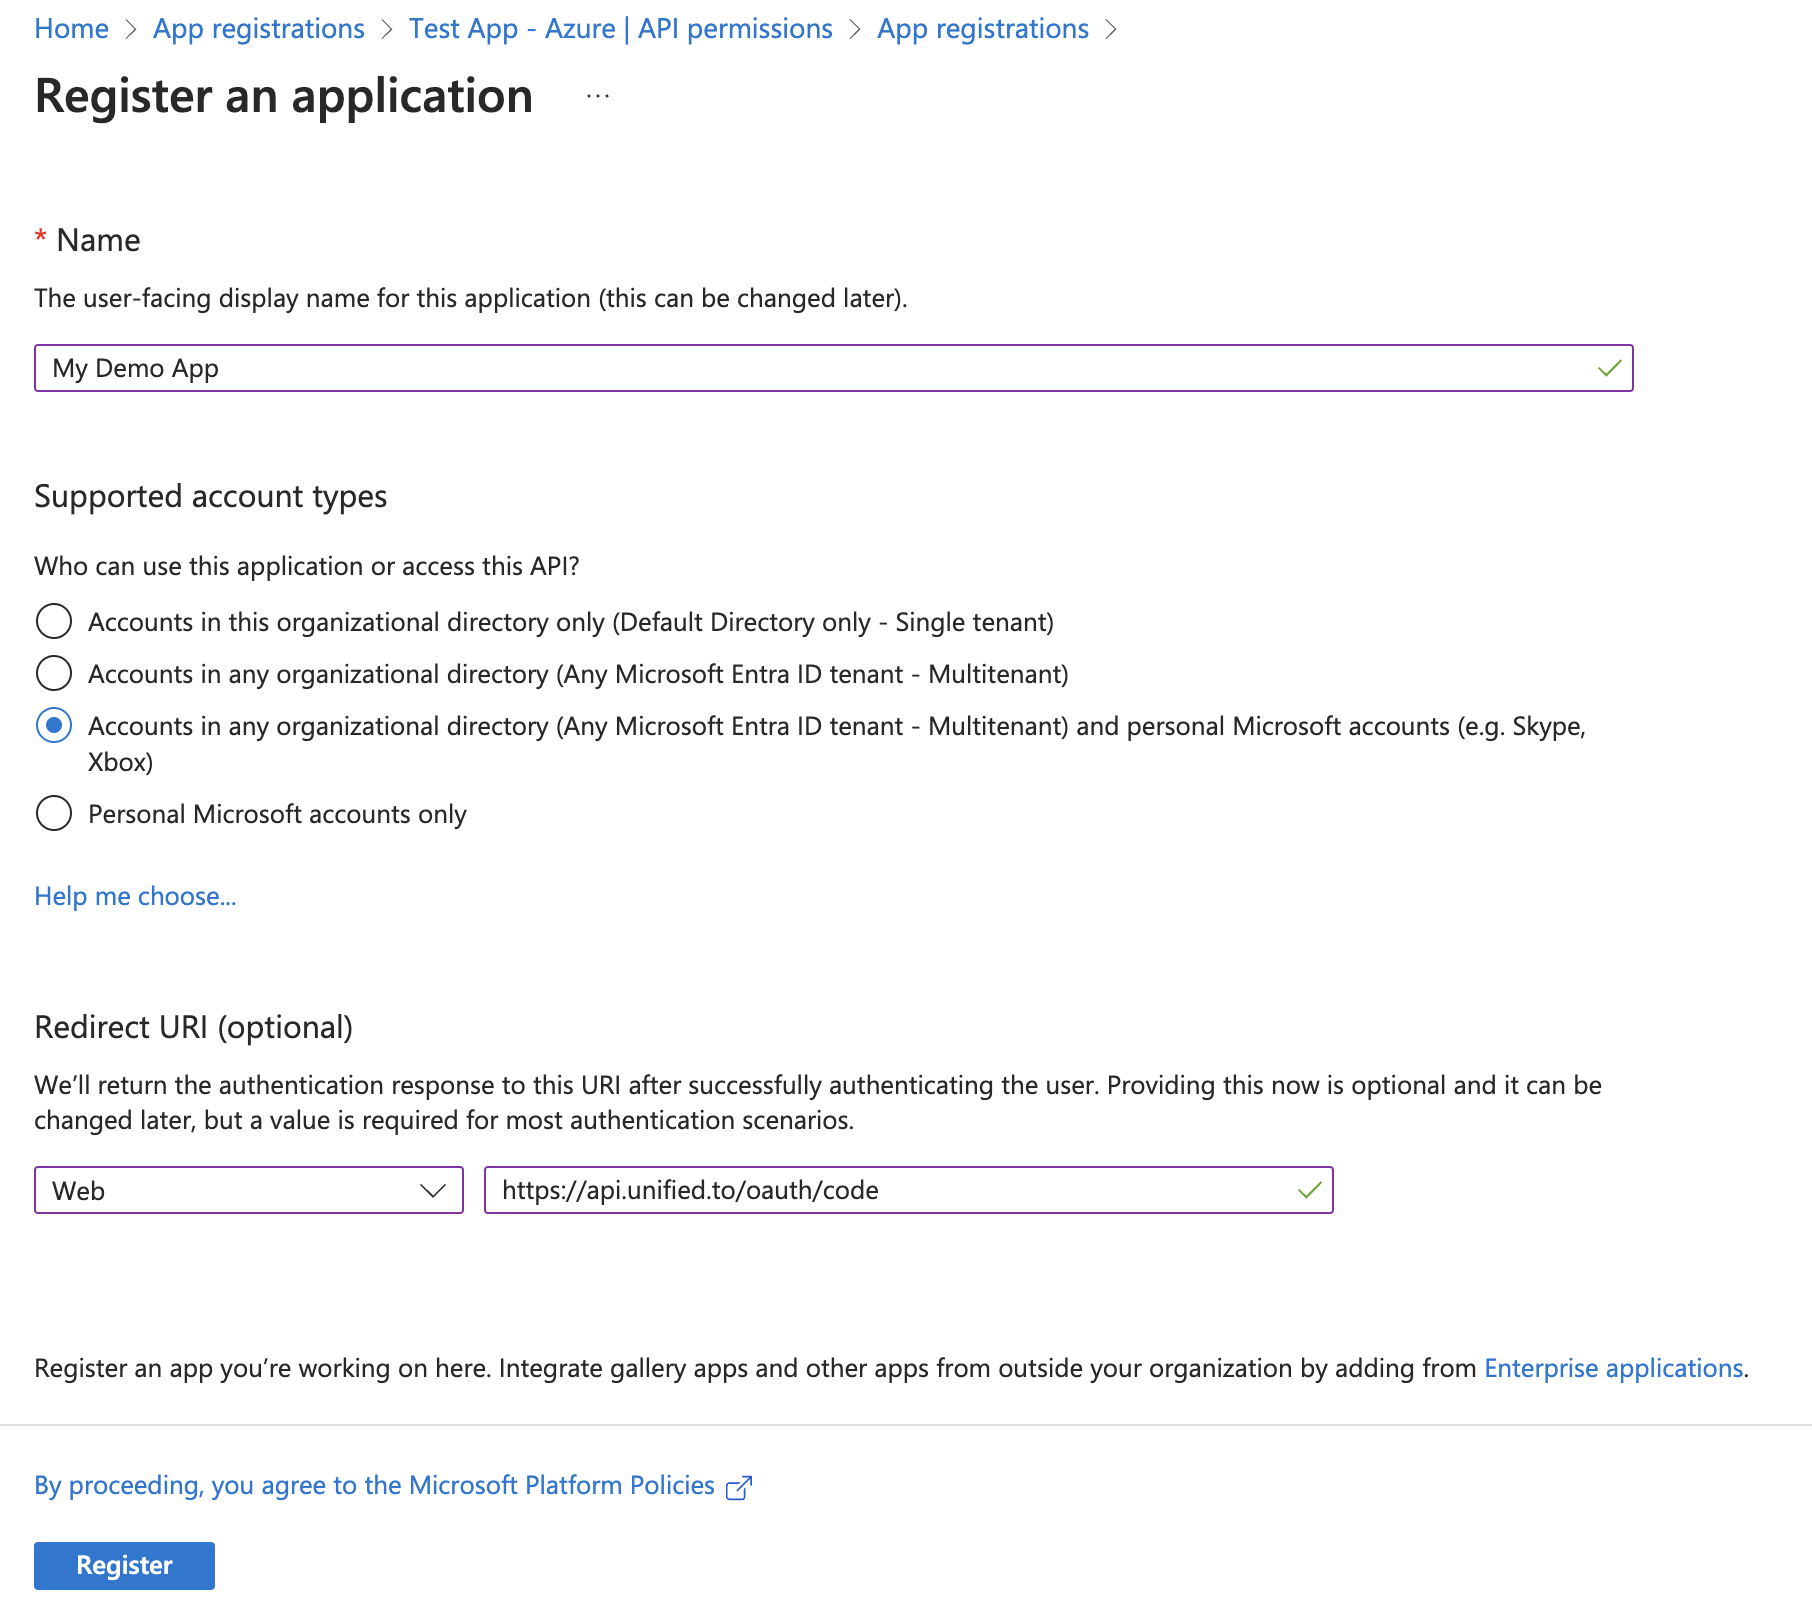
- Configure your application:
- Enter a meaningful name (for example, your product name).
- Under Supported account types, select Accounts in any organizational directory (Any Microsoft Entra ID directory - Multitenant).
- In the Redirect URI section:
- Select Web as the platform.
- Enter
https://api.unified.to/oauth/codeas the redirect URI (or the corresponding EU/AU regional URL if your workspace is hosted there).
- Click Register.
The redirect URI is where Microsoft sends users and authorization codes after they sign in and grant access, so it must exactly match what Unified.to expects.
Get your Dynamics 365 client ID and secret
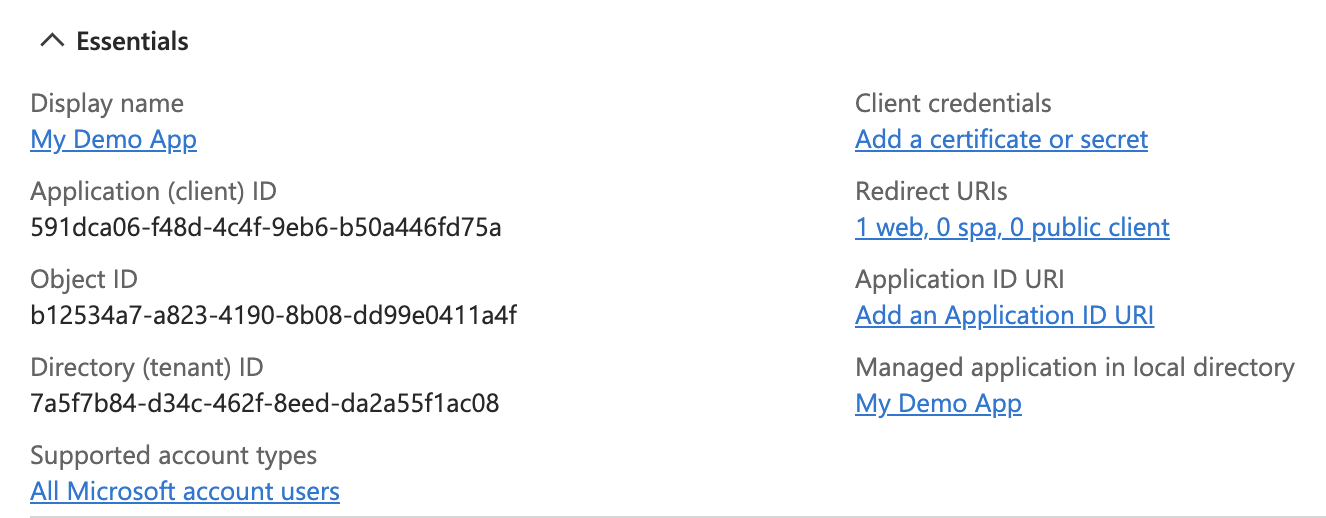
- Retrieve your client ID:
- On your application's overview page, locate the Application (client) ID.
- Copy this value — this is your client ID.
- Create a client secret:
- In the left menu, select Certificates & secrets.
- Under Client secrets, click New client secret.
- Provide a description (optional, but helpful for tracking).
- Set the expiration to its maximum value, unless your security policy requires shorter rotation.
- Click Add.
- Immediately copy the secret Value (not the secret ID). You won't be able to view it again after leaving this page, so store it securely right away — never commit it to source control or share it client-side.
Configure Dynamics 365 API permissions
- Set up Microsoft Graph permissions. These are used to obtain information about your users.
- In the left menu, click API permissions.
- Click Add a permission, select Microsoft Graph, then choose Delegated permissions.
- Search for and add the following permissions:
openidemailoffline_access
- Click Add permissions.
- Set up permissions for your Dynamics 365 business application.
- From the API permissions screen, click Add a permission again.
- Under More Microsoft APIs, select the API backing your Dynamics instance:
- If you're using Dynamics Sales, select Dynamics CRM.
- If you're using Dynamics Customer Engagement, select Customer Insights.
- Choose Delegated permissions.
- Search for and add the following delegated permission on the Dynamics API:
user_impersonation(required for basic access)
- Click Add permissions.
Depending on the specific Dynamics app or environment, you may see slightly different API names (for example, Dataverse or a specific Dynamics module), but you should always choose the API backing your Dynamics instance and add user_impersonation. Consent to these permissions is granted when an administrator connects the integration through Unified.to's authorization flow.
Enter your Dynamics 365 credentials on Unified.to
- Go to app.unified.to/integrations and search for the Dynamics 365 integration you're using.
- Enter your client ID and client secret from the steps above.
- Save your changes.
You can now use the Microsoft Dynamics 365 integration in your application. Happy building!
→ How to troubleshoot unhealthy connections