Getting started with Workable
January 11, 2024
Workable is one of 190+ integrations that you no longer have to build from scratch thanks to our unified API developer platform. In this guide, you will learn about Unified.to's Workable integration, including how to activate Workable, implementation steps, example use cases, and how your users can authorize the integration in your app.
At the end of this guide, you will have everything you need to activate a Workable integration and begin creating user connections in production.
Prerequisites
To activate a Workable integration, you will need a Unified.to account. Sign up for a free tester account and follow the onboarding steps. Workable and all our pre-built integrations are available on every Unified.to plan.
This article assumes you are familiar with Workable and product integration concepts. You do not have to be an expert in integration development or our platform.
Activating Workable
Once you've created your Unified.to account and completed onboarding, you can activate Workable and any other integrations you'd like to add to your app. Activation refers to the process of enabling and configuring an integration.
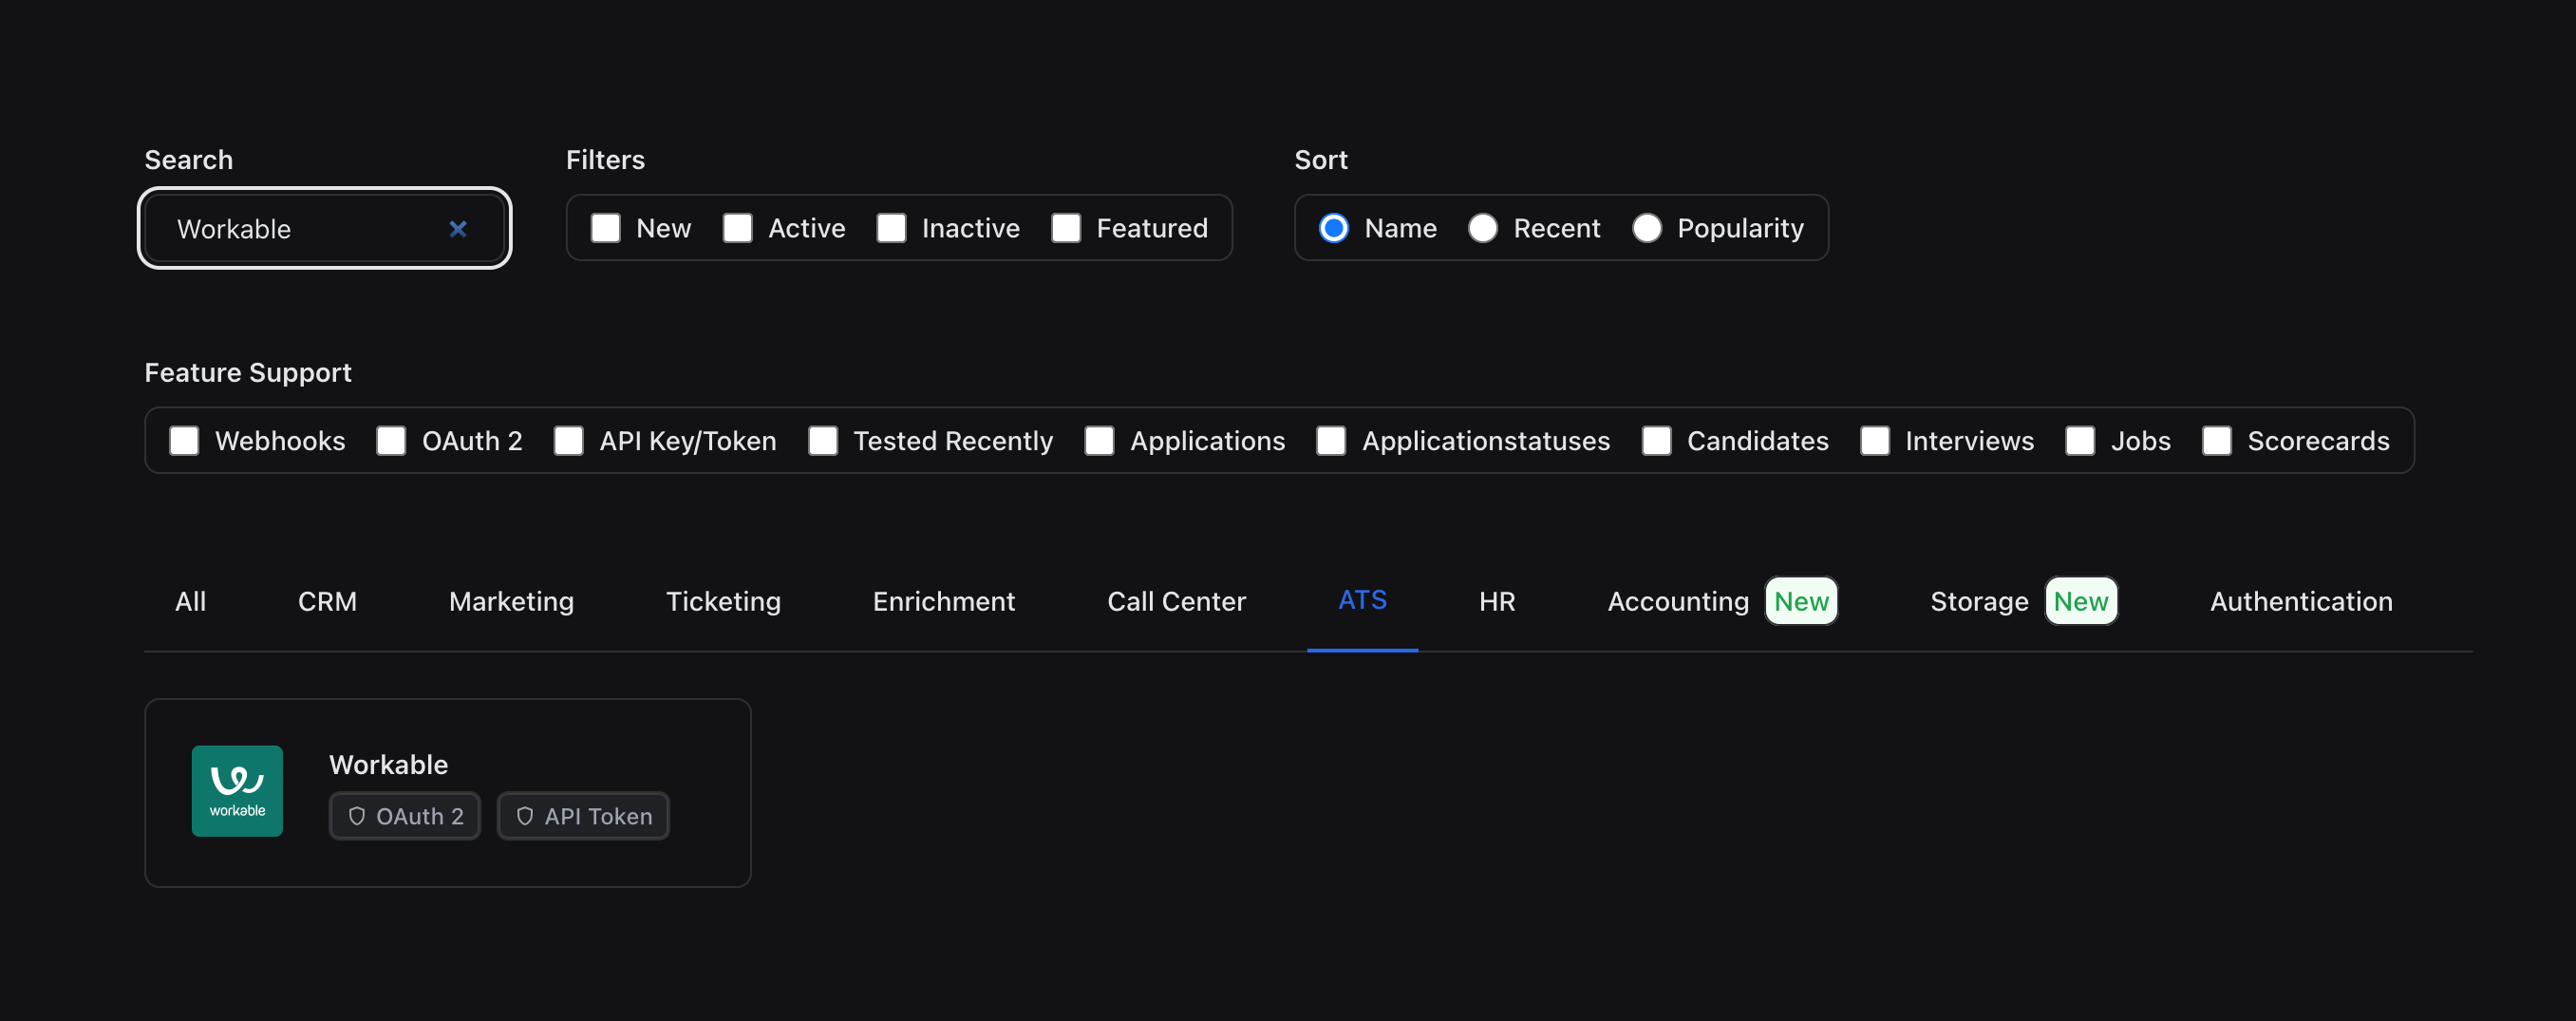
Sign in to Unified.to, and select Integrations > Active Integrations. Use the search bar or click the ATS tab to find Workable and other integrations within the same category. You can also locate Workable in the HR tab if you are interested in HR data.
Authorization
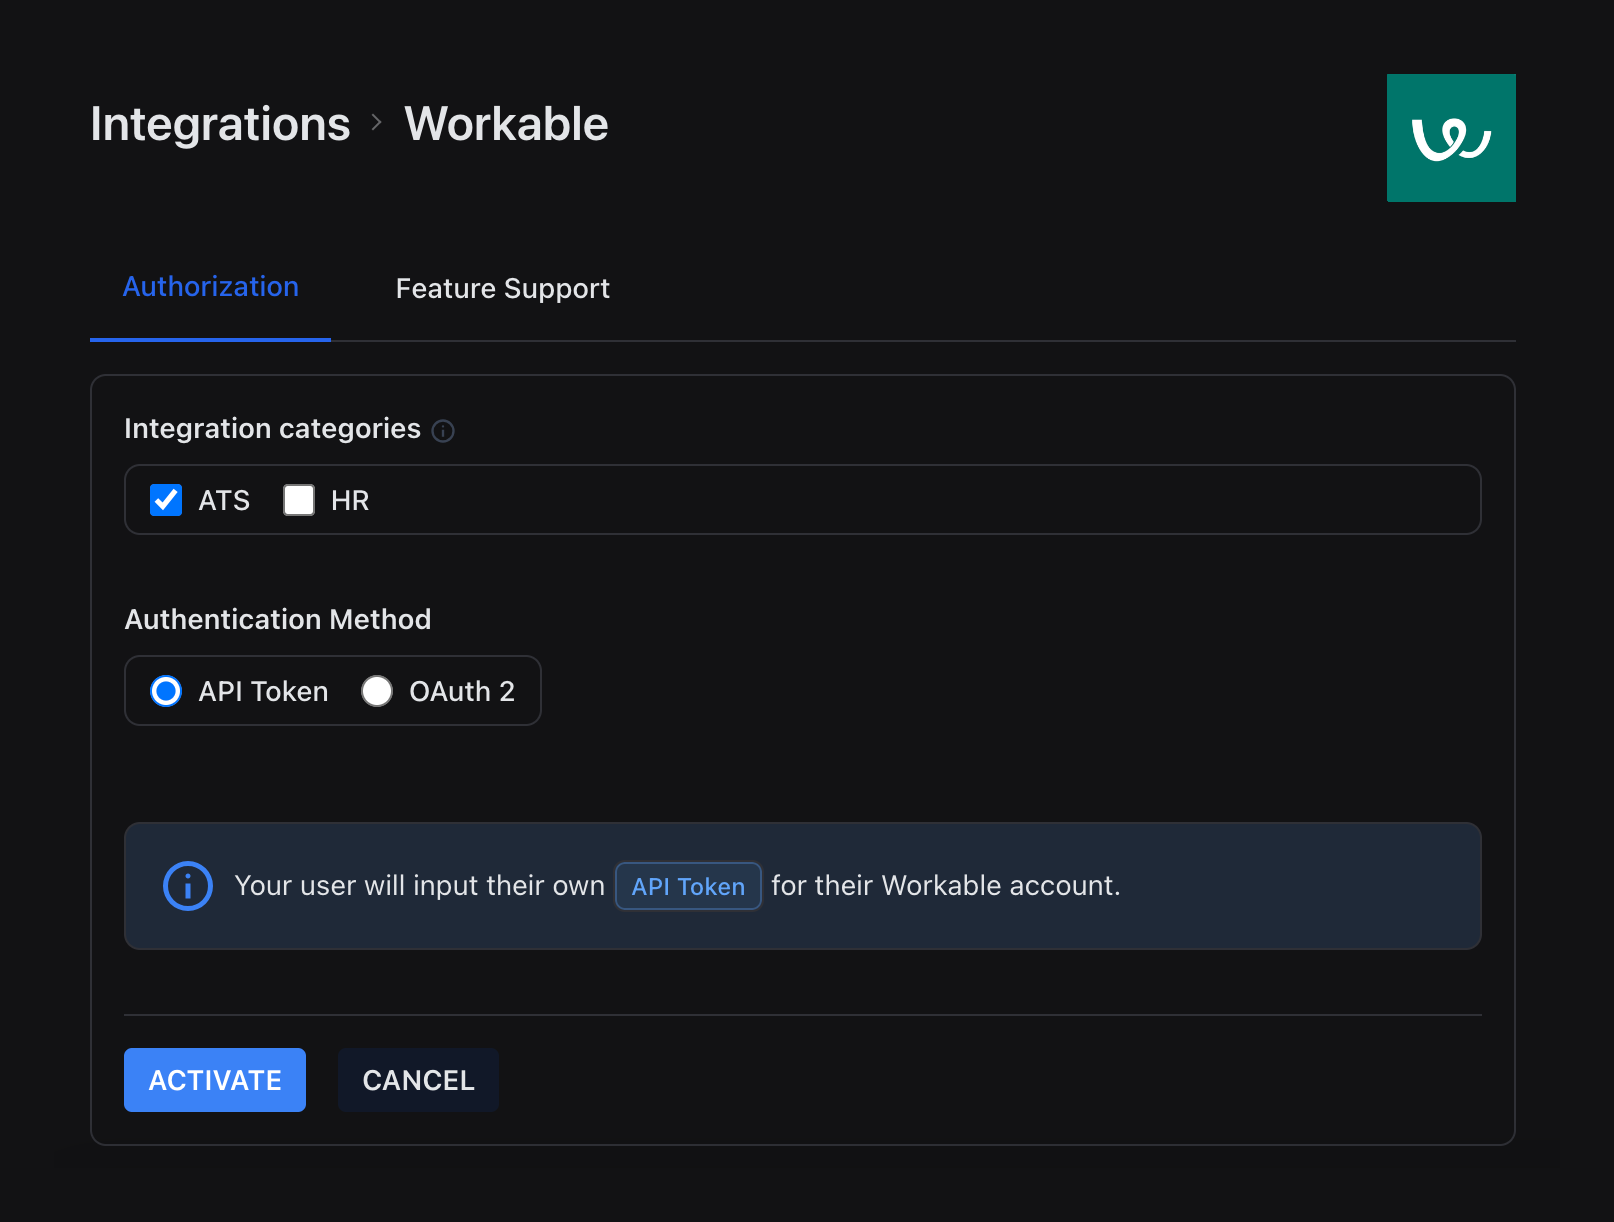
Select Workable to begin the activation process. On the authorization page, you can specify the integration categories (ATS or HR) and the authorization method (API key or OAuth 2). If you'd like your Workable integration to support OAuth 2, you will need to enter your OAuth 2 Client ID.
OAuth 2
If you want your Workable integration to support OAuth 2, select the OAuth 2 tab to view where to set your OAuth2 redirectUri to and the unified scopes to enable in your application. You may need all or some depending on your use case.

If you don't yet have your Workable OAUth 2 credentials, fill out this form to start a Workable partnership and generate your credentials. Return to the Authorization tab, paste your credentials, and select Activate. If you need support with your Workable partnership, please email hello@unified.to or reach out on Discord.
Feature support
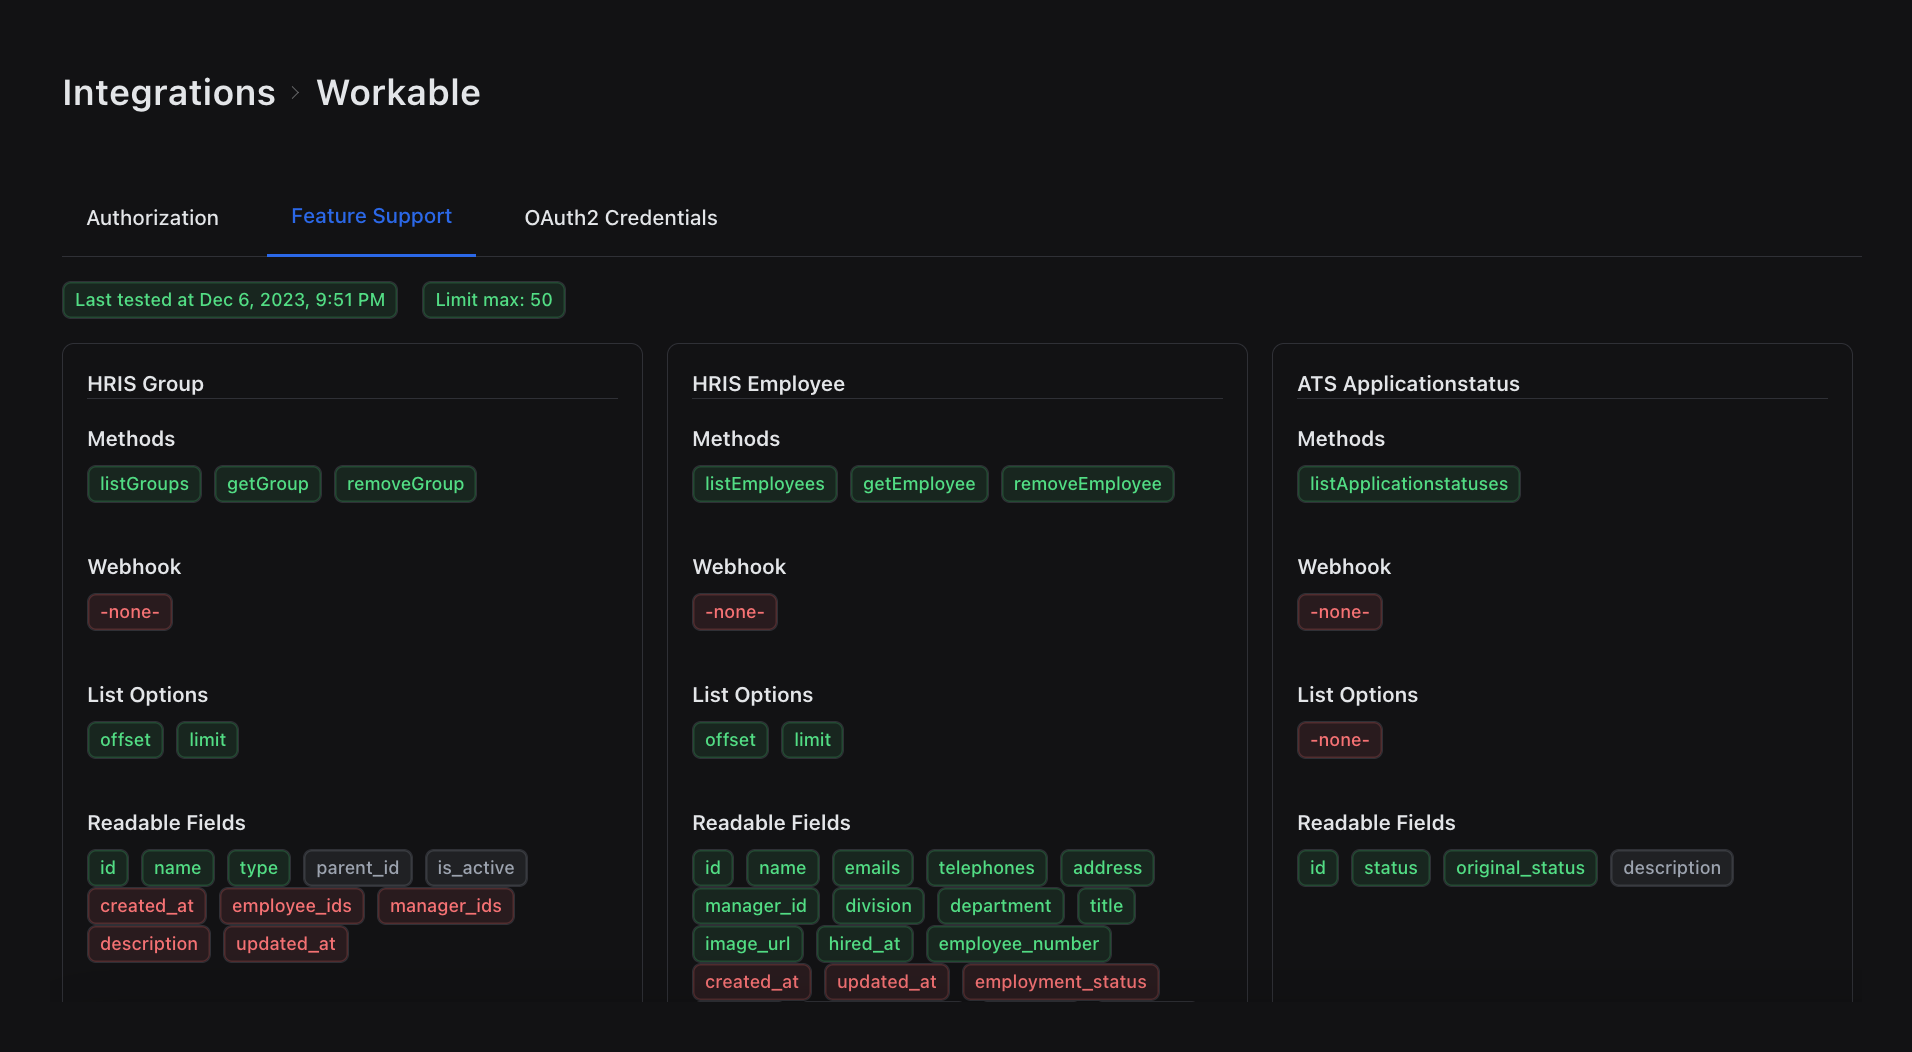
Select the Feature Support tab to view a detailed breakdown of the objects and fields our Workable integration currently supports. Green represents fields we support, grey represents fields Workable does not support, and the fields in red are the features we don't support yet.
We're always open to feedback. If you have questions or ideas, reach out on Discord. To see full feature support for Workable, sign in or sign up for Unified.to for free.
Your workspace
When you create a Unified.to account, we automatically create a workspace for you. This will be true for any team members in your company that individually sign up for Unified.to. You can create multiple workspaces for different environments (QA, staging, production, etc.) with unique access and configuration rules.
You will need to know your workspace ID when using our embedded authorization widget. You can find your workspace ID under Settings > API Information.
Setting up authorization
To add Workable and other integrations to your app, navigate to Settings > Embed to set up user authorization. Configure your authorization settings and copy the line of code to insert the embedded authorization widget into your app along with your workspace ID.
If you do not wish to use our authorization widget, you can call our API directly to get a list of integrations to display in your app and build your own front-end.
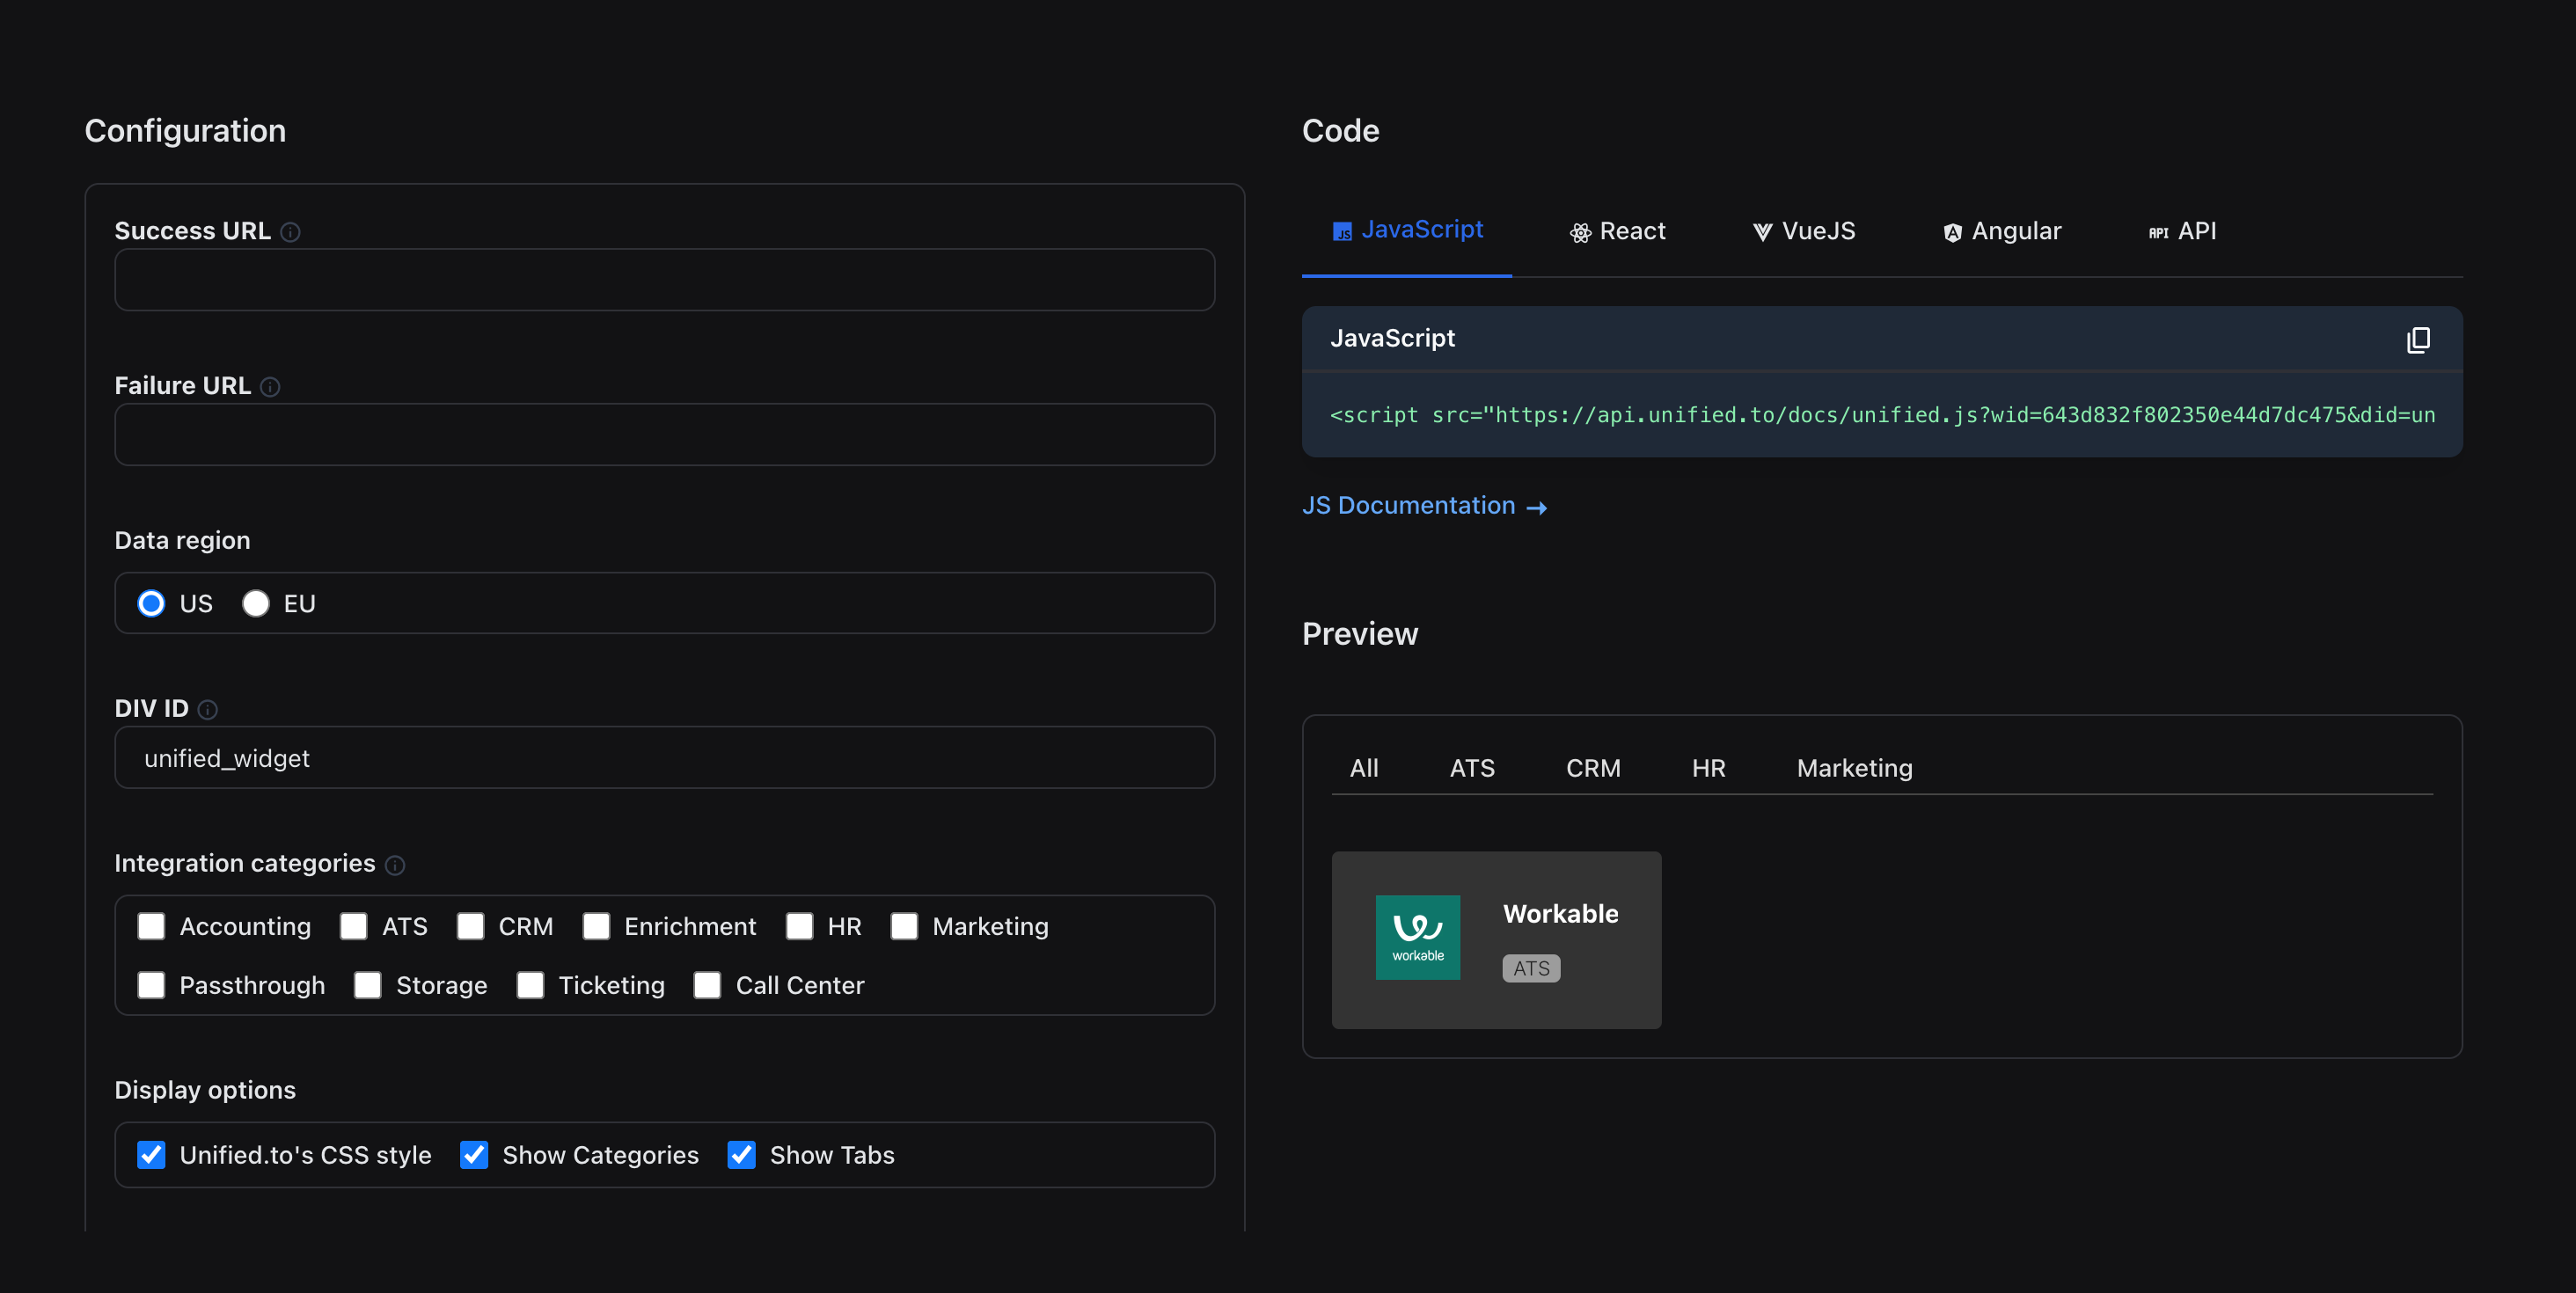
You can also interact with the authorization preview to simulate your end user's Workable authorization experience. You'll see the same authorization page that your end user will experience when they enable an integration in your app.
You can run further authorization tests by adding a test user connection or by using our sandbox environment.
Creating user connections
Once a customer authorizes a Workable integration from your app, they are redirected to the success URL that you defined earlier when setting up authorization.
That URL will have an id={connection_id} appended to the URL. Store that connection_id in your database and associate it with your customer's account. You can also send in a state query parameter with your customer's ID.
Important: Make sure you associate your app's user ID/account ID with the newly created Unified.to connection ID. We recommend using the state parameter in our embedded authorization widget or authorization endpoint. That state will be sent back to your success_url along with the connection_id. Store our connection_id in your database and associate it with your user.
Perform actions with your user connections
Here's the exciting part! Once your user authorizes your Workable integration, you can start accessing our API with your user connections. User connections represent a specific authentication of an integration, which means you can now:
- Access your customers' third-party data in Workable
- Build new features and support more users
- Leverage Workable data to support use cases like candidate sourcing and candidate assessments
If you'd like to simulate performing actions with user connections, you can create user connections in our Sandbox environment.
Pass 'X-Mock: 1' in a header in your API request to receive mock data from our API. See documentation.
Note: We have SDKs available for Node/Typescript, Python, PHP, Java, Go, C#, and Ruby. Learn more.
Have a question for us? Complete this form or chat with us directly on Discord.